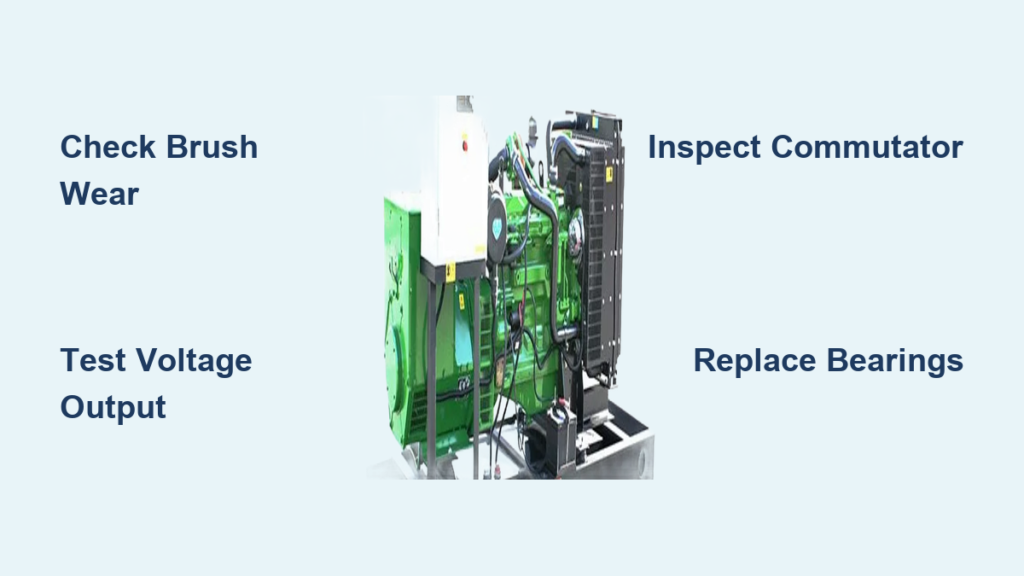
Your John Deere tractor sputters to life but won’t charge the battery. Headlights dim at idle, the ammeter reads constant discharge, and that familiar burning smell wafts from the generator housing. If you’re working with a vintage John Deere model from the 1940s-1970s, this almost certainly points to a failing Delco Remy three-brush generator – the heart of your electrical system. The good news? John Deere generator repair doesn’t require expensive replacements. For less than $25, you can rebuild this critical component using a proper repair kit and basic tools. This guide delivers the exact steps to diagnose common failures and restore factory-spec charging to your 6V or 12V generator, saving you hundreds over replacement costs.
Most John Deere operators face this scenario: after replacing the battery, they discover the real culprit is the generator. Unlike modern alternators, these three-brush Delco Remy units fail predictably through worn brushes and bearings – not catastrophic electrical faults. Rebuilding takes just an afternoon with the right approach, making it one of the most cost-effective John Deere generator repair projects you’ll tackle. By the end of this guide, you’ll confidently disassemble, inspect, and reassemble your generator to deliver reliable charging for years.
Confirm Your Delco Remy 3-Brush Generator Model

Before ordering parts, verify you’re working with the correct generator type. Delco Remy three-brush units powered John Deere tractors from the 1940s through the 1970s and feature distinct visual characteristics. Mistaking this for a two-brush or four-brush design leads to incorrect parts and wasted effort.
Critical identification markers:
– Round aluminum housing with “Delco-Remy” clearly cast into the side
– Three visible brush holders arranged symmetrically around the commutator
– 6V or 12V voltage designation stamped on the data tag
– Pulley mounted directly on the shaft end (not gear-driven)
Tractors requiring this specific repair:
– Model A, B, and G series (1940-1960)
– Early 20, 30, and 40 series tractors
– Vintage John Deere combines and balers
If your generator lacks three brush holders or shows square housing, this guide won’t apply. Double-check your model against John Deere service manuals before proceeding.
Why Model Confirmation Matters for Repair Success
Using mismatched parts destroys rebuilt generators. The GRK-46 repair kit – priced at $22.90 – contains bearings, bushings, and brushes engineered specifically for Delco Remy three-brush units. Install these components in a four-brush generator, and you’ll face immediate failure. Always cross-reference your data tag numbers with the kit’s compatibility chart before disassembly.
4 Critical Symptoms Demanding Immediate John Deere Generator Repair
Ignoring early warning signs turns minor wear into catastrophic damage. Recognize these specific failure indicators to prevent costly secondary issues like dead batteries or fried wiring harnesses.
Electrical failure red flags:
– Battery drains despite recent replacement
– Headlights noticeably dim at idle but brighten at higher RPMs
– Ammeter consistently shows discharge across all engine speeds
– Distinct burning odor near the generator housing during operation
Mechanical distress signals:
– Grinding or high-pitched squealing from the pulley area
– Excessive belt wear or frequent belt throwing
– Generator housing too hot to touch after short operation
– Visible wobble in the pulley shaft when manually rotated
Quick Field Diagnosis: The Light Test
Start your tractor and turn on headlights. If lights brighten significantly when revving the engine, your generator produces power but brushes aren’t maintaining proper commutator contact. This confirms worn brushes – the most common reason for John Deere generator repair. Address this immediately before carbon dust contaminates windings.
Essential Tools for a Successful $23 Generator Rebuild
You likely own 90% of required tools already. The GRK-46 repair kit covers bearings, bushings, and brushes, but proper tool selection prevents damage during disassembly.
Must-have basic tools:
– 1/4″ and 5/16″ socket set
– Flathead and Phillips screwdrivers
– Needle-nose pliers
– Small ball-peen hammer
– 1/2″ wrench for pulley nut
Specialized items (under $15 total):
– 6″ C-clamp (critical for bearing installation)
– 220-grit emery cloth
– Digital multimeter
– 40W soldering iron
Pro rebuild tip: Lay out all components on a white towel during disassembly. The contrasting color makes tiny parts like brush springs instantly visible, preventing frustrating losses. Keep your workspace clean – metal shavings cause shorts.
Disassembly Process: Avoiding Costly Housing Damage
Rushing disassembly ruins aluminum housings. Follow this sequence to preserve critical components while accessing worn brushes and bearings.
Step 1: Pulley removal (critical timing step)
– Paint alignment marks on pulley and shaft before loosening
– Hold armature stationary with a screwdriver in commutator slots
– Loosen pulley nut while engine is off – never use impact tools
– Slide pulley and key off shaft, preserving timing position
Step 2: Brush extraction
– Remove brush cover screws without stripping heads
– Photograph or sketch brush wire positions – miswiring causes failure
– Lift brushes straight out; never bend fragile brush holders
Step 3: Housing separation
– Remove through-bolts evenly in a star pattern
– Tap rear housing gently with rubber mallet – never steel
– Support armature during separation to prevent commutator damage
Critical warning: Never pry housings apart with screwdrivers. Aluminum housings warp easily, creating permanent gaps that cause bearing misalignment and premature failure.
Armature and Field Coil Inspection: What to Look For

With components exposed, perform these targeted checks to identify failure points before installing your $23 repair kit.
Armature examination:
– Inspect commutator for deep grooves or blue “burn” spots
– Test resistance between segments (0.2-0.5 ohms indicates healthy windings)
– Check for loose wires or cracked insulation at commutator connections
Field coil validation:
– Verify continuity between field terminals (infinite resistance = open coil)
– Look for brittle, cracked insulation from overheating
– Confirm no electrical contact between coils and housing (ground fault)
Bearing and brush assessment:
– Spin bearings by hand – roughness requires replacement
– Check shaft bushings for visible play (>0.005″ needs replacement)
– Replace brushes if shorter than 1/4 inch or showing chipped faces
Installing the GRK-46 Repair Kit: Bearings and Brushes
The $22.90 PLB Auto Electric kit contains precision-matched components designed specifically for Delco Remy three-brush generators. Cheap aftermarket parts fail quickly – stick with GRK-46 for vintage John Deere reliability.
Bearing installation protocol:
– Clean bearing bores thoroughly with brake cleaner
– Press new bearings squarely using C-clamp and socket
– Never hammer directly on bearings – use brass drift to avoid damage
Brush preparation essentials:
– Lightly sand commutator with 220-grit emery cloth
– Clean residue with electrical contact spray
– Pre-curve new brushes to match commutator diameter
Pro seating technique: Rotate armature by hand after brush installation. It should turn smoothly with slight drag – binding indicates misaligned brushes or contaminated commutator.
Reassembly and Voltage Testing: Getting It Right
Correct reassembly timing determines charging performance. Rushing this step causes immediate failure – take time to verify each step.
Precision reassembly sequence:
1. Install armature into drive-end housing with new bearing
2. Position field coils and attach rear housing using star-pattern tightening
3. Insert brushes, verifying free vertical movement in holders
4. Reinstall pulley using original alignment marks
Critical voltage test parameters:
– Connect multimeter across battery terminals
– Start engine and check output at 1500 RPM:
– 6V systems: Must read 7.0-7.5V
– 12V systems: Must read 13.5-14.5V
– Below range? Check belt tension (max 1/2″ deflection)
– Above range? Third brush likely misadjusted
Preventing Future John Deere Generator Failures
Regular maintenance extends rebuilt generator life dramatically. These simple habits prevent repeat John Deere generator repair:
Monthly field checks:
– Inspect drive belt for cracks and proper tension
– Blow commutator clean with compressed air
– Visually check brush wear through inspection ports
– Test charging voltage with lights on
Annual deep maintenance:
– Remove generator for thorough internal cleaning
– Check bearing grease condition (replace if dry)
– Inspect wiring for chafing against sharp edges
– Replace brushes at 50% wear (don’t wait for failure)
Storage protocol for off-seasons:
– Disconnect battery cables during storage
– Run engine monthly to circulate lubricants
– Cover generator to block moisture and debris
– Store in dry, temperature-stable environment
Rebuild or Replace? The $23 vs $400 Decision
Know when rebuilding makes financial sense versus sourcing a replacement.
Rebuild when:
– Brushes show normal wear (<1/4″ remaining)
– Commutator has light scoring (not deep grooves)
– Original generator matches tractor vintage
– GRK-46 kit available ($22.90)
Replace when:
– Severe commutator burning or pitting
– Open field coils (no continuity)
– Cracked housing or broken mounting lugs
– Unknown generator history on restored tractor
Cost comparison:
– Quality rebuild kit: $23
– Professional rebuild: $150-$200
– Remanufactured generator: $200-$400
– New OEM generator: $400-$800
Final Load Testing and Third Brush Adjustment
Complete your John Deere generator repair with calibration under real-world conditions.
Load test procedure:
– Turn on all lights and electrical accessories
– Verify voltage stays above:
– 6.2V for 6V systems
– 12.5V for 12V systems
– Monitor for overheating after 30 minutes continuous operation
Third brush fine-tuning:
– Locate adjustment screw on rear housing
– Turn clockwise in 1/8 increments to increase output
– Turn counterclockwise to decrease output
– Target: Slight charge indication at high idle
Break-in protocol:
– Operate for 2-3 hours with varying electrical loads
– Recheck belt tension after first 60 minutes
– Confirm brush seating by checking commutator for even wear pattern
– Record baseline voltage readings for future reference
Final Note: Most John Deere generator failures stem from predictable wear in brushes and bearings – not complex electrical faults. With the $22.90 GRK-46 repair kit and basic tools, you restore reliable charging in under four hours. This Delco Remy three-brush design rewards careful rebuilds with years of service, making it the smartest path for vintage tractor owners. After completing your John Deere generator repair, implement the monthly maintenance checklist to avoid repeat failures. For immediate parts access, search “GRK-46 John Deere generator repair kit” – keep one in your shop for when that first dimming headlight appears.


