Your marine generator installation can mean the difference between enjoying a comfortable cruise with reliable power and facing dangerous failures miles from shore. A properly installed marine generator delivers consistent AC power for air conditioning, refrigeration, and entertainment systems while meeting strict marine safety standards. Unfortunately, many boat owners underestimate the complexity of marine generator installation, leading to carbon monoxide risks, electrical fires, or complete system failures when you need power most. This guide reveals the exact steps professional marine technicians follow to ensure your marine generator installation operates safely and efficiently for years.
Unlike land-based generators, marine units face constant vibration, saltwater exposure, and strict ventilation requirements that demand specialized installation techniques. One common oversight—improper exhaust routing—causes water backflow that can sink your boat while you sleep. Another frequent error—using inadequate fuel lines—creates fire hazards that violate USCG regulations. With careful planning and attention to marine-specific requirements, you can complete a marine generator installation that provides reliable power without compromising safety.
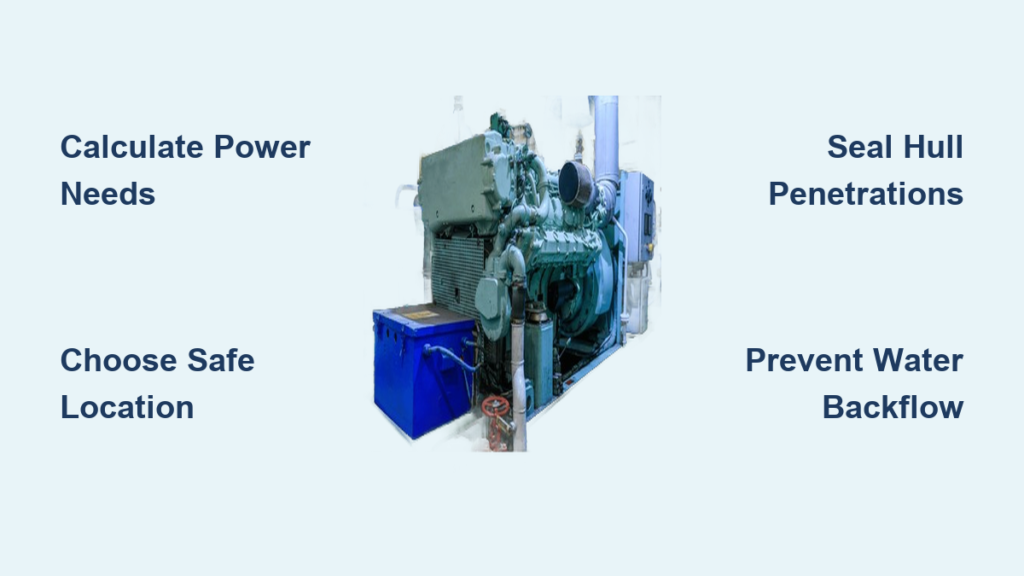
Calculate Your Exact Power Requirements Before Installation
Marine generator installation begins with accurate power calculations—guessing leads to undersized units that fail under load. List every AC device you’ll run simultaneously, paying special attention to starting watts (which can be double running watts). A 16,000 BTU air conditioner requires 1,600 running watts but needs 3,200 starting watts. Always design your marine generator installation for 80% of the generator’s rated capacity to prevent premature wear.
Critical power calculation steps:
– Document starting and running watts for each appliance
– Include safety margin for future additions
– Account for voltage drop in long cable runs
– Verify generator can handle largest motor startup
Many boat owners discover too late that their marine generator installation can’t handle simultaneous air conditioning and battery charging. Measure actual loads with a clamp meter rather than relying on nameplate ratings, which often underestimate real-world consumption.
Choose the Optimal Generator Location for Safety and Access
Your marine generator installation location determines both performance and safety. The unit needs 24 inches of service clearance on all sides, plus specific spacing for vibration isolation and exhaust routing. Engine rooms work well if properly ventilated, but lazarettes often provide better access for maintenance. Measure potential locations with the generator’s dimensions plus sound shields and exhaust components—you’ll discover the unit “grows” significantly during installation.
Location requirements you can’t ignore:
– Minimum 3″ clearance from bulkheads for vibration
– 6″ vertical space for exhaust riser
– 12″ forward space for cooling air intake
– Direct access to bilge for emergency shutdown
Avoid positioning your marine generator installation near fuel tanks or battery banks, which creates fire hazards. The generator must sit level within 1/4 inch in all directions to prevent oil starvation and premature bearing wear.
Install Critical Hull Penetrations Before Generator Placement

Marine generator installation requires precise hull penetrations that often dictate generator size more than actual power needs. The exhaust must exit above the waterline even when heeled 15 degrees—install too low and risk sinking your boat from water backflow. Cooling water intake needs placement where it stays submerged in all conditions but avoids propeller wash turbulence.
Penetration placement checklist:
– Exhaust outlet: minimum 6″ above waterline
– Cooling intake: minimum 8″ below waterline
– Both penetrations on same side as generator
– Mark exact locations on hull exterior before cutting
Use only bronze through-hulls with ball valves—never gate valves that can vibrate closed. Install sea strainers where accessible for cleaning, with hinged access panels if under berths. Bed all fittings with marine sealant and reinforce with backing plates before launching.
Secure Your Generator with Proper Vibration Isolation

Improper mounting causes 70% of premature marine generator failures. Your marine generator installation needs flexible mounts rated for the unit’s weight and horsepower. Use 3/4″ aluminum mounting beds reinforced with angles—never wood cores that absorb moisture and deteriorate. Plan for 2″ rubber isolation pads between engine and mounts to absorb vibration.
Mounting procedure that prevents damage:
1. Rough position generator with 1/4″ clearance gaps
2. Tighten mounts finger-tight while checking alignment
3. Verify coupling alignment with feeler gauges
4. Adjust mounts (not engine) for perfect alignment
5. Final torque bolts in star pattern to specifications
The generator should move slightly when pushed—this indicates proper isolation. Too rigid transmits vibration through the hull; too loose allows bolts to loosen. Recheck mount torque after 10 hours of operation as rubber settles.
Connect Exhaust System with Water Backflow Prevention
Marine generator installation demands special attention to exhaust systems—improper routing causes dangerous water backflow. Install the water injection elbow directly on the exhaust manifold with a new gasket. Route exhaust hose upward immediately with no horizontal runs until above waterline. Use only marine-grade silicone hose rated for wet exhaust, double-clamped with 316 stainless steel constant-torque clamps.
Exhaust connection sequence that works:
1. Install injection elbow with new gasket
2. Connect 3′ riser section (minimum 12″ height)
3. Install muffler at highest point
4. Route continuously upward to hull fitting
5. Support every 24″ minimum with cushioned clamps
Check water flow at the exhaust outlet—it should be a steady stream, not a dribble. Any low points in the exhaust hose will collect water and cause backflow when the generator stops.
Wire Electrical Systems to Prevent Deadly Hazards
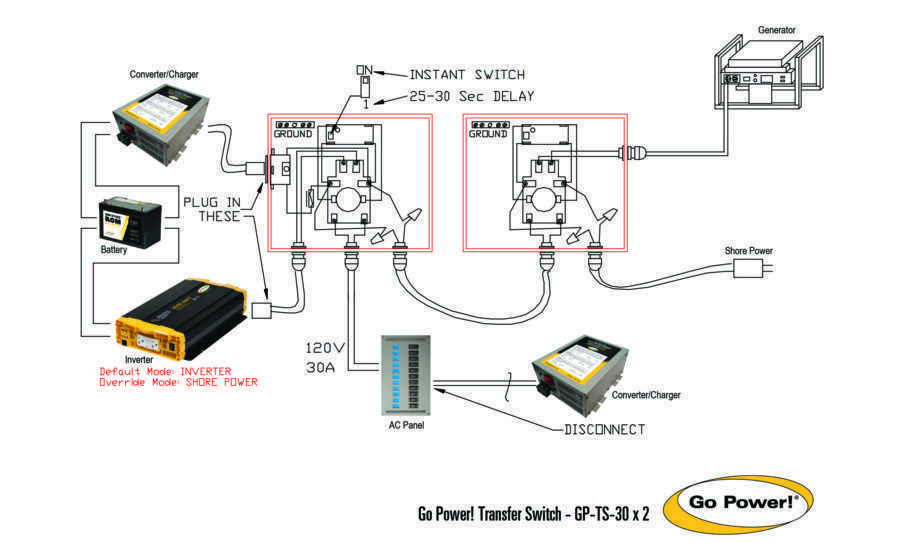
Electrical mistakes in marine generator installation cause fires and electrocution risks. Use dedicated starting batteries—never share with house bank. Mount batteries in ventilated boxes secured with 6G-rated straps. Run 2/0 AWG tinned copper cable with crimped terminals and adhesive heat shrink. Install 300-amp fuses within 7″ of the battery.
Critical electrical connections:
– Transfer switch rated for full load capacity
– Proper grounding to engine block (not hull)
– Neutral-ground bond at generator only
– Color-coded wiring (black/hot, white/neutral, green/ground)
– GFCI protection for all AC outlets
Position control panels where visible from helm and accessible during maintenance. Run monitoring cables in separate conduit from power cables to prevent interference. Install emergency shutdown buttons at helm and generator location wired to cut fuel and ignition simultaneously.
Test Your Marine Generator Installation Before First Use
Never skip comprehensive testing of your marine generator installation—problems found at dock beat failures at sea. Start with a thorough leak check: pressurize fuel system to 15 PSI and check for bubbles. Run the generator at idle for 10 minutes monitoring for leaks, then gradually increase load while watching temperature and oil pressure.
Essential commissioning tests:
– Load bank test from 25% to 100% capacity
– Verify voltage regulation (±5% of 120V)
– Check frequency stability (60 Hz ±0.5)
– Test transfer switch prevents shore/generator overlap
– Run overnight at cruise load
Document all performance metrics for future reference and warranty claims. Pay special attention to exhaust temperature—should stay below 200°F with proper water injection.
Maintain Your Marine Generator Installation for Longevity
Your marine generator installation requires specific maintenance routines that differ from land-based units. Perform daily checks while underway: oil level (hot engine), coolant overflow, fuel filter sight bowls, and exhaust water flow. Weekly, run the generator at full load for 30 minutes to prevent wet stacking and keep electrical connections clean.
Annual service checklist:
– Change oil and all filters
– Replace zinc anodes in heat exchanger
– Pressure test cooling system
– Load test starting batteries
– Inspect exhaust system for corrosion
– Calibrate voltage regulator
Saltwater environments destroy zinc anodes quickly—check them monthly and replace when 50% depleted. Neglecting this simple task in your marine generator installation leads to rapid heat exchanger failure and expensive repairs.
Troubleshoot Common Marine Generator Installation Failures
When your marine generator installation fails, diagnose systematically. For “won’t start” issues, check battery voltage (minimum 12.4V), fuel supply, cooling water flow, and safety shutdown switches in that order. Low power output usually indicates undersized generators, dirty air filters, or clogged cooling systems—not generator defects.
Overheating troubleshooting flow:
1. Verify water flow at exhaust outlet
2. Check strainer for blockages
3. Inspect impeller for damage
4. Test thermostat operation
5. Replace zinc anodes if depleted
Carbon monoxide detectors must trigger emergency shutdowns—never bypass them. Install marine CO detectors in all sleeping areas and test weekly. Position detectors 12″ from ceiling where CO accumulates, and replace every 5 years regardless of function.
A successful marine generator installation transforms your boat from a weekend vessel to a comfortable offshore cruiser. The key lies in meticulous attention to marine-specific requirements that land-based installations ignore. By following these precise steps for your marine generator installation, you’ll avoid the costly mistakes that turn dream cruises into emergency repairs. Properly executed, your generator will deliver reliable power for years, making every voyage safer and more enjoyable.


