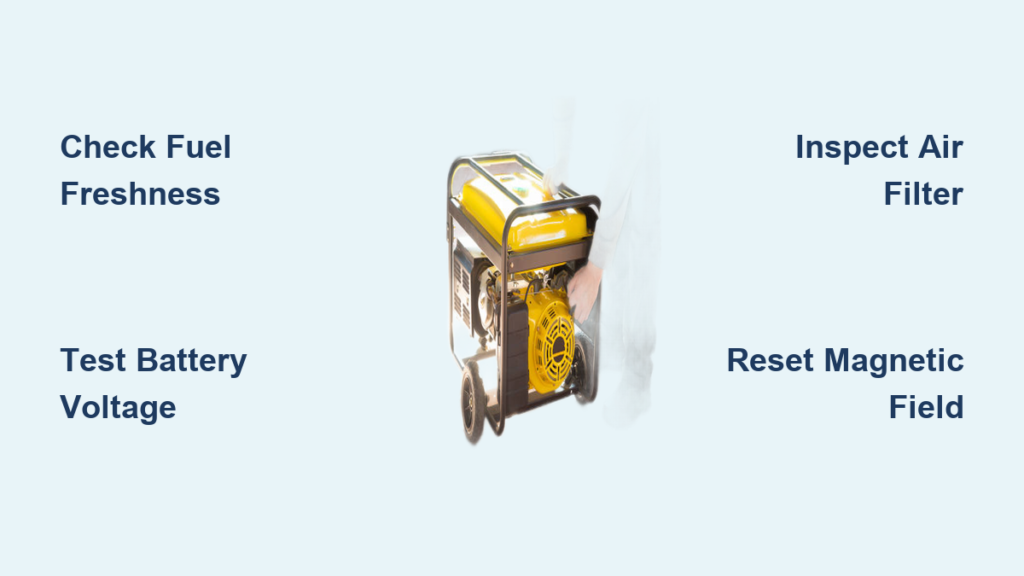
Your portable generator sputters to life during a storm, then dies as the lights flicker out—leaving you scrambling in the dark. This frustrating scenario affects thousands of homeowners annually when backup power fails at critical moments. With proper portable generator troubleshooting skills, you can transform panic into confidence and restore power within minutes. Most failures stem from preventable issues like stale fuel, clogged filters, or lost residual magnetism—not complex mechanical breakdowns. By mastering these proven diagnostic techniques, you’ll eliminate 90% of common generator problems without professional help. This guide delivers actionable solutions for immediate power restoration when you need it most.
Restore Power Output When Generator Runs but Outlets Are Dead
When your generator engine hums smoothly yet outlets deliver zero power, residual magnetism loss is almost always the culprit. This magnetic “memory” essential for electricity generation disappears after months of storage or improper shutdown. Don’t replace expensive components before trying these field-tested fixes.
How to Recharge Your Generator’s Magnetic Field in 10 Minutes
Battery Flash Method (Critical for Generac Models)
– Locate the electrical field terminals near the voltage regulator (typically two small wires)
– Connect a 12V battery’s positive lead to the generator’s positive field wire
– Briefly touch the negative battery lead to the generator’s negative field wire for 3-5 seconds
– Immediately disconnect and test power output—successful restoration shows 120V on multimeter
Emergency Drill Method (No Tools Required)
– Plug a corded drill into the generator while running
– Set drill to reverse direction and hold trigger fully engaged
– Manually spin the chuck backward rapidly for 15-20 seconds
– The drill motor acts as a temporary generator, rebuilding the magnetic field
Prevent Permanent Power Loss
Never shut down your generator with loads connected—always disconnect devices first. Exercise units monthly under 25-50% load to maintain magnetism. For storage exceeding 30 days, add fuel stabilizer and run 10 minutes to circulate treated fuel through the system.
Diagnose Engine That Won’t Start in Dusty Conditions

Starting failures in construction zones or barns typically involve fuel system blockages or air starvation. Work through these checks in order—most solutions take under 15 minutes with basic tools.
Immediate Fuel Flow Verification (5-Minute Test)
- Turn fuel valve OFF and disconnect line at carburetor
- Place container under line and turn valve ON
- Observe flow: Weak dribble indicates clogged filter or line
- Replace fuel filter (every 100 hours) and check vacuum relief valve position
Stale fuel older than 60 days causes 80% of no-start issues—drain tank and refill with fresh fuel when odor turns sour or varnish-like.
Spark Plug Emergency Assessment
Remove plug using 5/8″ socket: Light tan deposits mean healthy operation, while black carbon requires wire brush cleaning. Critical warning: Cracked porcelain or electrode gaps wider than 0.025 inches demand immediate replacement. For spark verification, ground plug against engine block while pulling starter—bright blue arcs confirm ignition system function.
Fix Engine Cranking Without Firing in Cold Weather
When the starter engages but the engine won’t catch, focus on fuel delivery and battery health—especially below 40°F where ethanol-blended fuels thicken.
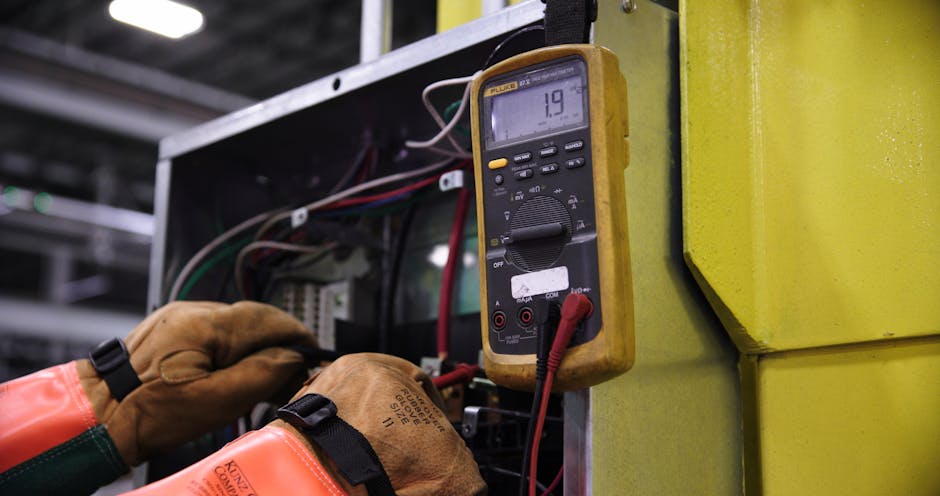
Battery Voltage Emergency Check
Test with multimeter: Below 12.0V indicates insufficient cranking power. Clean corroded terminals with baking soda paste and a wire brush. For immediate operation, use recoil starter while charging battery. Replace batteries older than 3 years regardless of voltage readings—cold weather exposes weak cells.
Recoil Starter Engagement Test
Pull cord slowly: Proper resistance should build at 1/3 pull. No resistance means broken pawls in starter assembly. Temporary fix: Rotate flywheel manually 1/4 turn then retry pull start. Complete replacement takes 30 minutes with basic hand tools.
Stop Engine Sputtering During High Load Operation

Sputtering under load usually signals air restriction or fuel starvation—especially critical when powering medical equipment or refrigeration.
Air Filter Emergency Protocol for Construction Sites
In dusty environments, inspect foam filters every 8 operating hours. Hold paper filters to light—if no illumination shows through, replace immediately. Never operate without a filter: Unfiltered air causes catastrophic piston scoring within minutes. For woodshops or barns, install pre-filters and clean weekly.
Load Management During Power Restoration
Start generator with all devices disconnected. Wait 5 minutes for warm-up before engaging circuit breaker. Add loads sequentially—never exceed 75% capacity. If sputtering occurs, disconnect non-essential devices immediately. Overloaded generators exhibit voltage drops below 110V—monitor with multimeter during operation.
Fuel System Maintenance for Ethanol-Blended Gas
Modern fuel’s ethanol content causes 75% of generator failures through varnish buildup and water absorption. Master these critical interventions.
Stale Fuel Emergency Response
If generator stalls after 5 minutes, stale fuel is likely culprit. Drain tank completely and refill with fresh fuel containing stabilizer. For severe cases (varnish in carburetor), professional cleaning is required—don’t attempt carburetor disassembly without specialized tools. Always run generator 10 minutes after adding stabilizer to circulate treated fuel.
Critical Filter Replacement Triggers
Replace fuel filter every 100 hours or when:
– Fuel flow test shows inconsistent drip pattern
– Visible debris in transparent fuel lines
– Engine starts but dies after 2 minutes
Never reuse foam filters—proper replacement prevents 60% of recurring fuel issues.
Oil Level Crisis Management for Emergency Use
Low oil causes immediate shutdowns and permanent damage. Verify levels correctly before assuming sensor failure.
Rapid Oil Verification Protocol
Place generator on level surface—uneven ground gives false dipstick readings. Wipe dipstick clean, reinsert fully, then check level between min/max marks. Use only manufacturer-specified oil viscosity (typically SAE 30 for warm weather). If oil appears milky, water contamination requires immediate oil change.
Oil Light False Alarm Fixes
When light stays illuminated with proper oil level:
1. Check wire connections at sensor
2. Clean sensor tip with electrical contact cleaner
3. Replace sensor if problem persists
Never bypass oil safety systems—engines seize within 2 minutes of low oil operation.
Decoding Generac Error Messages During Outages
Modern generators display critical codes during failures—knowing these saves hours of guesswork.
Emergency Code Response Guide
- E101 (Low Oil): Add oil to max mark—never restart until level corrects
- E102 (Overheating): Shut down immediately, clear cooling fins of debris
- E103 (Battery): Charge for 1 hour minimum before retrying start
- E104 (Fuel Restriction): Replace fuel filter and check vacuum valve
Battery Lifespan Extension Tactics
During storage, connect trickle charger to maintain 12.6V. Clean terminals monthly with baking soda solution. Test voltage quarterly—replace at first sign of slow cranking even if within 3-year window.
Monthly Exercise Routine That Prevents 90% of Failures
Consistent operation prevents the most common spring startup failures through component lubrication and fuel circulation.
20-Minute Power Readiness Test
Start generator with no loads connected. Run 10 minutes at half-throttle, then engage 50% load (like a space heater) for final 10 minutes. Verify:
– Steady voltage between 115-125V under load
– No unusual exhaust smoke
– Oil pressure light extinguishes within 3 seconds
Log results to detect performance degradation early.
Long-Term Storage Protocol for Hurricane Season
Proper storage prevents the top cause of seasonal startup failures—varnished fuel systems.
90-Day Storage Checklist
- Add fuel stabilizer at 1oz per gallon
- Run engine 10 minutes to circulate treated fuel
- Change oil (old oil contains combustion acids)
- Remove spark plug, add teaspoon of oil, slowly pull cord
- Store covered in climate-controlled space with battery maintainer
Critical mistake: Never store with empty fuel tank—moisture condensation causes rust. Maintain 1/4 tank with stabilized fuel for seasonal readiness.
Carbon Monoxide Safety Rules That Save Lives
CO poisoning causes generator fatalities annually—follow these non-negotiable protocols.
Emergency Operation Zones
Position generator minimum 20 feet from all structures with exhaust pointed downwind. Never operate within 100 feet of open windows or vents. Use battery-powered CO detectors within 10 feet of generator exhaust path. Shut down immediately if detectors alarm—even brief exposure causes irreversible brain damage.
Remote Monitoring That Prevents Disaster
Modern apps provide early warnings before failures occur during critical outages.
Generac Guardian Emergency Features
Enable outage alerts to test generator before power loss. Schedule monthly self-tests during daylight hours. Monitor oil pressure and voltage in real-time during operation. Receive maintenance alerts 30 days before service due—preventing 40% of unexpected failures through proactive care.
Your generator’s reliability depends on mastering these core troubleshooting principles. Start with the simplest solutions: verify fresh fuel, check oil levels, and inspect air filters before progressing to complex repairs. Monthly exercise sessions with load testing prevent 90% of failures by keeping components lubricated and fuel systems clean. When problems persist after these steps, consult your manual’s error code guide or contact a certified technician—never bypass safety systems like oil pressure sensors. Remember: proper storage with fuel stabilizer and battery maintenance ensures immediate readiness when storms strike. By implementing these field-tested techniques, you transform your portable generator from an unreliable backup into a dependable power source you can trust in any emergency.


