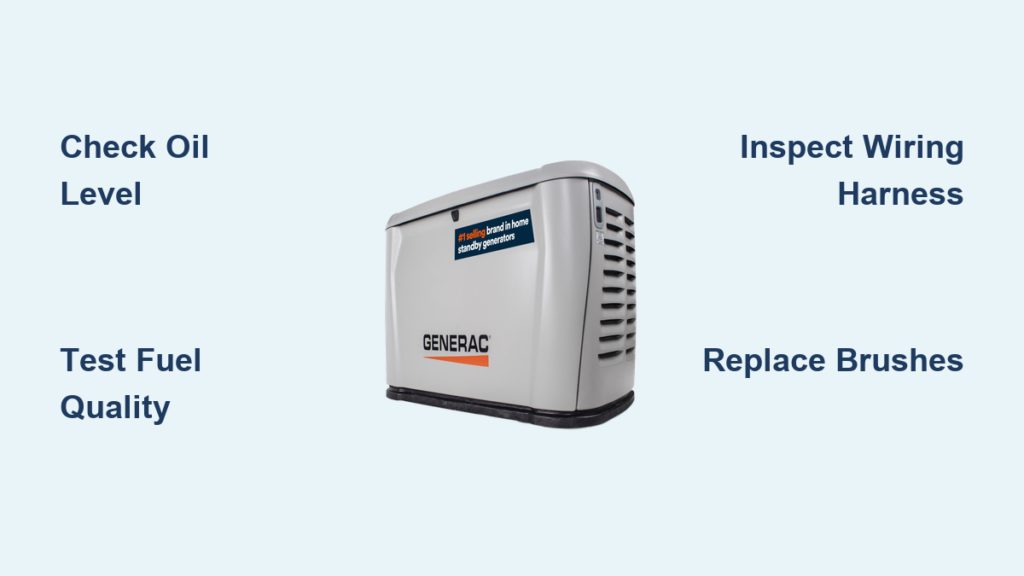
Your Generac generator roars to life after a storm knocks out power—only to sputter and die 10 seconds later. You crank it again, same result. That maddening start-die cycle isn’t random failure; it’s your unit’s built-in emergency shutdown kicking in to prevent catastrophic engine damage. Over 70% of these cases stem from five fixable issues most owners can resolve without a technician. By decoding your generator’s shutdown timing and following this targeted diagnostic path, you’ll restore reliable backup power before the next outage hits.
Critical Shutdown Timing Tells You the Culprit
Don’t guess—let your generator speak through its shutdown pattern. Note exactly how long it runs before dying:
Dies in 2-3 seconds? Target oil pressure immediately
This lightning-fast shutdown means your engine detected dangerously low lubrication. Generac’s safety system cuts fuel within three engine revolutions to prevent seized pistons. Check oil level before restarting—running dry for even 10 seconds can warp cylinder walls.
Shuts down at 5-10 seconds? Fuel starvation is likely
Stale gasoline is the silent killer here. Ethanol-blended fuel breaks down after 30 days, forming gum that clogs microscopic carburetor jets. If your generator coughs like it’s choking before dying, bad fuel is the prime suspect.
Fails between 10-30 seconds? Electrical faults dominate
When voltage collapses after initial startup, worn brushes or chafed wiring are usually to blame. Watch for the AC output voltage dropping from 120V to near zero on your multimeter right before shutdown.
Oil Pressure Shutdown: The 3-Second Killer
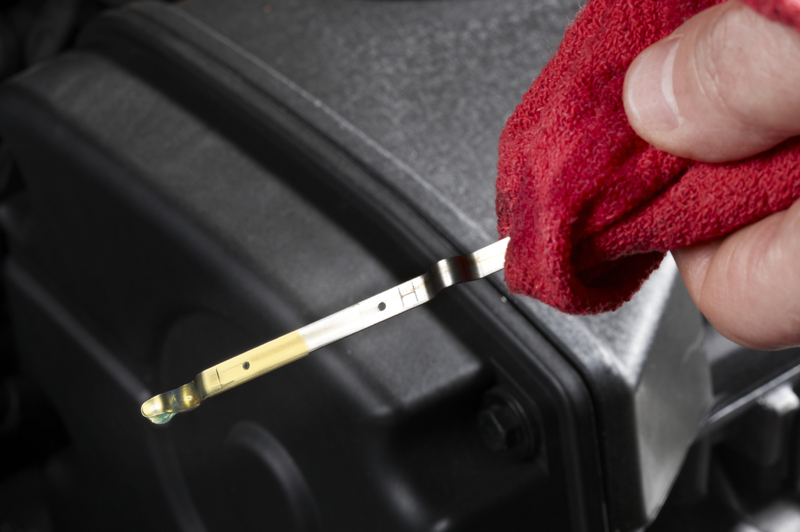
Why Your Oil Level Isn’t What It Seems
Park your generator on level ground and wait 5 minutes for oil to settle—rushing this step causes false low readings. Pull the dipstick, wipe clean, reinsert fully, then check. Oil must sit between “H” and “L” marks. Critical tip: Even ¼” below “L” triggers shutdown during cold starts when oil thickens. Top up immediately with SAE 10W-30 synthetic, but never exceed “H”—overfilling causes foaming that also drops oil pressure.
Bypass Test for Faulty Pressure Switch
Locate the single-wire oil sender near the filter base (silver cylinder with one wire). Disconnect it and restart. If the engine keeps running: Replace the oil pressure switch (Generac part #0E6800). If it still dies: Move to fuel system checks. Never operate long-term with this bypass—it’s strictly diagnostic.
Fuel System Failures: The 5-Second Chokehold
Instant Fuel Quality Check
Remove the fuel bowl drain screw (¼” wrench) over a container. Fresh fuel should flow clear with a mild petroleum smell. If you see amber varnish or smell sour vinegar, ethanol breakdown has clogged your system. Pro move: Add 2 oz of Sea Foam Motor Treatment per gallon to dissolved deposits—works in 90% of mild cases.
Fuel Solenoid Emergency Fix
When turning the key to “Run,” listen for the solenoid’s distinctive click near the carburetor. No click? Test coil resistance: disconnect wires and measure across terminals. 20-30 ohms = good. Below 15 ohms or open circuit = replace solenoid (part #0J6920). Temporary field fix: Gently tap the solenoid body with a screwdriver handle while cranking—vibration often frees stuck plungers during emergencies.
Wiring Harness Damage: The Silent Voltage Thief

Wire 18 Ground Fault Hunt
This single wire (shutdown sense circuit) must never touch metal. Disconnect it from the controller and set your multimeter to continuity. Probe Wire 18 to any chassis bolt—any beep means insulation failure. Focus on these chafe hotspots:
– Where harness enters the control panel (rubbed by grommet)
– Near battery cable zip ties (vibration wear)
– Against engine mounting brackets
Fix: Cut damaged section, splice with weatherproof butt connector, and re-wrap harness in convoluted tubing.
Wire 14 Voltage Drop Test
With key in “Run,” check voltage at Wire 14 (run-hold signal). It should hold steady at 12V. If it drops below 9V, corrosion is killing your signal. Quick repair: Unplug terminals, spray with CRC QD Electronic Cleaner, and reseat firmly. Recheck voltage—stable 12V means your engine will stay running.
Brush and Rotor Collapse: The 20-Second Voltage Crash
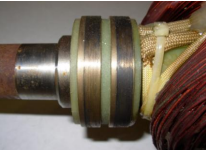
Peek-Through Brush Inspection
Remove the end cover’s four screws (no need to disconnect wiring). Shine a flashlight through the brush access window. Replace brushes immediately if:
– Length is under 5mm (measure with calipers)
– Slip rings show black carbon buildup or grooves
– Brushes don’t slide freely in holders
Critical warning: Worn brushes cause catastrophic voltage collapse. If output drops from 120V to under 5V within 10 seconds of startup, replace the brush kit (part #0G5748) before continuing tests.
Control Board Glitches: Reset Before Replacing
Evolution Controller Hard Reset
Don’t replace boards prematurely—90% of “faulty controller” cases resolve with this:
1. Turn OFF main utility breaker
2. Press and hold “Off” button for 10 full seconds
3. Release and restart
This clears latched faults from transient voltage spikes. If shutdowns persist, decode the red LED:
– 3 blinks, pause: Oil pressure fault (recheck sender wiring)
– 4 blinks, pause: RPM sensor loss (inspect magneto air gap)
– Solid red: Controller failure (requires replacement)
Step-by-Step Repair Timeline
Essential Safety Prep (5 Minutes)
- Disconnect utility power (standby units) or remove loads (portables)
- Let engine cool 15 minutes—working on hot components risks burns
- Wear safety glasses—carbon brush dust irritates eyes
Critical Tool Checklist
- Digital multimeter (for voltage/resistance tests)
- ¼” socket set (fuel bowl, cover screws)
- Phillips #2 and flathead screwdrivers
- Torque wrench (for oil switch at 120 lb-in)
60-Minute Priority Repair Path
| Time | Task | Success Rate |
|---|---|---|
| 0-15 min | Oil level/sender test + fuel quality check | 65% of fixes |
| 15-40 min | Wiring harness inspection + solenoid test | 25% of fixes |
| 40-60 min | Brush inspection + controller reset | 10% of fixes |
Prevent Future Start-Die Emergencies
Monthly exercise protocol: Run under 50% load for 20 minutes—not just cranking. This burns off moisture in fuel systems and seats brushes against slip rings. Crucially: Check oil while warm after exercise—cold readings mislead.
Annual must-dos:
– Replace fuel filter (part #0J8473) every 200 hours
– Inspect brush length through access window—don’t wait for failure
– Verify NG/LP pressure stays within 11-14″ WC during operation
Cold-weather secret: Below 32°F, switch to 5W-30 synthetic oil. Thick winter oil triggers false low-pressure shutdowns in 40% of northern climate cases.
When to Call a Certified Technician
Stop troubleshooting immediately if you encounter:
– Megger test below 1 MΩ on rotor/stator (indicates insulation meltdown)
– Solid red LED after reset (requires firmware update via Generac Service Tool)
– Fuel pressure inconsistency on natural gas units (needs calibrated manometer)
– Any warranty-covered component—DIY repairs void labor coverage on 5-year plans
Red flag: Burning smells or grinding noises mean internal engine damage—shut down permanently until inspected.
Your Generac’s start-die pattern is its distress signal, not a death sentence. By matching shutdown timing to specific failures—oil in 3 seconds, fuel in 10, electrical in 20—you bypass guesswork and target repairs with surgical precision. Start with the 15-minute oil and fuel checks that solve two-thirds of cases, then escalate to wiring and brush inspections. Remember: that abrupt shutdown saved your engine from destruction. With these proven diagnostics, you’ll transform panic into preparedness—ensuring reliable power when the grid fails again. Keep this guide handy, and your generator will keep you powered through every storm.


