That stale gasoline sitting in your Champion generator’s fuel system is silently causing damage right now. After just 30 days, fuel begins breaking down and forming varnish that clogs carburetors, leading to hard starts, rough running, and expensive repairs. Whether you’re preparing your generator for winter storage or troubleshooting starting issues caused by old fuel, knowing exactly how to drain gas from Champion generator properly is essential maintenance. This step-by-step guide shows you the safest, most effective methods to completely empty your Champion generator’s fuel system without risking fire, environmental damage, or component failure.
Ignoring proper fuel drainage procedures can turn a simple maintenance task into a dangerous situation. Gasoline vapors are highly flammable and can ignite from something as small as a static spark. Taking the time to follow these procedures correctly protects your investment and keeps you safe while ensuring your Champion generator will fire right up when you need emergency power most.
Safety First: Critical Pre-Drain Protocols
Before you even think about touching your generator’s fuel system, implementing these safety measures isn’t optional—it’s the difference between a routine maintenance task and a potential disaster. Gasoline vapors can travel significant distances and ignite from sources you might not even consider dangerous.
Required Safety Gear Checklist
Never skip protective equipment when handling gasoline—your skin absorbs harmful chemicals, and fumes can damage your eyes. You absolutely need:
– Chemical-resistant gloves (nitrile or neoprene, NOT latex)
– Safety goggles that seal around your eyes (regular glasses won’t protect)
– Natural fiber clothing (cotton or denim—synthetics can melt to skin)
– UL-approved gasoline container (never use plastic jugs or glass)
Workspace Setup Requirements
Your location determines safety more than any other factor. Position your generator in an open outdoor area at least 25 feet from:
– Your home’s foundation or any structures
– Vehicle fuel tanks or propane lines
– Electrical outlets or running appliances
– Dry grass or flammable yard debris
Critical check: On breezy days, position yourself upwind of the generator so fumes blow away from you, not toward you.
Pre-Drain Engine Prep
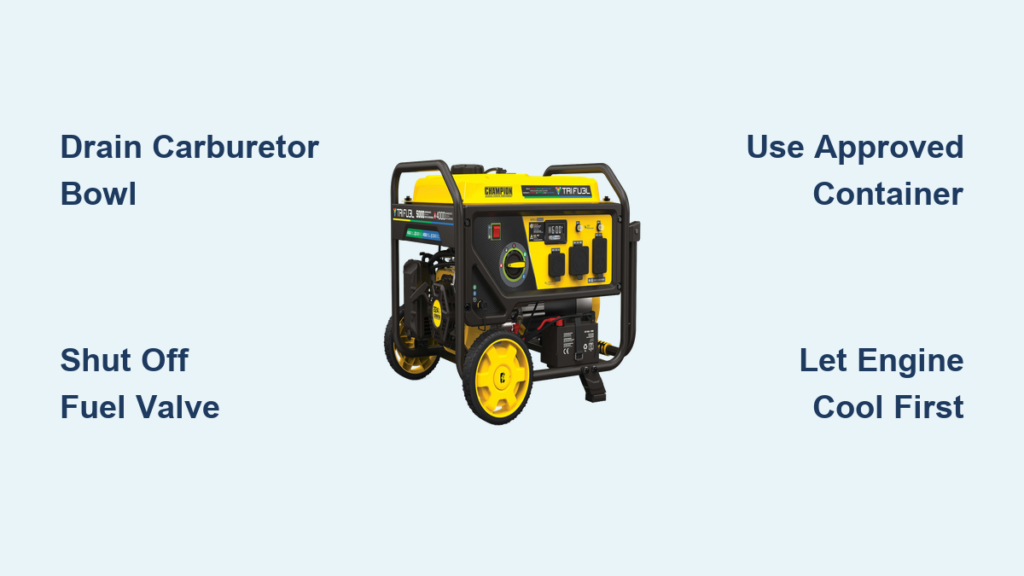
- Shut off the fuel valve (usually a red lever near the base of the tank)
- Let the engine cool completely (minimum 45 minutes—touch the exhaust to verify)
- Remove spark plug to prevent accidental starting
- Place generator on level ground—tilting causes uneven drainage
Warning: Never attempt to drain fuel while the engine is warm. Hot components can ignite gasoline vapors before you even see liquid fuel.
Locate Your Champion’s Fuel System Components

Champion generators follow consistent design principles across their product line, but component locations vary slightly between models. Knowing exactly where to find these parts prevents unnecessary disassembly.
Finding the Fuel Valve
This critical shutoff component appears in three common configurations:
– Red lever valve mounted directly on newer inverter models (pull toward “OFF” position)
– Black rotary knob on older open-frame generators (turn clockwise to close)
– Inline fuel valve along the fuel line (requires shutting off before disconnecting)
Pro tip: If you can’t locate your fuel valve, trace the fuel line from the carburetor back to the tank—you’ll find it within 6 inches of the tank outlet.
Identifying the Carburetor Drain
The universal drainage point sits at the lowest part of the carburetor assembly:
– Metal bowl beneath the air filter housing (remove cover to access)
– 10mm drain bolt at the bowl’s base (some models use Phillips head)
– Clear plastic tube extending downward on newer models (follow to collection point)
Primary Drain Method: Carburetor Bowl Technique
This approach works on every Champion generator model and removes fuel from both the tank and carburetor simultaneously—the most thorough drainage method.
Step 1: Position Your Container
Place your approved gasoline container directly beneath the carburetor drain bolt. Elevate the container slightly if needed—gasoline flows better downhill than uphill. Ensure it has at least 25% empty space to prevent dangerous overflow from vapors expanding.
Step 2: Open the Fuel Valve
Turn the fuel valve to “ON” position—this creates the gravity feed necessary for complete drainage. You’ll hear fuel immediately begin flowing through the lines toward the carburetor. Wait 30 seconds for the flow to stabilize before proceeding.
Step 3: Remove the Drain Bolt
Using a correct-size 10mm wrench (not a pliers—stripped bolts cause leaks), slowly loosen the carburetor drain bolt counterclockwise. Back it out just enough for fuel to flow—about 2-3 full turns. Never remove it completely while fuel is flowing.
Step 4: Complete the Drainage
Allow fuel to flow until the stream reduces to occasional drips. For complete drainage:
– Small generators (2000-3100W): 4-6 minutes
– Medium units (3500-5500W): 6-8 minutes
– Large models (7500W+): 8-12 minutes
Critical step: After the main flow stops, gently rock the generator side-to-side for 30 seconds to dislodge fuel trapped in tank corners—this removes the last 10-15% of residual fuel.
Alternative Methods for Stubborn Situations

When standard drainage fails or your model has unique features, these specialized techniques ensure complete fuel removal without damaging components.
Tank Drain Plug Method (Newer Models)
Many Champion generators now include dedicated tank drains:
– Plastic wing-nut plug on tank bottom (hand-tighten only—over-tightening cracks plastic)
– Brass petcock valve near fuel shutoff (turn counterclockwise to open)
– Screw-in plug requiring flathead screwdriver (common on industrial models)
Important: This method only drains the tank—you must still remove the carburetor bowl to drain residual fuel from the carburetor.
Vacuum Extraction for Complete Removal
For absolute fuel elimination (essential for long-term storage):
1. Insert 1/4″ clear tubing through fuel filler neck
2. Use hand pump to extract remaining fuel
3. Remove carburetor bowl to drain residual fuel
4. Wipe bowl clean with shop towels before reassembly
Troubleshooting Common Drain Problems
Even straightforward procedures encounter unexpected issues. These solutions address the most frequent drainage complications.
Fuel Won’t Drain Completely
Causes & Solutions:
– Clogged fuel line: Disconnect line and blow compressed air backward from carburetor
– Stuck fuel valve: Tap valve body gently with plastic mallet while turning
– Vapor lock: Loosen fuel cap slightly to equalize pressure, then retighten
– Tank sediment: Use vacuum method instead of gravity drainage
Drain Bolt Won’t Loosen
Never force it—stripped bolts require expensive carburetor replacement:
1. Apply penetrating oil around threads (wait 15 minutes)
2. Try impact method: Tap wrench handle with rubber mallet
3. Use proper 6-point wrench (not a 12-point or adjustable)
4. Heat bolt head slightly with hair dryer to expand metal
Preventing Future Fuel Problems
Regular maintenance prevents the need for emergency draining and extends your generator’s lifespan significantly.
Fuel Stabilizer Use
Add fuel stabilizer to fresh gas immediately after purchase:
– Ratio: 1 oz per 2.5 gallons of fuel (follow product instructions)
– Timing: Add before filling tank—stabilizer can’t reverse degradation
– Top brands: STA-BIL 360 Marine, Sea Foam Motor Treatment, Champion brand
Regular Exercise Schedule
Run your generator monthly with proper load:
– Duration: 30-60 minutes under 50% load
– Fuel management: Use stabilized fuel and don’t top off tank
– Pro tip: Run until automatic shutdown to clear fuel lines
Quick Reference: Drain Time by Model
| Champion Model | Tank Size | Drain Time | Special Notes |
|---|---|---|---|
| 2000W Inverter | 1.1 gal | 4-5 min | Remove side panel for carb access |
| 3500W Open Frame | 3.4 gal | 6-7 min | Check for tank drain plug location |
| 5500W Dual Fuel | 6.0 gal | 8-9 min | Drain both gasoline and propane systems |
| 7500W Electric Start | 6.1 gal | 9-11 min | Disconnect battery before draining |
| 9000W Portable | 7.7 gal | 11-13 min | Use vacuum method for complete removal |
Final Safety Reminders
Gasoline vapors remain flammable long after liquid fuel is gone, so maintain safety protocols throughout the entire process.
Critical post-drain checks:
– Sniff-test all connections for fuel odors (do this outdoors)
– Wait 15 minutes before restarting generator to clear vapors
– Wash hands thoroughly with soap—even trace fuel exposure causes skin irritation
Never skip these steps when storing your generator:
– Run engine until it stops from fuel starvation
– Change oil while engine is warm (not hot)
– Store with fuel tank cap slightly loose to prevent vacuum lock
– Keep generator covered but breathable in dry storage area
Properly draining gas from your Champion generator protects your investment and ensures reliable performance when emergency power is critical. Following these exact procedures keeps you safe while preventing the carburetor damage that turns simple maintenance into expensive repairs. With these methods, you’ll complete this essential task correctly every time—keeping your Champion generator ready for whenever you need it most.


