Your Westinghouse generator fires up perfectly—then sputters and dies within seconds. This frustrating start-then-stall pattern affects thousands of owners each year, often during critical power outages. Whether you’re preparing for storm season or troubleshooting after storage, this guide delivers the exact diagnostic sequence professionals use to pinpoint and fix your westinghouse generator starts then dies problem fast.
Don’t panic—90% of these issues stem from just five common causes and most fixes require basic tools and under 30 minutes. You’ll learn the critical 60-second visual check that solves 70% of cases, the carburetor cleaning trick that costs nothing, and when that mysterious control board is actually the culprit. No mechanical background required—just follow our step-by-step approach built from real Westinghouse service data.
Decode Your Generator’s Shutdown Pattern
The moment your engine stops tells a critical story. Immediate stalls under 1 second typically indicate fuel starvation, low-oil shutdown, or ignition kill circuit failure. 5-15 second failures point to stale fuel, vapor lock, or auto-choke problems. 30-60 second shutdowns reveal overload detection, air restriction, or thermal ignition failure.
Watch for these signature patterns that pinpoint your specific issue:
– Stops like key released: Low-oil sensor or kill circuit malfunction
– Surges then dies: Governor or fuel mixture imbalance
– Smooth idle to stall: Carburetor jet blockage
– Restarts after 10 minutes: Vapor lock or thermal failure
Essential Safety Steps Before Diagnosing
Before touching any component, follow these critical safety protocols:
– Position generator minimum 20 feet from buildings—carbon monoxide poisoning remains the leading generator-related fatality
– Close fuel valve and let engine cool completely
– Remove spark plug wire when probing rotating parts
– Verify main breaker OFF and all cords disconnected
– Wear safety glasses and nitrile gloves
Never operate generators in garages, carports, or near open windows—even with doors open. These simple precautions prevent serious accidents during troubleshooting.
The 5-Minute Diagnostic Checklist
Run through this sequence before disassembling anything—it solves most westinghouse generator starts then dies cases:
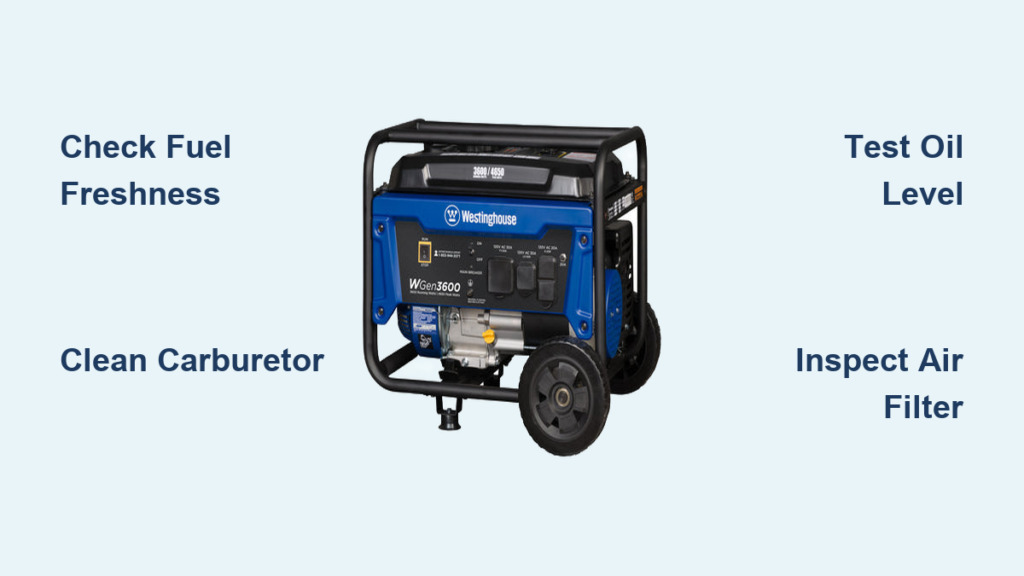
- Fuel freshness: Smell test—sour odor means drain completely (ethanol-blended fuel degrades after 30 days)
- Oil level: Must reach upper dipstick mark (sensors are hypersensitive—½ quart low triggers shutdown)
- Air filter: Remove element—if engine runs without it, replace immediately
- Fuel valve: Verify fully ON; debris often wedges underneath
- Choke linkage: Should move to RUN position within 5-10 seconds
- Load status: Disconnect all cords—overload kills in 3-5 seconds
- Fuel cap vent: Loosen ¼ turn—if engine continues, cap is clogged
Fix Fuel Starvation Fast

Clean Carburetor Without Removal
80% of start-then-die issues trace to clogged carburetor jets. Try this field fix first:
- Drain carb bowl: Turn fuel valve OFF, position container underneath, remove bowl drain screw
- Fresh fuel flush: Turn valve ON for exactly 5 seconds, then OFF
- Compressed air blast: Use straw attachment through drain hole (30 PSI max)
- Reinstall screw with new crush washer if available
Test Fuel Cap Vent System
A $12 fuel cap can mimic major engine failure:
Symptom: Engine runs 10-30 seconds, dies, restarts after 5-minute wait
Test: Loosen cap ¼ turn—if problem disappears, replace cap (P/N 110812 for WGen3600)
Quick fix: Clean vent hole with 0.020″ wire or paperclip
Diagnose Ignition System Failure
Spark Plug Quick Test
Required spark: ≥0.7 kV under compression (test with inline spark tester)
Checklist:
– Gap specification: 0.028-0.031″ for 79-224cc engines
– Electrode condition: Brown-gray deposits normal, glazed or eroded = replace
– Torque properly: 14-18 ft-lbs with new crush washer
Low-Oil Sensor Bypass Test
Westinghouse yellow/black wire runs from sensor to ignition coil kill terminal:
- Disconnect yellow/black wire from coil
- Start engine (brief test only)
- If engine runs: Sensor faulty or oil level marginal
- Sensor ohm check: Infinite resistance at proper oil level, <5Ω when tilted 30°
Warning: This bypasses safety protection—restore connection immediately after testing.
Solve Air and Governor Issues

Air Filter Restriction Test
Dual-element systems (iGen series) clog faster than expected:
- Foam pre-filter: Wash with warm soapy water, oil lightly
- Paper element: Replace if discolored or torn
- Restriction indicator: Engine keeps running with filter removed
Governor Adjustment Procedure
Symptoms: RPM hunts, surges, then dies under no-load
Adjustment steps:
1. Loosen governor arm clamp bolt
2. Rotate throttle shaft to full wide-open position
3. Hold governor arm clockwise until spring just taut
4. Tighten clamp bolt
5. Fine-tune: 3600 ± 100 RPM no-load (62 Hz)
Critical: Incorrect governor settings cause over-revving and permanent engine damage.
Fix Inverter Control Problems (iGen Series)
Overload Detection Logic
Westinghouse inverters use 3-level shutdown protection:
- Level 1: >2200W for 3 seconds = red LED, engine continues
- Level 2: >2200W for 10 seconds = flashing red, shutdown
- Level 3: Short-circuit = instant shutdown
Test: Disconnect all loads—if generator runs normally, load was excessive.
Choke Actuator Calibration (Auto-Start Models)
iGen series auto-choke uses stepper motor controlled by control board:
Calibration sequence:
1. Hold STOP button for 3 seconds
2. Release immediately
3. Engine auto-calibrates choke position
Error code E-15: Replace choke module (P/N 75559B for iGen4500)
Prevent Vapor Lock and Altitude Issues
High-Temperature Fuel Routing
Vapor lock symptoms: Hot stall, 10-15 minute restart delay
Problem: Fuel line routed near cylinder head
Solutions:
– Insulate line with high-temp sleeve
– Reroute fuel line away from exhaust components
– Use premium non-ethanol fuel (91 octane minimum)
Altitude Compensation Guide
Jet sizing by elevation:
– 0-2000 ft: Factory jet
– 2000-5000 ft: 0.002″ smaller main jet
– 5000-8000 ft: 0.004″ smaller + reduce speed to 3400 RPM (58 Hz)
Note: Lean misfire at altitude mimics carburetor problems.
Real-World Repair Examples
Case Study 1: iGen2200 3-Second Stall
Problem: Ran fine last season, now stalls immediately
Solution:
– Drained sour fuel, replaced with fresh 91-octane + Sea Foam
– Found varnish chunks in carb bowl
– 15-minute ultrasonic clean solved issue
– Cost: $0 (45 minutes labor)
Case Study 2: WGen7500 10-Second Failure
Problem: New unit, first use after storage
Root cause: Oil level ½ quart low
Fix: Topped to upper dipstick mark—problem solved
Note: Westinghouse sensors trigger at marginal levels
Maintenance Schedule That Prevents 90% of Problems
| Task | Frequency | Pro Tip |
|---|---|---|
| Fuel stabilizer | Every fill-up | Sta-Bil 360 Marine, 1 oz per 2.5 gallons |
| Oil change | 50 hours or 6 months | 10W-30 synthetic, 0.63 qt for 79cc engines |
| Air filter | 25 hours | Wash foam, replace paper—dual elements clog fast |
| Spark plug | 100 hours | Replace if electrode rounding occurs |
| Carb bowl drain | End of season | 5-second drain prevents varnish buildup |
| Valve lash | 200 hours | 0.004″ intake, 0.006″ exhaust (cold specs) |
When to Call Professionals
Warranty period: 3-year residential, 1-year commercial—do not open engine if covered
Internal engine signs: Low compression (<60 PSI), metal shavings in oil, valve-train noise
Control board codes: E-18, E-21 requiring factory scan tool
Your Westinghouse generator’s start-then-die problem has a logical solution. Work through the diagnostic flow systematically—most fixes require basic hand tools and under an hour. Fresh fuel and proper oil level solve the majority of cases, but when deeper issues arise, this guide provides the exact specifications and part numbers professionals use. Keep that maintenance schedule handy—preventive care beats emergency repairs every time. If you’ve followed these steps without success, consult a certified Westinghouse technician with factory diagnostic tools to address potential control board issues.


