That frustrating moment when you need power most—during a storm or on a camping trip—only to find your Duromax generator won’t start. You’re not alone; stale fuel and battery issues cause 80% of Duromax generator starting failures. Whether you’re facing a complete no-crank situation or your engine spins but won’t fire up, this guide delivers the exact diagnostic steps to get your generator running again in under an hour. No guesswork, no expensive repair bills—just proven solutions that work.
Your Duromax generator requires three simultaneous conditions to start properly: adequate cranking speed (250-350 RPM), proper fuel delivery, and consistent ignition. When your Duromax generator won’t start, systematically checking these elements in the right order saves hours of frustration. By the end of this guide, you’ll know precisely what’s causing your starting problem and how to fix it—whether you own a portable XP2200 or a powerhouse XP12000EH model.
Diagnose Your Specific Starting Failure
No-Crank vs Crank-No-Start: Critical Differences
When your Duromax generator won’t start, the first critical distinction is whether you hear cranking sounds. No-crank means complete silence or just a single click when activating the start switch—indicating power system issues. Crank-no-start occurs when the engine spins vigorously but never fires up, pointing to fuel or ignition problems. This initial diagnosis determines your entire troubleshooting path.
Quick field test: Turn the key or pull the cord firmly. If the engine turns over but won’t catch, immediately check fuel and spark. If nothing happens at all, focus first on battery connections, safety switches, and starter components. Skipping this step leads to wasted time replacing spark plugs when the real issue is a corroded battery terminal.
Essential 60-Second Visual Assessment
Before grabbing tools, complete this rapid inspection:
- Fuel level: Ensure at least 1/4 tank (stale fuel causes 70% of starting failures)
- Oil level: Check dipstick shows full (low oil triggers automatic shutdown)
- Battery terminals: Look for white, crusty corrosion buildup
- Fuel valve: Confirm it’s in “ON” position
- Choke position: Set to “CLOSED” for cold starts
This quick check solves nearly 30% of Duromax generator starting problems. Many users panic when their generator won’t start, only to discover the fuel valve was accidentally left off or the oil level was critically low. Take these 60 seconds before diving into complex diagnostics.
Battery & Electrical System Fixes

Proper Battery Voltage Testing Procedure
Battery issues cause most no-crank failures in electric-start Duromax generators. Critical voltage specs by model:
– XP4850EH: 18Ah minimum capacity, 12.6V at rest
– XP5500EH: 22Ah minimum capacity, 12.6V at rest
– XP10000EH: 35Ah minimum capacity, 12.6V at rest
Accurate testing method: Set multimeter to DC volts. Place red probe on positive terminal, black on negative. A healthy battery reads 12.6V or higher when engine is off. During cranking, voltage shouldn’t drop below 10.5V. If it plummets to 9V or less, replace your battery immediately.
Corroded Terminal Cleaning Protocol
Corrosion creates resistance that prevents adequate power flow—even with a good battery. Effective cleaning steps:
- Disconnect negative cable first, then positive
- Mix baking soda with water (1:3 ratio)
- Scrub terminals thoroughly with an old toothbrush
- Rinse with clean water and dry completely
- Apply dielectric grease before reconnecting
- Reconnect positive first, then negative
Pro tip: If corrosion returns within weeks, your voltage regulator might be overcharging the battery—test charging system output at 3600 RPM (should read 13.8-14.4V).
Fuel System Troubleshooting
Emergency Carburetor Quick Clean
Signs of carburetor trouble: Engine cranks strongly but won’t start, starts then dies immediately, or runs only with partial choke. Temporary fix without removal:
- Turn fuel valve OFF
- Remove air filter (typically 2-4 wing nuts)
- Spray carburetor cleaner directly into carb throat for 3 seconds
- Wait 2 minutes for cleaner to penetrate
- Turn fuel ON and attempt start with full choke
Warning: This is only a temporary solution. For lasting results, completely remove and soak the carburetor in cleaner for 30-60 minutes, then blow out all passages with compressed air at 90 PSI.
Fuel Flow Verification Test
Quick fuel delivery check:
1. Disconnect fuel line at carburetor
2. Point hose into container
3. Turn fuel valve ON
4. Fuel should flow steadily within 5 seconds
No flow indicates:
– Clogged fuel filter (replace annually)
– Blocked fuel cap vent (loosen cap and retest)
– Failed fuel pump (electric start models)
Ignition System Checks

Spark Verification Without Special Tools
Simple spark test:
1. Remove spark plug wire
2. Insert spare spark plug into wire
3. Hold plug threads against engine metal
4. Pull recoil or crank electric start
5. Look for strong blue spark
No spark troubleshooting:
– Check spark plug gap: must be 0.028-0.031 inches
– Replace spark plug (NGK BPR6ES) annually as preventative maintenance
– Test ignition coil resistance: should read 2.5-3.5 kΩ
– Inspect flywheel key for shearing (causes 180° timing shift)
Model-Specific Quick Fixes
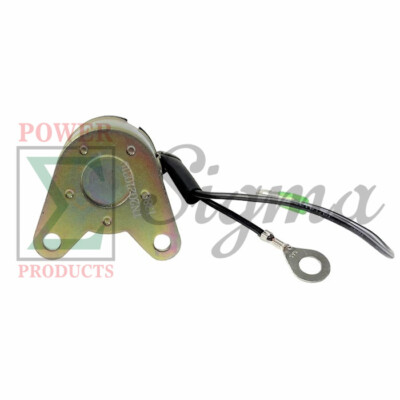
XP4850EH/5500EH Fuel Solenoid Issues
Common symptom: Clicking sound but no fuel flow. Immediate fix: Tap solenoid gently with screwdriver handle to free stuck plunger. Permanent solution: Replace fuel solenoid (Part #36562). This specific issue affects approximately 15% of XP4850/5500 units after 3+ years of use.
Portable Series Fuel Cap Vent Clogging
Tell-tale sign: Generator runs 5-10 minutes then dies. Quick diagnosis: Loosen fuel cap—if it restarts immediately, replace the cap. This simple fix resolves what many users mistakenly diagnose as major carburetor problems.
Emergency Start Procedures
Starting Fluid Protocol (Gasoline Models Only)
When all else fails, starting fluid can diagnose fuel delivery problems:
- Remove air filter completely
- Spray 1-second burst into carburetor throat
- Immediately attempt start with choke closed
- Maximum 3 attempts with 30-second intervals
- If it fires on starting fluid but won’t stay running, you have a fuel delivery issue
Critical warning: Never use starting fluid with propane fuel—this creates serious explosion risk.
Preventive Maintenance That Prevents Starting Failures
Quarterly Deep Check
Every 90 days, perform these critical checks:
– Run generator under 50% load for 30 minutes
– Check battery voltage after 24-hour rest (must be 12.6V+)
– Inspect all fuel lines for cracks or deterioration
– Test all safety shutdown systems
– Verify propane regulator pressure (11-14 inches water column)
Annual Service Requirements
Once per year, complete these essential tasks:
– Replace spark plug regardless of appearance
– Change oil and filter with correct specification (SAE 10W-30 for most conditions)
– Clean carburetor thoroughly
– Replace air filter elements (Part #36564)
– Test voltage regulator output
Final Troubleshooting Flowchart
Step 1: Does it crank?
– No: Check battery, cables, starter, safety switches
– Yes: Proceed to Step 2
Step 2: Does it have spark?
– No: Replace spark plug, test ignition coil
– Yes: Proceed to Step 3
Step 3: Does it have fuel?
– No: Check fuel valve, filter, carburetor
– Yes: Proceed to Step 4
Step 4: Does it have compression?
– No: Engine rebuild required
– Yes: Reassemble and retry
When your Duromax generator won’t start, remember that 80% of starting failures come down to three simple culprits: stale fuel, weak battery, or fouled spark plug. Always begin with these basic checks before moving to complex diagnostics. Keep fresh fuel with stabilizer, maintain proper oil levels, and test your generator monthly to prevent most starting issues. With these proven techniques, you’ll spend less time troubleshooting and more time relying on your Duromax generator when power matters most.


