Your Generac generator sputters or won’t start after sitting idle? Nine times out of ten, a clogged carburetor is the culprit—especially when old fuel leaves behind varnish that chokes critical passages. This sticky residue forms within 30 days of fuel sitting stagnant, blocking jets and needles that regulate your generator’s air-fuel mixture. How to clean a carburetor on a generac generator isn’t just a repair—it’s essential maintenance that restores reliable power during outages. You’ll save $150+ in professional service fees while gaining confidence in your emergency power system. Let’s tackle this with standard tools and proven techniques that work on GP, XP, and XG series models.
Essential Safety Steps Before Carburetor Cleaning
Eliminate Fire Hazards Immediately
Work exclusively outdoors on concrete—not plywood or grass—where gasoline vapors can’t pool near ignition sources. Position your generator 10+ feet from propane grills, water heaters, or electrical panels. Critical warning: Gasoline vapors are invisible and 4x heavier than air—they’ll crawl along the ground to find sparks. Keep a Class B fire extinguisher within arm’s reach, and never use carburetor cleaner near open flames. If you smell fuel during disassembly, stop immediately and ventilate the area.
Personal Protection Non-Negotiables
Safety glasses and nitrile gloves aren’t optional—they’re your first defense against chemical burns from carb cleaner and fuel. Carburetor solvents like Gumout contain methanol that strips skin oils within seconds, causing painful dermatitis. For fume-sensitive users, a $15 N95 respirator prevents headaches from prolonged exposure. Pro tip: Lay down cardboard under your workspace—this catches drips and prevents concrete from absorbing hazardous fluids.
Required Tools for Generac Carburetor Service
Basic Hand Tools You Already Own
Skip specialized kits: Use your existing 8mm, 10mm, and 12mm sockets with a 3/8″ drive ratchet. Phillips #2 and flathead screwdrivers handle most fasteners on Nikki or Walbro carburetors (standard on GP/XG models). Needle-nose pliers remove cotter pins from throttle linkages, while a small brass brush safely cleans metal without scratching. Never use steel brushes—they gouge aluminum carb bodies causing expensive leaks.
Budget Carburetor-Specific Supplies
Grab these at auto parts stores:
– Carburetor cleaner spray (Berryman B-12 or equivalent)
– Canned compressed air ($4 at Walmart) for blowing passages
– Carb rebuild kit ($18 for Generac 5K-10KW models—verify part number online first)
– New fuel filter ($6) and spark plug ($8) while you’re at it
Critical note: Generac diaphragm carbs (on iX series) require different kits—double-check your model before purchasing parts.
Locate Your Generac Carburetor in 60 Seconds
Finding the Carburetor on Portable Models
On GP5500, XP3300, or XG4500 generators, remove the black air filter housing secured by two thumb screws. The carburetor sits directly beneath—a brass bowl visible at the bottom. Pro tip: Take three photos before disconnecting anything: top view showing linkages, side view of fuel line, and bottom of the carburetor. These become your reassembly blueprint when parts get confusing.
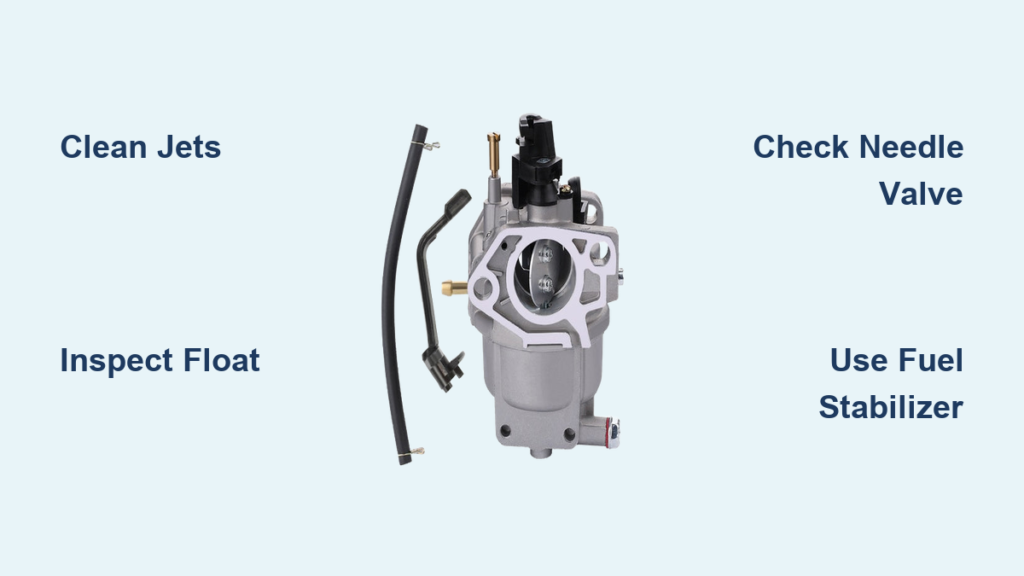
Identify Your Carburetor Type Instantly
- Float-type carbs (most common): Have a visible bowl with 4 bolts (Nikki/Walbro)
- Diaphragm carbs (iX series): No bowl—look for a flat metal plate with fuel lines
- Vacuum carbs (standby models): Mounted inside protective housing—remove side panels
Warning: Never force disassembly—Generac uses Torx T20 screws on newer models, not standard Phillips.
Remove Carburetor Without Damage

Disconnect Fuel Line Safely
Pinch the fuel line 2 inches from the carburetor with needle-nose pliers, then slide the clamp backward. Pull the line free over a rag—expect 1-2 tablespoons of residual fuel. Immediately plug the line with a golf tee or 1/4″ bolt to prevent spills. If your model has a fuel shutoff valve, close it before disconnecting.
Preserve Linkage Alignment
Photograph throttle and choke connections from multiple angles before removal. Generac uses delicate cotter pins that bend easily—use needle-nose pliers to straighten them for reuse. Critical mistake to avoid: Throttle linkages control governor function—misalignment causes dangerous overspeed conditions. Label each linkage with painter’s tape marked “THROTTLE” or “CHOKE.”
Disassemble Carburetor Components Correctly
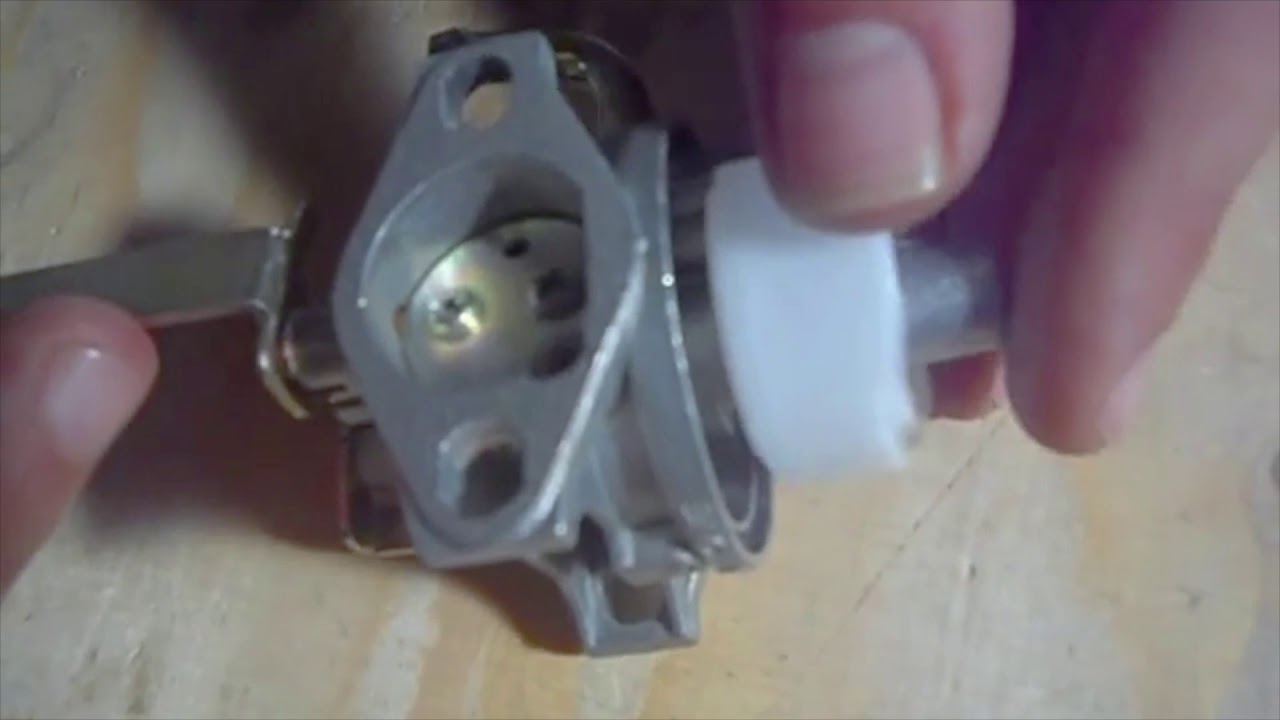
Float Bowl Removal Protocol
Turn the carburetor upside-down over a parts tray. Remove the four bowl bolts in a crisscross pattern—this prevents warping the aluminum base. Inspect carefully: Dark sludge in the bowl means severe varnish buildup requiring ultrasonic cleaning. Peel off the old gasket completely—any residue causes air leaks that lean out the mixture.
Jet Extraction Without Stripping
Use a perfectly sized flathead screwdriver on the main jet (center brass screw). Never force it—stripped jets mean carburetor replacement. Note the stamped number (e.g., “68”) for reassembly reference. For idle jets near the throttle plate, count rotation turns as you remove the mixture screw—this setting gets you 80% of the way to proper adjustment later.
Deep Cleaning Techniques That Work
Targeted Passage Cleaning Method
Spray carb cleaner through every visible hole while holding the can 6 inches away—closer blasts debris deeper into passages. Key insight: Fuel flows from inlet → main jet → emulsion tube → venturi. Clean in reverse order: blow air through venturi first, then emulsion tube. Use carburetor picks only on metal parts—brass jets scratch easily.
Ultrasonic Cleaning for Stubborn Varnish
For generators stored with ethanol fuel (which gummifies faster), soak disassembled parts in an $18 ultrasonic cleaner filled with Berryman Chem-Dip. Run at 140°F for 20 minutes—this dissolves varnish that manual cleaning misses. Never soak plastic floats—they absorb solution and sink, causing flooding.
Critical Component Inspection Checklist
Float Failure Signs You Must Spot
Replace floats showing any of these:
– Audible fuel slosh when shaken (indicates cracks)
– Dark discoloration from fuel saturation
– Physical dents from carburetor bowl contact
Pro consequence: A sinking float overfills the bowl, causing raw fuel leaks that damage your engine.
Needle Valve Wear Indicators
The needle valve’s rubber tip must form a perfect seal against the seat. Replace immediately if you see:
– Flat spots from constant fuel pressure
– Grooves from debris grinding
– Missing rubber fragments
Air leaks from worn needles cause lean running that seizes pistons.
Reassembly Without Costly Errors
Float Level Adjustment Shortcuts
Most Generac carbs don’t require measuring—just set the float parallel to the carb body when inverted. Critical step: Hold the carburetor upright and blow through the fuel inlet—air should stop flowing when the float rises. No seal means a bent float arm or worn needle.
Jet Installation Safety Rules
Thread main and idle jets in finger-tight only. Over-tightening strips soft brass threads—if resistance increases, back out and restart. For mixture screws, turn in gently until seated (don’t force!), then back out to your pre-removal count (usually 1.5 turns).
First Startup and Testing Protocol
Safe Initial Ignition Sequence
Reconnect spark plug wire last. Prime the carburetor using the choke lever—never flood the engine. Start and let run at half-throttle for 5 minutes to circulate oil. Immediately check for leaks at all fuel connections—ethanol-blended fuel eats through old rubber lines.
Performance Validation Tests
Your generator must pass these checks:
– Idle test: Holds 1750-1800 RPM steadily with no load
– Surge test: Maintains speed when applying 50% load
– Smoke check: Zero black smoke under full load
Black smoke fix: Turn idle mixture screw clockwise 1/4 turn increments until clean exhaust appears.
Troubleshoot Common Post-Cleaning Failures
Hard Starting Solutions That Work
If the generator won’t catch after cleaning:
1. Verify spark plug gap (0.020-0.030″)
2. Check float height—too low starves fuel
3. Re-clean idle jet with compressed air
4. Ensure fuel valve is fully open
Never adjust governor springs—this requires professional calibration.
Surging Fixes Under 5 Minutes
Speed fluctuations mean:
– Air leak at intake manifold (listen for hissing)
– Partially clogged main jet (re-spray cleaner through it)
– Sticking throttle linkage (lubricate with dry lube)
Quick test: Spray carb cleaner around manifold gaskets—if RPM spikes, you’ve found the leak.
Prevent Carburetor Problems Forever
Fuel System Maintenance Schedule
- Every fill-up: Add STA-BIL 360° Protection ($10 for 32oz treats 128 gallons)
- Monthly: Run generator 15 minutes under load to circulate treated fuel
- Before storage: Run dry by closing fuel valve until engine stops
Ethanol warning: Use TOP TIER gasoline below E10—higher blends destroy carburetor seals.
Seasonal Storage Checklist
- Add stabilizer to fresh fuel
- Run 10 minutes to circulate
- Shut fuel valve and run until carburetor empties
- Remove spark plug, add 1 tsp oil, pull cord slowly
- Store upright in climate-controlled space
Costly mistake: Leaving fuel in the carburetor over winter guarantees varnish buildup.
Clean carburetors resolve 90% of Generac generator starting issues—no professional help needed for most models. By following this precise process, you’ll restore reliable emergency power while avoiding $150+ service calls. Remember: fresh stabilized fuel and annual cleaning prevent 100% of carburetor failures. Your generator stands ready when the grid fails—now you hold the key to keeping it that way.


