Your Onan 5500 generator sputters, stalls under load, or refuses to start after sitting idle. If you’re searching for how to clean carburetor on Onan 5500 generator, you’ve hit the most common culprit: fuel varnish clogging microscopic passages. Modern ethanol-blended fuels leave sticky residues that choke your generator’s fuel system within months. This guide delivers a foolproof cleaning process requiring only basic tools—no special skills needed. You’ll restore reliable power in under 2 hours and learn proven strategies to prevent repeat failures.
Ignoring carburetor issues risks permanent engine damage from lean fuel mixtures. But here’s the good news: 90% of “broken” generators simply need this $10 cleaning job. I’ve restored dozens of Onan 5500 units using these exact steps, and you will too. By following this guide, you’ll gain confidence in diagnosing fuel problems and keeping your generator mission-ready for emergencies.
Critical Safety Steps Before Cleaning Your Onan 5500 Carburetor
Never skip these life-saving precautions. Working with fuel and electricity demands absolute vigilance. Start by disconnecting the negative battery terminal with an 8mm wrench—this eliminates shock risks and prevents accidental starts. Wait 30+ minutes after shutdown for complete cooling; hot engines ignite fuel vapors instantly. Work only in open-air spaces like garages with doors wide open, never in enclosed sheds. Keep a Class B fire extinguisher within arm’s reach at all times.
Pro Tip: Lay shop rags under your work area before starting. Fuel spills are inevitable during disassembly, and absorbent pads prevent slippery hazards. Always wear nitrile gloves and safety glasses—carburetor cleaner causes chemical burns on skin and blindness if splashed in eyes. If you smell gasoline fumes, stop immediately and ventilate the area. One spark near fuel vapors can cause catastrophic explosions.
Must-Have Tools for Onan 5500 Carburetor Cleaning
Gather these exact tools before starting to avoid mid-job frustration. You’ll need an 8mm, 10mm, 12mm, and 13mm socket set plus flathead/Phillips screwdrivers for disassembly. Crucially, use small-engine-specific carburetor cleaner (like Berryman Chem-Dip)—brake cleaner damages rubber seals. Bring compressed air (canned air works, but a compressor blasts debris better) and fuel line clamps to stop spills.
Don’t risk gasket failures: Always buy a carburetor rebuild kit ($8-$15). Original gaskets tear during removal, and reusing them guarantees vacuum leaks. Include these essentials:
– Needle-nose pliers for spring clamps
– Copper wire or fishing line (for jet cleaning)
– New float bowl gasket and O-rings
– Digital calipers (to measure float height)
– Torque wrench (prevents stripped bolts)
Critical Warning: Never use steel brushes or drill bits on jets—they enlarge precision orifices permanently. A single damaged jet ruins fuel calibration.
Locate Your Onan 5500 Carburetor in 4 Simple Steps
Finding the carburetor takes 90 seconds once you know where to look. Face your generator’s control panel—the carburetor always sits on the engine’s right side (left if facing the engine). First, remove the top housing panel by unscrewing four 10mm bolts. Next, detach the air filter housing from the carburetor throat using a flathead screwdriver to release the clamp. Pull out the air filter element completely.
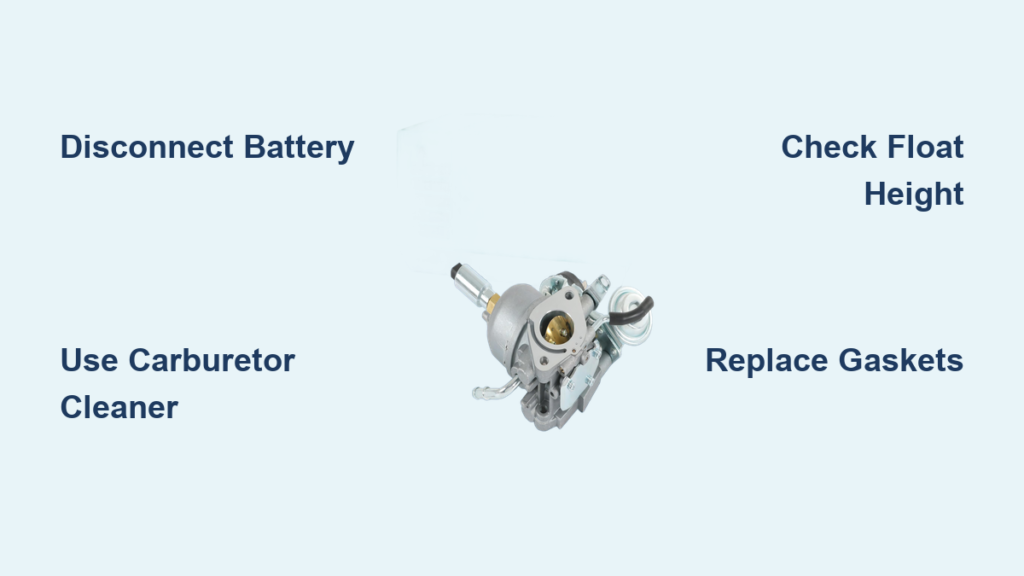
Visual Cue: The carburetor resembles a small metal cylinder with fuel lines and linkages attached. Immediately photograph all connections with your phone before disconnecting anything. Note the throttle cable’s attachment point (a small clip on the lever arm) and the choke linkage’s position. One misplaced photo saves hours of reassembly headaches later.
Remove Your Onan 5500 Carburetor Without Damage
Prevent fuel floods by turning off the tank valve first. Place a drain pan under the carburetor, then pinch the fuel line with pliers to stop flow. Disconnect the line by sliding the spring clamp back with needle-nose pliers—plug the line immediately with a clean rag to avoid spills. Next, unhook the throttle linkage: remove the retaining clip with pliers and slide the cable off the lever.
Critical Step: Unscrew the two 12mm mounting bolts holding the carburetor to the intake manifold. Lift straight up—no twisting! If it sticks, gently wiggle side-to-side. Inspect the old intake gasket: replace it if cracked or compressed. Cover the engine’s intake port with a rag to block debris entry. Time Saver: Label all disconnected parts with masking tape (e.g., “throttle,” “choke”) for foolproof reassembly.
Deep Clean Carburetor Passages: Avoid Common Mistakes

Never soak plastic parts—remove the float, needle valve, and gaskets first. Soak metal components (jets, emulsion tube) in carburetor cleaner for 45 minutes. Spray cleaner directly into every passage: main jet (center brass tube), idle jet (smaller side tube), and emulsion tube. Here’s the pro technique: Blow compressed air through each orifice while holding them up to light—you should see a clear beam through unclogged jets.
Clean jets safely: Insert 0.5mm copper wire through orifices—never force it. If clogged, re-soak parts and repeat. Scrub the float bowl’s interior with a toothbrush to remove varnish sludge. Critical Check: Verify the float moves freely on its pin without sticking. A gummed-up float causes flooding or lean running.
Reassemble Your Onan 5500 Carburetor Correctly
Rebuild kits include critical new parts—install all O-rings and gaskets first. Insert the main jet (typically #80 size), idle jet (#40), and emulsion tube in their original positions. Attach the float needle to the float, then slide the pivot pin through. Measure float height precisely: It should sit 0.43 inches from the gasket surface (use digital calipers). Adjust by bending the float tab slightly.
Torque matters: Tighten the float bowl screws to 40 inch-pounds—overtightening cracks the carburetor body. Reinstall the carburetor using a new intake manifold gasket. Hand-tighten mounting bolts, then torque to 18 ft-lbs in a star pattern. Reconnect linkages in reverse order of removal, ensuring smooth throttle movement.
Test and Adjust Your Cleaned Carburetor
Pre-start checklist: Turn fuel valve on, check for leaks, reconnect battery. Pull the choke fully and start the generator. Let it warm up at half-load for 15 minutes—this burns off residual cleaner. Now adjust:
1. Set idle speed to 2000 RPM using the throttle screw
2. Turn the mixture screw clockwise until engine stumbles, then counterclockwise 1.5 turns
3. Test under full load (e.g., 3000W appliance)—no surging or hesitation should occur
Warning: If fuel leaks from the bowl, the gasket isn’t seated properly—shut down immediately and re-tighten. Persistent rough running means recheck jet clearances.
Troubleshoot Post-Cleaning Carburetor Issues
Hard starting? Verify fuel flow by disconnecting the line at the carburetor—fuel should spurt when cranking. If not, replace the inline fuel filter. Surging at idle? Recheck float height; too high causes flooding. Vacuum leaks (high idle RPM) mean loose mounting bolts or a torn intake gasket—retorque to spec.
Critical Fix: If the generator dies under load, the main jet is still clogged. Remove it and re-clean with compressed air. Never adjust mixture screws beyond 2 full turns—this indicates deeper blockage.
Prevent Future Carburetor Problems on Your Onan 5500
Stop varnish before it starts: Add fuel stabilizer (like STA-BIL) to every tank fill and run the generator 10 minutes to circulate treated fuel. Monthly exercise is non-negotiable: Run under load for 30+ minutes to prevent ethanol separation. Replace the fuel filter every 100 hours—clogged filters starve the carburetor.
Long-term storage protocol: Run the generator dry, then add stabilizer to the tank and run 5 more minutes. Pro Tip: Store with the fuel valve OFF and carburetor bowl drained—this eliminates 95% of seasonal startup failures.
Your Onan 5500 should now start reliably and run smoothly under full load. This cleaning typically lasts 150-200 hours—far longer than quick “spray-and-pray” methods. If problems persist, suspect contaminated fuel or a failing fuel pump (test pressure at 3 PSI). Bookmark this guide for your next annual maintenance—it’s the ultimate insurance against power failure when you need it most. Always keep a rebuild kit and carburetor cleaner in your generator toolkit; future-you will thank present-you when storm season hits.


