
Your generator sputters and dies mid-storm, plunging your home into darkness just when you need power most. Before you panic about costly repairs, check the air filter—it’s the culprit in 70% of unexpected generator shutdowns. A clogged filter starves your engine of clean air, causing hunting, surging, or complete failure within minutes. The good news? Cleaning it takes just 15 minutes with basic tools you likely own. This guide delivers the exact steps to revive your generator’s performance, prevent future blackouts, and extend engine life. You’ll learn where to find the filter on any generator model, avoid dangerous mistakes during cleaning, and recognize when replacement is critical.
Locate Your Generator Air Filter in Under 60 Seconds
Traditional Generator Filter Access Point
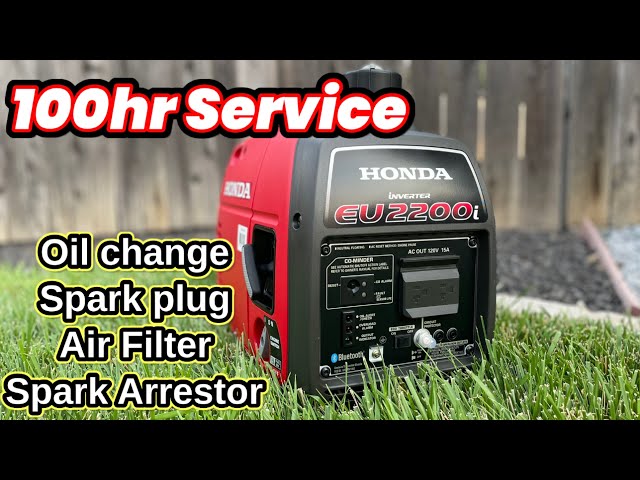
For standard open-frame generators like Honda EU2200i or Champion models, the air filter hides left of the recoil starter handle. Remove the side panel secured by two Phillips screws—you’ll spot a black rectangular cover with either a plastic thumb knob or metal clips. If you see a metal housing with ventilation slots directly connected to the carburetor, you’ve found it. Pro tip: Trace the air intake tube from the carburetor—it leads straight to the filter housing.
Inverter Generator Filter Position
Closed-frame inverters (Westinghouse iGen, Yamaha EF) tuck the filter below the carburetor behind a snap-fit panel. Look for a black square cover near the air intake vents on the generator’s side. Press the tabs inward while lifting—the cover should release with a soft click. If your model has a fuel tank above the engine, check beneath it; some manufacturers position the filter in this tight space requiring a flashlight for visibility.
Essential Safety Steps You Must Complete First

Skipping these steps risks fire, injury, or engine damage—never proceed without verification:
- Confirm complete cooldown: Place your palm near the muffler and engine block for 10 seconds—no heat should radiate
- Shut down all systems: Turn the engine switch to “OFF” AND close the fuel valve (usually marked with a fuel icon)
- Disable ignition: Yank the spark plug boot firmly sideways—never pull the wire—to disconnect from the plug
- Battery safety: For generators with electric start (like DuroStar models), disconnect the black negative battery terminal
- Manual reference: Have your specific model’s manual open to the maintenance section—WEN generators position filters differently than Generac units
Gather These Exact Tools Before Starting
Use only these materials to avoid filter damage:
– Clean microfiber towel (paper towels leave lint)
– 1-2 tablespoons of fresh SAE 30 engine oil
– Bowl of warm water mixed with 1 tsp dish soap
– Soft-bristle toothbrush (never use wire brushes)
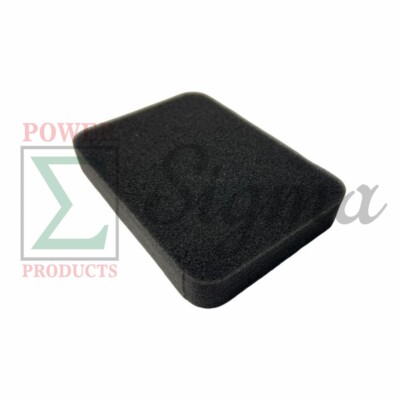
– Replacement foam filter (if yours shows cracks after inspection)
Remove Your Generator Air Filter Cover Safely
Panel Removal Process for Traditional Models
Unscrew the two side panel fasteners using a #2 Phillips head. For models with metal clips, press the release tabs inward while lifting the panel upward. Warning: Forcing stuck clips cracks plastic housings—wiggle gently while applying pressure.
Cover Identification and Release
Your filter cover uses one of three mechanisms:
– Thumb knob covers: Rotate counterclockwise until loose (stops at 1/4 turn)
– Snap-fit tabs: Press both tabs simultaneously while lifting the cover edge
– Screw-secured covers: Remove the single Phillips screw completely before lifting
Visual cue: If you see foam peeking through vents, the cover is improperly seated—recheck alignment during reassembly.
Clean Foam Air Filter Element Without Damage
Correct Washing Process
- Pull the foam filter straight out—never twist it in the housing
- Submerge in soapy water and squeeze slowly 10 times (like a sponge)
- Rinse under lukewarm running water until droplets run clear
- Press firmly against the sink edge to eject trapped water
Critical: Never use gasoline, solvents, or compressed air—they degrade foam integrity.
Proper Drying Technique
- Blot excess water with microfiber towel (no twisting!)
- Air-dry on a clean surface for minimum 45 minutes
- Test dryness by pressing filter against white paper—no moisture rings should appear
- Pro tip: Place near a fan (not heater) to accelerate drying without heat damage
Apply Engine Oil Correctly to Restore Filtration
Precise Oil Distribution Method
Place the dry filter on a paper plate. Apply 3-4 drops of fresh engine oil directly onto the foam. Massage oil through the entire filter using fingertips—focus on the outer edges where debris enters. The foam should feel lightly tacky but never greasy. Warning: Excess oil gets sucked into the carburetor, causing black smoke and spark plug fouling.
Coverage Quality Check
Hold the filter against bright light. Every pore should show a faint oil sheen—no white dry spots or dark oily patches. If oversaturated, blot with paper towel for 10 seconds. For undersaturated areas, add one additional drop max and redistribute.
Reinstall Filter to Prevent Air Bypass

Housing Preparation Steps
Wipe the filter cavity with a dry microfiber towel—pay special attention to the gasket groove where dirt hides. Inspect the rubber seal for cracks; if damaged, replace the entire housing before proceeding. Visual cue: Shine a flashlight into the housing—any visible debris means you missed cleaning.
Correct Filter Placement and Cover Reattachment
Slide the oiled filter straight in until it seats flush against all sides. For covers with gaskets, press firmly around the entire perimeter. Secure using the original method:
– Thumb knobs: Hand-tighten only (overtightening cracks plastic)
– Snap-fit covers: Listen for two distinct clicks at opposite corners
– Screw covers: Tighten to “snug” resistance—never force
Test Your Generator After Filter Cleaning
Critical Post-Installation Checks
Before starting:
– Verify spark plug boot is fully reconnected (push until it clicks)
– Confirm fuel valve is reopened (lever parallel to fuel line)
– Ensure all panels are secured—loose covers cause dangerous vibration
First Start Procedure and Diagnosis
Start the generator and let it idle for 3 minutes. Listen for these signs of success:
– Steady RPM without fluctuations (use tachometer if equipped)
– No black or blue exhaust smoke
– Immediate response when switching to “HIGH” throttle
If problems persist: Recheck filter seating—90% of “failed” cleanings are due to gaps allowing unfiltered air.
Generator Air Filter Maintenance Schedule You Need
When to Inspect Based on Usage
| Condition | Inspection Frequency |
|---|---|
| Normal home backup use | Every 50 operating hours |
| Construction/dusty sites | Before each use |
| Monthly storage periods | Every 30 days |
Immediate Replacement Indicators
Replace your filter now if:
– Holes larger than 1/4 inch appear after cleaning
– Stiff, brittle texture remains when squeezed
– Oil won’t absorb even after thorough drying
– Annual deadline passes (regardless of appearance)
Avoid These 5 Costly Air Filter Cleaning Mistakes
Dangerous Errors Mechanics See Weekly
- Using gasoline for cleaning: Melts foam structure—always use mild soap only
- Oiling damp filters: Causes white smoke and carbon buildup—dry 45+ minutes
- Forcing misaligned covers: Creates air leaks—reseat filter before closing
- Skipping housing cleaning: Recontaminates new filter within minutes
- Reusing damaged filters: Allows sand into cylinders—replace torn units immediately
Performance Warning Signs You Can’t Ignore
Your generator needs filter attention when:
– Engine surges every 10-15 seconds at idle
– Hard starting requires 5+ pulls despite fresh fuel
– Power drops noticeably when connecting appliances
– Exhaust smells excessively oily during operation
When to Call Generator Professionals Immediately
Contact manufacturer support before proceeding if:
– Filter housing shows cracks near mounting points
– Engine stalls within 60 seconds after filter cleaning
– Metal shavings appear in the filter housing (indicates internal damage)
– You own a commercial-grade generator (over 10kW output)
For WEN generator owners: Call 1-847-429-9263 (Mon-Fri 8AM-5PM CST) or email orders@wenproducts.com with your model number. Other brands: Consult your manual’s service section—many offer live video support for filter maintenance.
Final Note: A clean air filter prevents 80% of avoidable generator failures. Make this 15-minute task part of your pre-storm checklist and monthly routine. Properly maintained filters double engine lifespan by keeping abrasive particles out of critical components. After your next cleaning, note the smoother startup and steadier power output—your generator will run quieter and more efficiently until the next scheduled maintenance. Never store your generator with a dirty filter; clean it immediately after heavy-use periods to prevent hardened debris buildup.


