
That dusty generator in your garage might look harmless, but accumulated grime is silently sabotaging its performance and lifespan. When debris clogs critical components, your generator works harder, consumes more fuel, and becomes unreliable when power outages strike. Knowing how to clean a generator properly transforms it from a potential liability into a dependable power source that delivers maximum efficiency when you need it most.
Most generator failures during emergencies stem from preventable maintenance issues rather than mechanical defects. A thorough cleaning routine takes less than an hour but prevents costly repairs and ensures your backup power will start reliably. Follow this comprehensive guide to restore your generator’s peak performance and extend its operational life through proper cleaning techniques.
Essential Safety Protocols Before Cleaning
Complete Power Down Sequence
Never approach a hot generator—wait 60 minutes after shutdown for complete cooling. Remove the spark plug wire to eliminate accidental starts, which could cause severe injuries from moving parts. For electric-start models, disconnect the battery negative terminal first using a properly sized wrench. These critical safety steps prevent serious burns and mechanical injuries during cleaning.
Electrical Isolation Steps
Unplug all power cords and load connections completely. Remove any external charging sources or transfer switch connections to create a fully isolated system. This eliminates electrical hazards that could occur if circuits remain partially energized during your cleaning process.
Protective Equipment Checklist
Wear safety glasses to shield against flying debris and chemical splashes. Chemical-resistant gloves protect your skin from degreasers and fuel residue. Long sleeves and pants prevent scratches from sharp generator edges. Keep a Class B fire extinguisher nearby when working around fuel systems—safety must always come first when learning how to clean a generator.
Exterior Cleaning Process
Remove Surface Debris
Start with a soft, dry microfiber cloth to remove loose dust and cobwebs from all accessible surfaces. Pay special attention to air intake areas where debris commonly accumulates. Use a shop vacuum with a brush attachment for stubborn dirt in crevices and around the control panel—this prevents particles from being blown deeper into sensitive components.
Degrease and Deep Clean
Mix a non-flammable degreaser with warm water according to product instructions. Dampen (never soak) a microfiber cloth with the solution and wipe down all exterior surfaces systematically. Focus on areas around the fuel cap, oil fill, and control panel where grime builds up fastest. Never use water directly on electrical components—moisture intrusion causes short circuits and corrosion.
Compressed Air Technique
Use compressed air at 30 PSI maximum to blow out vents, cooling fins, and hard-to-reach areas. Work systematically from top to bottom, holding the nozzle 6 inches from surfaces to prevent damage. This removes dust that cloths can’t reach while avoiding the risk of water exposure from pressure washers.
Fuel System Deep Clean
Drain and Inspect
Completely drain the fuel tank into an approved container—this prevents spills during cleaning. Look for water separation (a cloudy layer at the bottom) or sediment indicating contaminated fuel. Clean fuel strainers in the fill port using a small brush and fresh fuel to remove blockages that restrict fuel flow.
Filter Maintenance
Remove the fuel filter and hold it up to light. Replace immediately if you can’t see through it—restricted fuel flow causes hard starting and poor performance. Clean reusable filters with compressed air, blowing from the clean side outward. Install new filters hand-tight only (typically 3/4 turn after gasket contact) to prevent thread damage.
Stabilize Remaining Fuel
Add fuel stabilizer to fresh gasoline if storing for 30+ days. This prevents varnish buildup that clogs carburetors. Run the generator for 10 minutes after adding stabilizer to distribute it throughout the system—this simple step when cleaning your generator prevents 80% of fuel-related failures.
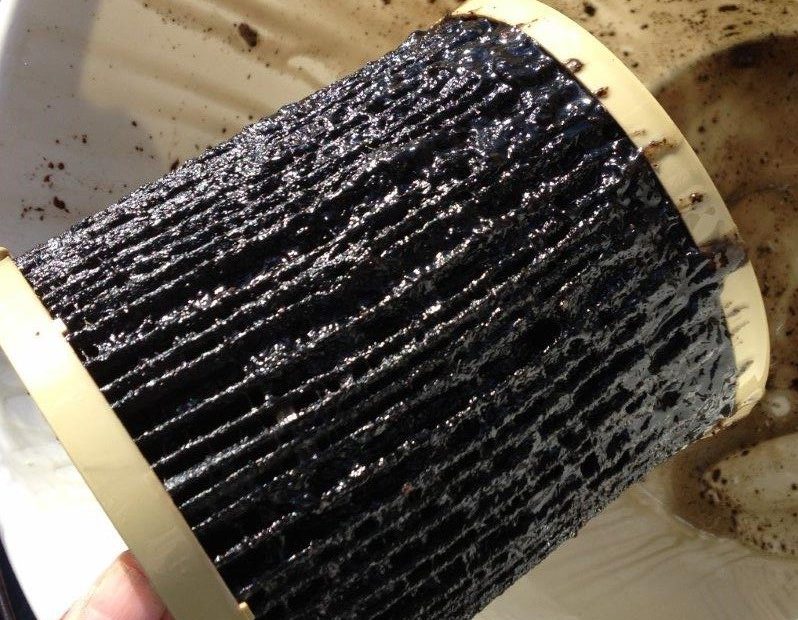
Air Filter System Care

Quick Visual Assessment
Pop the air filter cover and inspect the element immediately after operation. A gray or black filter needs attention—light surface dust can be tapped gently on a hard surface, but heavy contamination requires replacement. Never operate your generator without an air filter—this allows abrasive particles to destroy engine components.
Foam Filter Cleaning
Remove foam filters and wash in warm, soapy water. Rinse thoroughly and squeeze (don’t wring) excess water. Apply clean engine oil sparingly, then squeeze to distribute evenly. This creates the oil barrier that traps fine particles while allowing proper airflow—critical for how to clean a generator properly.
Paper Filter Replacement
Paper filters cannot be effectively cleaned—replace when dirty or every 50 operating hours. Check more frequently in dusty environments like construction sites or during wildfire season. Improperly maintained air filters reduce generator efficiency by up to 25% and significantly shorten engine life.
Oil System Maintenance
Initial Drain and Assessment
Drain oil while the engine is warm (not hot) for complete removal. Check the drained oil for metal particles (indicating internal wear), excessive darkness, or gasoline contamination. These signs require professional attention before continuing your generator cleaning routine.
Filter Replacement Steps
Remove the old oil filter using a strap wrench—never use pliers that can damage the filter housing. Lightly coat the new filter’s rubber gasket with fresh oil to ensure a proper seal. Install hand-tight plus 3/4 turn—over-tightening causes leaks and makes future removal difficult.
Fresh Oil Installation
Refill with manufacturer-recommended oil using a clean funnel. Start with 80% of capacity, check the dipstick, then add gradually to reach the full mark. Overfilling causes smoking, excessive pressure, and potential engine damage—proper oil levels are non-negotiable when learning how to clean a generator.
Spark Plug Restoration

Remove and Inspect
Use the correct spark plug socket (usually 13/16″ or 5/8″) to avoid rounding the plug. Check electrode gap with a feeler gauge—typically 0.030″ for most generators. Replace immediately if the porcelain is cracked or electrodes are severely worn—fouled plugs cause hard starting and poor performance.
Cleaning Technique
For lightly fouled plugs, use a wire brush to remove carbon deposits. Spray with brake cleaner for stubborn buildup. Check and adjust the gap using the proper tool—never file platinum or iridium electrodes as this destroys their special coatings.
Installation Tips
Hand-thread plugs first to prevent cross-threading, which damages cylinder heads. Tighten 1/4 turn past finger-tight for used plugs, 1/2 turn for new ones. Reconnect spark plug wire securely until you hear a distinct click—improper seating causes misfires and starting difficulties.
Cooling System Care
Fin Cleaning Method
Use a soft brush or compressed air to clean between cooling fins, working in the direction of airflow. Bent fins reduce cooling efficiency by up to 30%—straighten gently with a fin comb if available. Blocked cooling fins are the #1 cause of generator overheating during extended operation.
Coolant Check and Replacement
Check coolant level in the overflow tank when the engine is cold. Top off with manufacturer-approved coolant—never use plain water which causes corrosion. For liquid-cooled generators, flush and replace coolant every 2 years or 100 operating hours to prevent mineral buildup.
Debris Removal
Remove grass clippings, leaves, and debris from around the cooling fan and shroud. These materials create hot spots that lead to overheating and potential engine failure—especially critical when cleaning your generator after seasonal storage.
Weather Protection Strategies
GenTent Installation
Install a GenTent running cover for all-weather protection—this NFPA-rated system withstands 70 MPH winds and 18″ snow loads while maintaining proper ventilation. It reduces cleaning frequency by 60% by preventing debris accumulation during operation, making how to clean a generator much less frequent.
Storage Cover Setup
Use a full storage cover or GenSkirt kit for long-term storage. Ensure the cover is breathable to prevent moisture buildup. Position the generator on 2×4 blocks to keep it off damp ground—this simple step prevents rust and corrosion that complicates future cleaning.
Positioning Considerations
Place generators on level, well-drained surfaces away from water sources. Avoid low spots where water collects during rain. Elevated platforms or concrete pads provide the best protection against moisture and debris—critical for minimizing how often you need to clean your generator.
Maintenance Schedule Summary
Weekly Checks (During Use)
- Visual inspection for leaks or damage
- Check oil level before each use
- Clean debris from air intakes
- Verify fuel level
Monthly Tasks
- Clean exterior surfaces
- Check battery terminals
- Inspect air filter
- Test all connections
Quarterly Deep Clean
- Change oil (every 50 hours)
- Clean or replace air filter
- Inspect and clean spark plug
- Check cooling system
Annual Overhaul
- Replace spark plug
- Flush cooling system
- Professional inspection
- Replace fuel filter
Regular cleaning prevents 90% of generator failures during power outages. This systematic approach takes less than two hours annually but saves hundreds in repair costs and ensures reliable power when you need it most. Create a simple maintenance log tracking cleaning dates and hours of operation—this prevents overlooked tasks and identifies performance issues before they become emergencies.
Pro Tip: After completing your generator cleaning routine, run the unit under load for 15 minutes to verify all systems function properly. This final test catches any issues before you need emergency power, ensuring your cleaning efforts translate to reliable performance.


