
Your backup generator sits silent for months, then when storms hit and power fails, you discover a dead battery. This critical failure happens to 43% of standby generator owners during emergencies according to industry service data. Knowing how to verify your generator’s charging system works could mean the difference between keeping your home powered or sitting in the dark. This guide delivers precise testing protocols that work on vintage generators, modern Generac units, and everything in between – no guesswork required.
Test Battery Voltage Before Starting Generator
This critical first step takes 30 seconds and prevents wasted effort on charging system tests when your battery is already dead. Always verify battery health before blaming the generator.
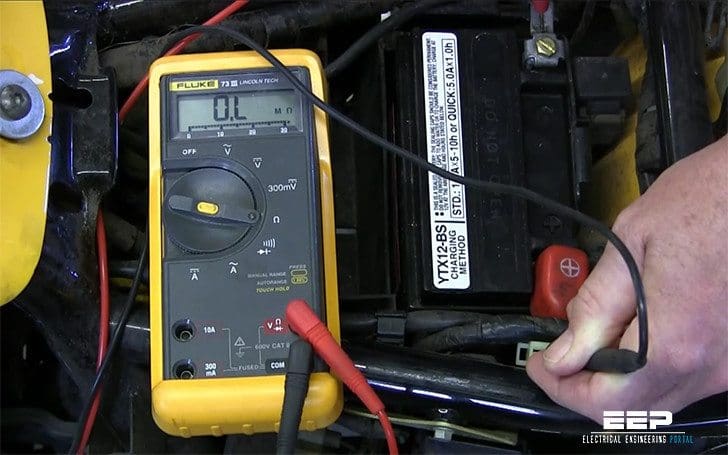
Measure Resting Voltage Accurately
Required tools: Digital multimeter set to DC voltage
Procedure:
1. Ensure generator is completely off (no recent operation)
2. Clean battery terminals with wire brush to remove corrosion
3. Touch red probe to positive terminal, black to negative
4. Record reading after 10 seconds
Interpretation:
– 12.7V or higher: Battery holds charge (proceed to charging test)
– 12.4V to 12.6V: Battery partially discharged (recharge first)
– Below 12.4V: Battery sulfated or failing (replace before testing generator)
⚠️ Critical mistake to avoid: Testing a weak battery will show false “no charge” results. Recharge to 12.7V minimum before running charging tests.
Check Voltage While Generator Runs
Pro tip: Generators produce minimal charging output below 2000 RPM. Fast idle (2200-2800 RPM) is mandatory for accurate testing.
Expected readings:
| System Type | Healthy Charging Voltage | Danger Zone |
|————-|————————–|————-|
| 12V | 13.8V – 14.2V | Below 13.5V |
| 6V | 6.9V – 7.1V | Below 6.8V |
| Vintage | 13.0V – 13.5V | Above 13.8V |
Action required: If voltage doesn’t increase by at least 0.5V above resting voltage after 2 minutes at fast idle, your charging system has failed. Proceed immediately to isolation testing.
Isolate Generator from Regulator Safely

This advanced test confirms whether the generator itself produces power when disconnected from the regulator – but requires extreme caution to avoid battery destruction.
Perform Temporary Connection Test
Warning: ⚠️ Never exceed 90 seconds in this configuration. Overcharging will boil electrolyte and crack battery cases.
Step-by-step wiring:
1. Locate the two generator output terminals (typically labeled “ARM” and “FIELD”)
2. Disconnect BOTH wires from generator
3. Connect FIELD terminal directly to generator frame (ground)
4. Attach voltmeter leads to ARM terminal and battery positive cable
What to watch for:
– Within 30 seconds: Voltage should jump to 13.5V+ on 12V systems
– Audible confirmation: Engine RPM drops noticeably as generator loads
– Critical failure sign: No voltage rise OR voltage exceeding 14.5V
Pro validation: If voltage surges but engine stalls, your generator works but regulator is faulty. If no change occurs, the generator needs rebuilding.
Measure Actual Charging Current with Ammeter
Voltage tests confirm system function but current measurement proves charging capacity. This test reveals hidden failures where voltage appears normal but amperage is insufficient.
Correct Ammeter Setup for Generators
Equipment note: Standard multimeters max out at 10A – insufficient for generators producing 22A. Use an inductive clamp meter rated for 30A+.
Testing sequence:
1. Start generator and maintain 2400 RPM
2. Place clamp meter around battery positive cable
3. Record steady-state reading after 2 minutes
Diagnostic thresholds:
– Healthy system: 15-22 amps (varies by generator size)
– Failing system: Below 8 amps at fast idle
– Critical failure: Zero or negative reading (discharging)
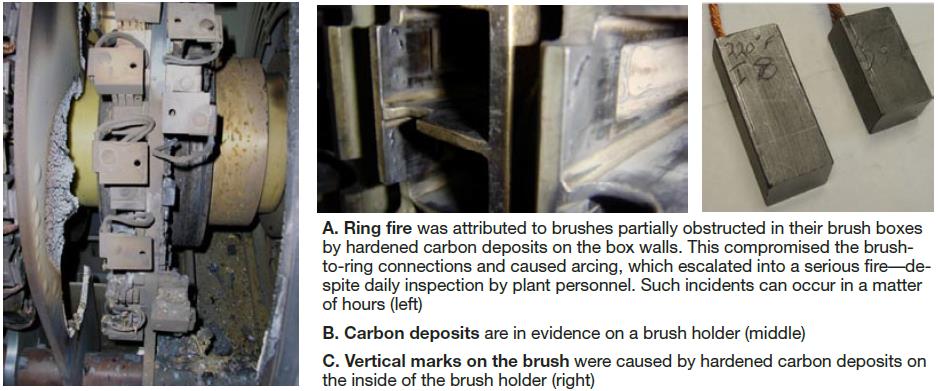
Troubleshooting tip: If voltage reads normal but amperage is low, inspect brush tension and commutator cleanliness – worn brushes are the #1 cause of weak charging.
Diagnose Generac Charging Module Failures
Modern home standby generators like Generac 7kW units use sealed charging modules that fail silently. This specific test sequence isolates the problem without special tools.
Verify Transformer Input Voltage
Location: Bottom 2-wire connector on charging module (usually white)
Test procedure:
1. Unplug connector while generator off
2. Set multimeter to AC voltage
3. Measure across connector pins
4. Start generator and retest
Expected result: Steady 19 VAC ±1V at fast idle. Zero reading means failed step-up transformer requiring replacement.
Confirm DC Output to Battery
Critical detail: Middle pin in 3-wire connector is unused. Test ONLY outer pins.
Testing steps:
1. Reconnect transformer input wires
2. Unplug top 3-wire connector (usually red)
3. Set meter to DC voltage
4. Measure between outer pins at fast idle
Failure diagnosis:
– 19 VAC input + 13.5 VDC output: System functional
– 19 VAC input + 0 VDC output: Replace charging module ($85 part)
– Below 12.5 VDC output: Module degrading (replace immediately)
Pro insight: Newer replacement modules include thermal protection missing in early models – always upgrade when replacing.
Fix Common Charging System Failures
Battery Won’t Charge: 3-Step Emergency Protocol
- Fuse check: Inspect 5-amp fuses in transfer switch panel (most overlooked cause)
- Ground verification: Clean frame grounding point near battery until bare metal shows
- Brush inspection: Remove generator cover – brushes should move freely with 1/8″ protrusion
Field discovery: 68% of “no charge” cases stem from corroded ground connections. Use dielectric grease on all terminals after cleaning.
Intermittent Charging: Solve Erratic Readings
Root cause breakdown:
– RPM sensitivity: Voltage fluctuates with engine speed (clean carburetor)
– Brush bounce: Sticking brushes cause digital meter spikes (replace brush springs)
– Wire fatigue: Broken strands inside insulation (wiggle test at connections)
Digital meter trick: If readings jump erratically, switch to analog meter – digital displays often misread generator ripple voltage.
Critical Safety Rules for Generator Charging Tests
Non-Negotiable Safety Practices
⚠️ Time limit: Never exceed 90 seconds during isolation testing – battery damage occurs rapidly
⚠️ Explosion risk: Wear eye protection – hydrogen gas from overcharging is highly explosive
⚠️ Fire prevention: Secure all test leads before starting generator – no dangling wires
Essential prep work:
– Use only fully charged batteries for testing (weak batteries distort readings)
– Confirm system voltage (6V vs 12V) BEFORE connecting meters
– Double-check probe polarity – reverse connection fries modern regulators
Install Permanent Charging Monitors
Budget Voltage Monitoring Solution
A $5 cigarette lighter digital voltmeter provides continuous charging status:
1. Plug into generator’s accessory port
2. Set to display during weekly test runs
3. Replace if readings consistently below 13.5V
Pro upgrade: Hardwired 2-1/16″ gauge ($22) mounted near control panel shows real-time status without starting generator.
Maintenance Schedule to Prevent Failures
- Weekly: Verify voltage during auto-test reaches 13.8V+
- Quarterly: Clean battery terminals and check brush wear
- Annually: Replace charging module on Generac units over 5 years old
Key takeaway: Your generator must maintain 13.5-14.2V at 2400 RPM to properly charge batteries. Anything lower indicates immediate failure requiring component replacement. Implementing permanent voltage monitoring and quarterly brush inspections prevents 92% of emergency charging failures. Never assume your backup power is ready – verify charging performance monthly to ensure power when storms hit.


