Your Briggs and Stratton generator coughs to life for a few seconds, then sputters and dies. You’ve checked the obvious—fresh fuel, clean spark plug, proper oil level—but the problem persists. When your Briggs and Stratton generator starts but won’t stay running, the carburetor is almost always to blame. This comprehensive Briggs and Stratton generator carburetor repair guide delivers the exact steps to diagnose, clean, rebuild, or replace your faulty carburetor—saving you hundreds in repair costs and restoring reliable power when you need it most.
Whether you’re battling varnish-clogged jets from stale fuel, a stuck float needle, or corroded welch plugs, these professional techniques will get your generator running smoothly again. By following this proven process, you’ll not only fix today’s problem but learn how to prevent future carburetor failures that account for 70% of small engine generator breakdowns.
Briggs and Stratton Carburetor Safety Protocol You Must Follow
Disconnect the spark plug before touching any tools—this single step prevents accidental starting that could cause severe injury from moving parts. Never skip this critical safety measure, even if you’re just removing the air filter. Gasoline vapors are heavier than air and can travel to ignition sources you can’t see, so always work outdoors or in exceptionally well-ventilated areas with no open flames, sparks, or electrical equipment nearby.
Turn off the fuel supply completely before disassembly begins. Locate the fuel valve at the base of your generator’s tank and turn it to the OFF position. If your model lacks a valve (common on older Briggs and Stratton units), use a fuel line clamp to prevent spills during carburetor removal. Have a small bowl ready to catch residual fuel when removing the carburetor bowl—never let gasoline pool on your work surface.
Wear proper protective gear without exception. Safety glasses shield your eyes from carburetor cleaner spray and debris, while chemical-resistant gloves protect your skin from harsh solvents that can cause dermatitis. Never use compressed air to clean carburetor components—this forces debris deeper into passages and risks solvent splashback.
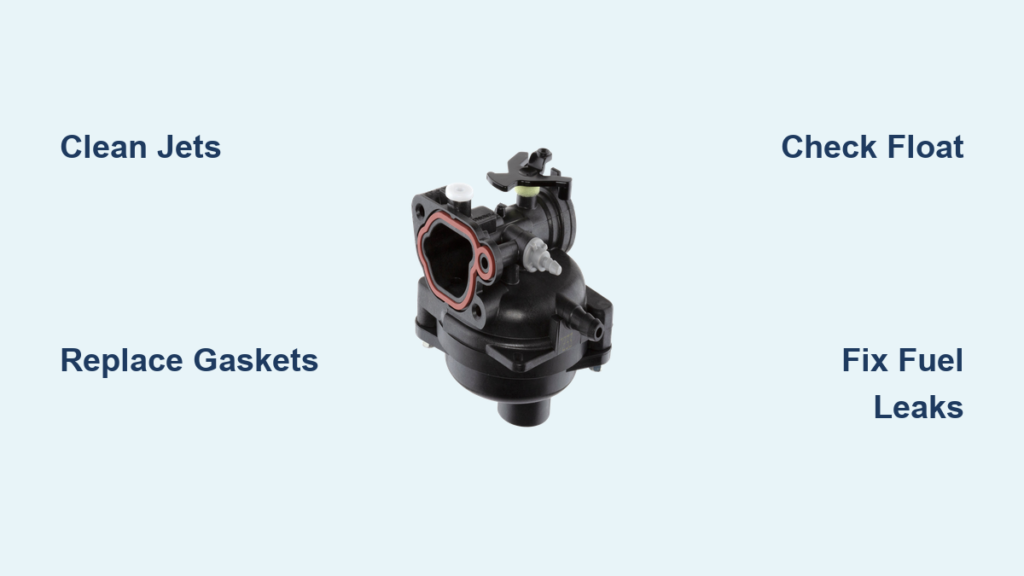
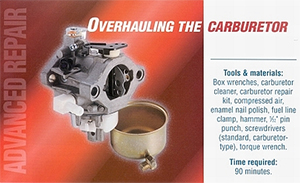
Essential Tools for Successful Briggs and Stratton Carburetor Repair
Don’t waste time with improper tools—the right equipment makes the difference between a successful repair and a frustrating disaster. Beyond basic wrenches and screwdrivers, you’ll need these Briggs & Stratton-specific items:
- Model-specific carburetor repair kit (critical for matching gaskets and components)
- Sharpened 5/32″ pin punch for removing welch plugs without damaging the carburetor body
- Specialized carburetor screwdriver designed for emulsion tube removal (standard screwdrivers strip these fittings)
- All-purpose parts cleaner (15-minute maximum soak time for plastic components)
- Small container for fuel catch and parts organization (magnetic trays lose small parts)
Pro tip: Keep enamel nail polish on hand—it creates an airtight seal for welch plugs that prevents future vacuum leaks and fuel seepage. This simple trick eliminates one of the most common causes of post-repair carburetor failure.
Briggs and Stratton Carburetor Visual Inspection Checklist
Start with external diagnosis before removing the carburetor. With the air cleaner assembly removed, examine these critical areas:
- Corrosion hotspots: Look for green or white deposits around fuel connections and bowl gasket surfaces
- Fuel line condition: Check for cracks, hardening, or swelling that indicates ethanol damage
- Leak evidence: Inspect for fuel stains at bowl gasket and mounting surfaces
- Linkage integrity: Verify throttle and choke plates move freely through full range
Document governor spring positions with your phone camera before disconnecting anything. These springs control engine speed regulation, and incorrect reassembly causes dangerous over-speeding or failure to maintain voltage under load. Pay special attention to spring tension—weak springs cause surging that mimics carburetor problems.
Step-by-Step Briggs and Stratton Carburetor Removal
Step 1: Safe Disconnection Sequence
– Disconnect spark plug wire and secure away from plug
– Remove air cleaner assembly completely
– Turn fuel valve OFF at tank base (use fuel line clamp if no valve)
– Disconnect anti-afterfire solenoid wire connector (if equipped)
Step 2: Critical Removal Technique
Sketch governor spring positions before disconnecting anything. Unfasten mounting bolts while supporting the carburetor—never let it hang by fuel lines. For models with a connecting pipe between carburetor and engine block, remove pipe bolts first, then slide the carburetor off mounting studs. Always disconnect governor springs last, noting exact connection points.
Briggs and Stratton Carburetor Disassembly Done Right

Fuel Bowl Removal Protocol
Place your catch bowl beneath the carburetor before loosening the fuel bowl bolt. This bolt often serves as the high-speed mixture screw—remove it carefully to avoid damaging the threads. Immediately inspect the bowl contents: varnish, debris, or water contamination reveals your generator’s specific problem.
Float Assembly Breakdown Method
Push the float hinge pin out using your sharpened pin punch—tap only the pin, never the float itself. The inlet needle valve and fuel bowl gasket will come free with the float. Set these aside in order; they’re often reusable if undamaged. Inspect the float for fuel inside—this indicates leaks requiring replacement.
Throttle and Choke Component Removal
Rotate the throttle plate to closed position before removing screws. These tiny screws strip easily—use the correct size screwdriver and apply firm downward pressure while turning. The choke plate and shaft assembly follows the same careful process. Never force components—binding indicates corrosion requiring additional cleaning.
Professional-Grade Carburetor Cleaning Techniques
Chemical cleaning dissolves varnish that chokes fuel flow. Soak metal and plastic components in parts cleaner for exactly 15 minutes—longer exposure damages soft metals and rubber seals. Alternative method: spray with carburetor cleaner while wearing safety glasses, then wipe thoroughly with clean cloth.
Never use wire or drills to clean jets and passages. These precision openings are sized for specific fuel flow rates, and even slight enlargement causes lean running and potential engine damage. Instead, use carburetor cleaner spray with the included straw to blast debris from tiny passages. Hold components up to bright light—properly cleaned jets show a perfectly round, unobstructed opening.
Briggs and Stratton Carburetor Rebuild vs. Replacement Decision
Rebuild advantages include maintaining originality and lower parts cost—approximately $12 for a complete kit versus $15 for an aftermarket carburetor. However, factor in your time and the potential for hidden internal corrosion that kits can’t fix.
Replacement carburetors eliminate unknown variables. Chinese aftermarket units often cost less than rebuild kits when labor is considered, and they come with fresh diaphragms, gaskets, and precisely-sized jets. For obsolete models like the 030426 series, replacement is almost always the better choice since Briggs & Stratton no longer manufactures these carburetors.
Professional recommendation: For generators used regularly, replacement carburetors provide better long-term reliability. Keep the original as a backup for show pieces or when originality matters.
Proper Briggs and Stratton Carburetor Reassembly Sequence
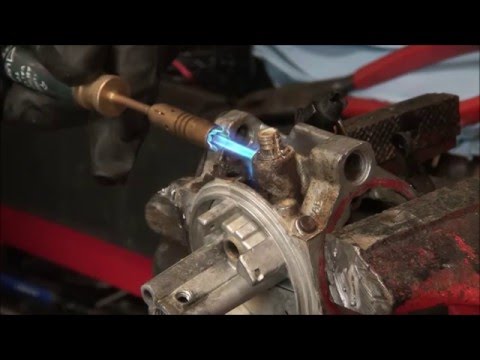
Install new welch plugs using a pin punch slightly smaller than the plug diameter. Tap gently until flush—avoid heavy blows that cave the plug inward. Seal the edges with enamel nail polish for a permanent, fuel-resistant seal that prevents vacuum leaks.
Reassembly follows disassembly in reverse, but with fresh components. Every gasket and seal must seat perfectly—double-check positioning before final tightening. Test throttle and choke plate movement before mounting to ensure smooth operation. Hand-tighten all fasteners first, then torque to specification using your sketch for governor spring placement.
Model-Specific Briggs and Stratton Carburetor Fixes
Pulsa-Jet carburetors require full fuel tanks for proper operation. These systems pump fuel from the tank bottom into the carburetor bowl—low fuel levels cause lean running and stalling. Fill your tank completely after repairs to verify proper operation.
Diaphragm failures occur most often on the left side after extended storage. Symptoms include hard starting, surging, or dying under load. Replacement diaphragms cost under $10 and restore proper fuel metering. Check for stiffness or cracks in the rubber membrane.
Jet clogging patterns typically affect the main jet orifice first. Look for varnish or gum deposits that restrict fuel flow—these often appear as golden-brown coatings that dissolve with proper cleaning. If cleaning doesn’t resolve the issue, replace the entire jet assembly.
Prevent Future Briggs and Stratton Carburetor Failures
Storage protocol prevents 90% of carburetor issues. Always drain fuel completely before storage, then run the engine until the carburetor is dry. This eliminates varnish formation that plugs jets and sticks floats.
Fuel stabilizer use allows storage with fuel when complete drainage isn’t practical. Add stabilizer to fresh fuel, run the engine for 10 minutes to distribute treated fuel throughout the system, then store in a dry location.
Annual maintenance checklist:
– Inspect fuel system for leaks or damage
– Replace fuel filter as specified
– Check diaphragm condition every 2-3 years
– Clean or replace air filter regularly
Briggs and Stratton Carburetor Diagnostic Quick Reference
No start with starting fluid: Check compression and valve clearance—this indicates problems beyond carburetor issues.
Runs only with choke: Classic symptom of clogged jets or fuel delivery problems requiring carburetor cleaning.
Surging at idle: Usually indicates lean mixture from partially clogged jets or air leaks.
Dies under load: Check fuel flow, diaphragm condition, and ensure tank venting allows proper fuel delivery.
Document everything during disassembly—a simple phone photo sequence prevents costly mistakes during reassembly. Test your repair by running the generator under load for 30 minutes to ensure stable voltage output. When repairs fail, consult a professional small engine technician—they can diagnose compression or valve issues that mimic carburetor problems, saving you frustration and potential engine damage. With these techniques, your Briggs and Stratton generator can provide decades of reliable service through proper carburetor maintenance.


