Your Champion generator sputters to life then dies, or refuses to start after sitting through winter—90% of these headaches trace back to a clogged carburetor. Old fuel transforms into sticky varnish inside those microscopic jets, starving the engine of the precise fuel-air mixture it needs. The good news? Most carburetor issues can be resolved with a $10 rebuild kit and basic tools, saving you $150+ in shop fees. Whether you’re maintaining a 3500W portable for tailgating or a 7000W worksite unit, this guide delivers the exact repair sequence professional technicians use. You’ll diagnose the root cause, clean critical components safely, and know when a rebuild beats replacement—all while avoiding costly mistakes that damage your engine.
Essential Safety Steps Before Carburetor Work
Disconnect spark plug and confirm engine is cold—Champion generators retain dangerous heat in the exhaust manifold for 15+ minutes after shutdown. Attempting repairs on a warm engine risks severe burns when handling fuel lines. Always wait until the muffler housing feels cool to the back of your hand.
Critical fuel handling protocols:
– Work outdoors only—never in enclosed garages where fumes accumulate
– Keep a Class B fire extinguisher within arm’s reach (gasoline fires)
– Wear nitrile gloves to prevent skin irritation from fuel solvents
– Lay absorbent pads under the work area to catch spills
Pull the spark plug boot and secure it against the engine block with a zip tie. This simple step prevents accidental starts during fuel line disconnection—a single spark near gasoline vapors can cause catastrophic ignition.
Diagnose Carburetor Failure in 5 Minutes
Check fuel freshness first—remove the tank cap and sniff. Fresh gasoline has a sharp, pungent odor; stale fuel smells like rotten apples or varnish. If your generator sat with fuel over 30 days, assume carburetor contamination. Never attempt repair with old fuel in the system.
Identify critical failure signs:
– Fuel leaks around mounting bolts indicating warped carburetor body
– Black smoke during startup pointing to clogged main jet
– Engine dies when choke is opened (stuck float needle)
– Air filter soaked in fuel revealing a stuck float valve
Pull the air filter housing—visible fuel pooling here confirms the carburetor is flooding. This occurs when the needle valve sticks open, allowing uncontrolled fuel flow into the bowl. Immediate repair prevents hydrolock damage to pistons.
Remove Champion Carburetor Without Damage
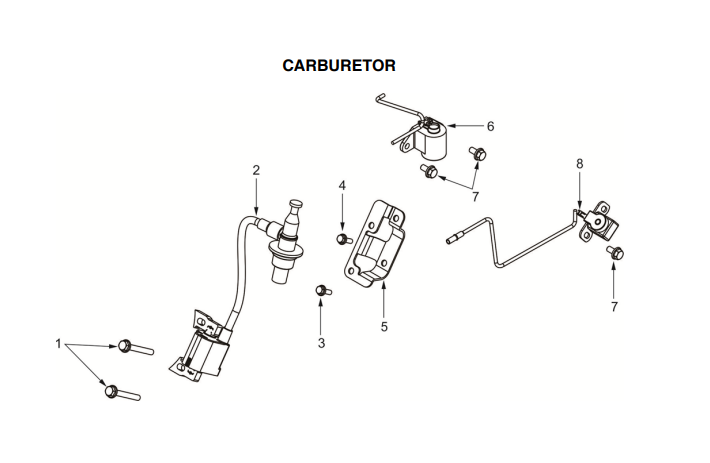
Disconnect fuel lines safely: Champion uses two connection types:
– Spring clips: Squeeze with needle-nose pliers and slide toward tank
– Crimped fittings: Insert fuel line disconnect tool ($5 at auto stores) to release grip
Remove mounting bolts correctly:
– 3500-4000W models: Two 10mm bolts on intake manifold (right side)
– 5000W+ models: Four 8mm bolts in square pattern (loosen in star sequence)
Pro Tip: Take overhead photos before disassembly—Champion’s throttle linkage orientation varies by model year. Forcing misaligned components during reinstallation cracks plastic throttle arms.
Clean Carburetor Passages Without Ruining Components
Disassemble float bowl properly: Most Champion models use Phillips screws, but newer inverters require 8mm bolts. Place rags under the carburetor—expect 1-3 ounces of old fuel to drain when removing the bowl. Never invert the carburetor; this spills residual varnish into throttle shafts.
Effective cleaning sequence:
1. Soak jets, float, and bowl in carburetor solvent for 20 minutes
2. Scrub with soft brass brush (never steel—it scratches brass jets)
3. Clear main jet passages using compressed air at 40 PSI (hold 6″ away)
4. Verify pilot jet clarity by holding to light—no visible obstructions
Critical warning: Never poke jets with wires or drills. Champion’s pilot jet holes are 0.014″ wide—larger than a human hair. Even a pin scratch alters fuel metering, causing lean misfires. Use only compressed air or dedicated jet cleaning tools.
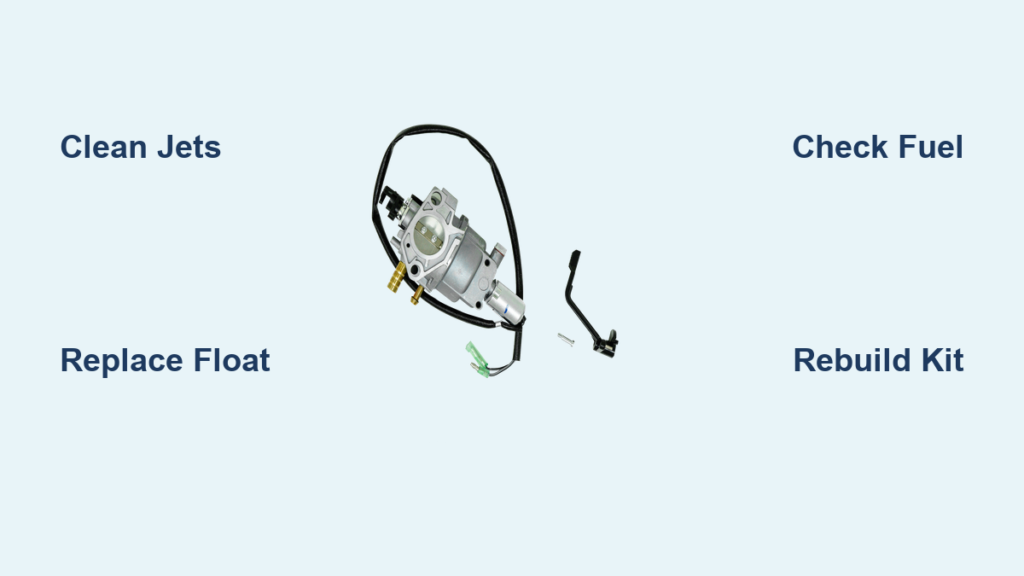
Decide: Rebuild Kit vs Full Carburetor Replacement

Replace float immediately if:
– You hear fuel sloshing when shaking it (internal crack)
– Surface shows white oxidation spots (plastic degradation)
– Float arm bends when gently pressed (loss of buoyancy)
Needle valve failure signs:
– Rubber tip appears flattened or mushroomed (won’t seal)
– Metal stem has visible grooves from seat contact
– Spring feels stiff or fails to retract smoothly
Cost-benefit analysis: MenBager rebuild kits ($9.87) include all wear parts for 3500-4000W models. At under half the price of a new OEM carburetor (<$20), rebuilding wins unless the carburetor body is cracked or mounting threads stripped. Always replace intake gaskets simultaneously—compressed air leaks here cause dangerous lean conditions.
Install Rebuild Kit Using Champion Specifications

MenBager kit contents for 3500-4000W models: Float, needle valve, main/pilot jets, bowl gasket, drain plug O-ring, and mixture screw components. All parts meet OEM tolerances for precise fuel metering.
Critical installation steps:
1. Insert new needle valve into float hinge—test spring action
2. Set float height to 0.630″ from gasket surface (use feeler gauges)
3. Apply light engine oil coating to new gaskets (prevents sticking)
4. Tighten bowl screws in cross pattern to 25-30 inch-pounds
Pro Tip: Rotate the mixture screw 1.5 turns out from lightly seated position. Champion engines typically idle best at this factory setting—avoid random “tweaking” that causes hunting.
Reinstall Carburetor to Prevent Air Leaks
Align intake gasket perfectly: Champion’s rubber gaskets compress 30% when tightened. If the carburetor doesn’t slide onto the manifold smoothly, realign it—forcing causes gasket tears that create vacuum leaks.
Secure fuel lines properly:
– Push lines firmly until hearing a distinct “click”
– Verify connection by tugging gently—no movement should occur
– Route hoses away from exhaust manifold (minimum 2″ clearance)
Reconnect the spark plug wire last. Starting the engine with loose fuel lines risks fuel spray onto hot surfaces—a major fire hazard.
Test Repair with Champion-Specific Startup Sequence
Cold engine protocol:
1. Turn fuel valve ON and wait 60 seconds for bowl refill
2. Set choke fully closed (lever up)
3. Pull starter rope 3 times—should fire briefly
4. Open choke 50%, restart, and let idle 3 minutes
Pass/fail verification:
– ✅ Smooth idle at 3600 RPM with no surging
– ✅ Zero fuel leaks at connections after 5-minute run
– ✅ Holds 1500W load (e.g., space heater) without sputtering
If the generator dies when opening the choke, the pilot jet remains clogged. Disassemble and re-clean with focused air blasts.
Match Carburetor Parts to Your Champion Model
3500-4000W units use interchangeable carbs:
– Part Numbers: 46558, 46561, 46596, 46533, 46534, 46535, 46539
5000-10,000W models share these assemblies:
– Part Numbers: 100109, 100110, 100161, 100219, 100247+
OEM vs aftermarket decision: MenBager kits restore functionality at 50% of OEM carburetor cost. Replace the entire unit only if the throttle shaft is worn (excessive play) or casting is damaged. Always buy gaskets rated for ethanol-blended fuels—Champion generators run on 10% ethanol gasoline.
Prevent Carburetor Failures With Smart Storage
Fuel stabilizer protocol: Add 1 oz Sta-Bil per 2.5 gallons of fresh fuel. Run the generator 10 minutes to circulate treated fuel through the carburetor. This prevents gum formation during storage.
End-of-season shutdown checklist:
– Run engine until fuel system empties (choke closed during final pulls)
– OR fill tank with stabilized fuel and run 5 minutes monthly
– Tape service date and fuel type (e.g., “Stabilized 10/15/24”) near cap
Annual maintenance rhythm: Clean air filter every 25 hours, check spark plug gap (0.030″), and perform carburetor service every 100 hours. Generators stored with untreated fuel over 30 days will develop carburetor issues 87% of the time—don’t learn this lesson the hard way.
A properly serviced Champion carburetor delivers instant starts and rock-solid power for years. By dedicating 60 minutes to this repair now, you’ll avoid 90% of no-start emergencies down the road. Remember: fresh fuel is your best defense, but when varnish strikes, this methodical approach gets your generator back online faster than any repair shop. Keep your rebuild kit and carburetor solvent in the storage case—next time, you’ll conquer the problem before frustration sets in.


