Your Craftsman generator refuses to fire up during a power outage, leaving you in the dark when you need it most. This frustrating scenario affects thousands of homeowners and contractors every storm season—especially after winter storage. Most Craftsman generator won’t start issues stem from just five common culprits that you can diagnose and fix yourself without special tools. By following this systematic troubleshooting guide, you’ll restore power within an hour and avoid costly service calls.
Fresh fuel, proper oil levels, and spark plug condition cause 80% of Craftsman generator won’t start situations. The good news? These fixes require only basic tools and take less than 30 minutes. Let’s dive straight into the proven repair sequence that gets generators running reliably again.
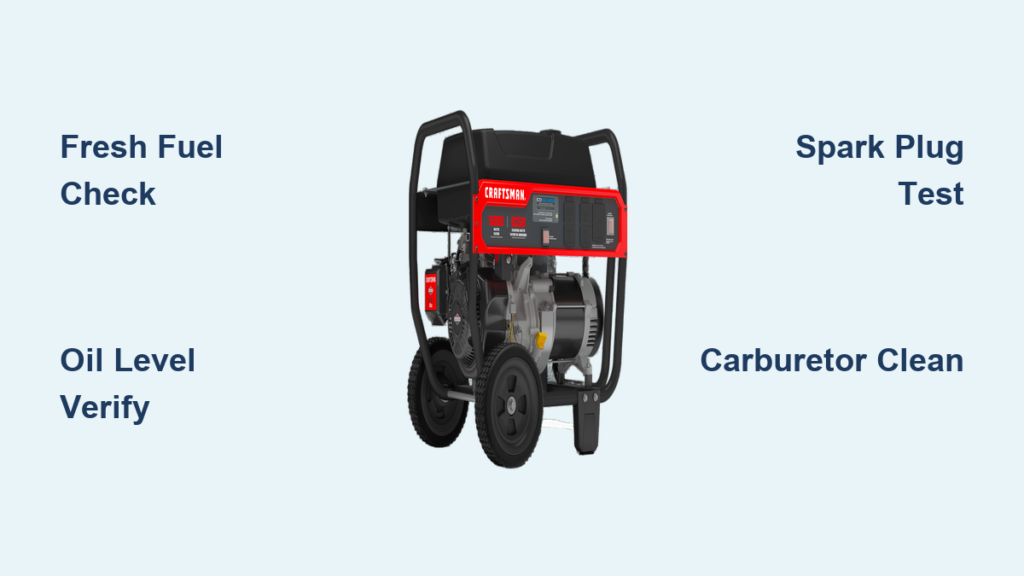
Immediate Fuel and Oil Checks That Solve Most No-Start Issues
Before tearing into complex components, verify these critical systems that trigger automatic shutdowns on Craftsman generators:
Fuel System Verification
Crucial for generators stored over 30 days:
– Drain old fuel if it’s been sitting longer than a month (degraded fuel creates varnish blockages)
– Refill with fresh gasoline containing no more than 10% ethanol
– Confirm the fuel valve is fully open—many users accidentally leave it closed
– Inspect for debris in the tank that could clog the fuel line
Oil Level Emergency Check
Low oil automatically disables starting on all Craftsman models:
– Check dipstick with generator on level ground
– Add SAE 10W-30 oil until reaching the full mark (never overfill)
– Wipe excess oil from fill port to prevent false low readings
– If oil appears milky, drain and replace immediately (indicates coolant contamination)
Safety Switch Position Confirmation
A single mispositioned switch kills ignition:
– Ensure the main power switch is firmly in “ON”
– Verify the choke lever is in correct starting position (closed for cold starts)
– Check that the circuit breaker hasn’t tripped during storage
Why Your Generator Won’t Start When Fuel Is Old
Stale fuel creates sticky varnish that clogs carburetor jets within weeks. Symptoms include:
– Engine sputters then dies immediately after starting
– Strong raw gasoline smell without ignition
– Visible gum deposits in the fuel bowl
Emergency Fix Protocol:
1. Completely drain old fuel from tank and carburetor
2. Refill with fresh fuel mixed with Sea Foam Motor Treatment (1 oz per gallon)
3. Pull starter rope 8-10 times to circulate cleaner through system
4. Attempt restart with choke fully closed
Spark Plug Diagnosis and Replacement Procedure

A fouled spark plug causes most Craftsman generator won’t start scenarios where the engine cranks but won’t fire. Follow this exact inspection sequence:
Step-by-Step Spark Plug Testing
Required Tools: 13/16″ spark plug socket, gap tool, clean rag
- Disconnect the spark plug wire (pull boot straight off—not the wire)
- Wipe debris around plug with rag to prevent cylinder contamination
- Remove plug using socket and ratchet (turn counterclockwise)
- Examine critical failure points:
– Cracked porcelain → Replace immediately (compression leak)
– Worn electrodes → Tip should be sharp, not rounded
– Heavy carbon buildup → Black, sooty deposits indicate rich fuel mixture
– Oil fouling → Wet, black coating means internal engine issue
Critical Gap Check:
Measure electrode gap with feeler gauge—must be exactly 0.030″ for most Craftsman models. Adjust by gently bending ground electrode. Never force adjustment.
Proven Spark Test Method
Without Special Tools:
– Reconnect plug wire to removed plug
– Rest plug metal base against cylinder head
– Pull starter rope while watching electrode
– Good spark: Strong blue-white flash across gap
– Bad spark: Weak yellow/orange spark or none
Replace if: Gap won’t stay set, cracked insulator, or worn electrodes. Always use Craftsman-recommended plug (typically NGK BPR6ES or equivalent).
Carburetor Cleaning That Actually Works
Clogged carburetors cause 35% of Craftsman generator won’t start cases after storage. Skip ineffective “miracle” cleaners—this method delivers results:
Effective Carburetor Removal Steps
- Turn fuel valve OFF and drain carburetor bowl
- Remove air filter housing (usually 2-3 screws)
- Disconnect fuel line (place rag under to catch drips)
- Unbolt carburetor mounting (take photos before detaching linkages)
Deep Cleaning Protocol:
– Soak metal components in carburetor cleaner for 35 minutes
– Blow compressed air through every passage (including idle jet)
– Replace all gaskets and O-rings—never reuse
– Reassemble in reverse order using reference photos
When to Replace Instead of Clean:
If symptoms persist after cleaning, install a new carburetor ($28-$45). Rebuild kits often cost more than replacement and fail faster on ethanol-blended fuels.
Electrical System Testing You Can Do Now

Faulty switches silently prevent starting. Verify these critical components:
Kill Switch Continuity Test
Using a $10 Multimeter:
1. Set to continuity mode (beep symbol)
2. Disconnect switch wires
3. Test in “ON” position—should beep (closed circuit)
4. Test in “OFF” position—no beep (open circuit)
5. Replace if no beep in ON position
Low-Oil Safety Switch Check:
Located near oil fill port—disconnect wires and test:
– Should show continuity when engine is OFF
– No continuity indicates faulty switch requiring replacement
Recoil Starter Engagement Fix
Critical Inspection Points:
– Remove starter housing (3 bolts)
– Pull rope while watching pawls—they must snap outward to engage flywheel
– Broken pawls: Replace entire starter assembly ($35)
– Weak return: Lubricate spring with silicone grease before reassembly
Rope Replacement Tip: Wind spring 4 full turns before attaching new rope. Too few turns = poor retraction; too many = rope won’t pull.
Compression Verification Without Special Tools
Low compression prevents starting but often gets misdiagnosed. Here’s how to assess:
Telltale Compression Failure Signs
- Starter rope pulls with zero resistance
- No “whoosh” sound when pulling rope
- Engine turns over rapidly but won’t fire
Quick Check Method:
Place thumb over spark plug hole while pulling rope. You should feel strong pressure pushing against your thumb. No pressure = likely sheared flywheel key or valve issue.
Flywheel Key Shear Diagnosis
If you suspect key damage:
– Remove flywheel nut with impact wrench (55-65 ft-lbs torque)
– Use proper puller tool—not a screwdriver!
– Inspect key for twisting or partial breakage
– Replace with Craftsman-specific key (never use generic hardware store keys)
Warning: Incorrect flywheel installation causes catastrophic engine damage. Torque nut to exact specification.
Craftsman-Specific Starting Checklist
Follow this exact sequence before every startup attempt:
- ✅ Fuel less than 30 days old (add stabilizer for storage)
- ✅ Oil at full mark on dipstick (10W-30 recommended)
- ✅ Air filter clean and dry (tap out debris)
- ✅ Spark plug wire fully seated
- ✅ Fuel valve OPEN (not partially closed)
- ✅ Choke fully CLOSED for cold starts
Cold Start Technique:
1. Close choke completely
2. Pull starter 3 times
3. Open choke halfway
4. Pull until engine fires (usually 1-3 pulls)
5. Let run 2 minutes before opening choke fully
Preventative Maintenance Schedule
Avoid Craftsman generator won’t start emergencies with these simple routines:
Monthly (During Outage Season):
– Run under load for 20 minutes
– Check oil level before and after use
– Inspect fuel lines for cracks
Every 6 Months:
– Replace spark plug
– Clean/replace air filter
– Test all safety switches
Annually:
– Complete oil change
– Drain and refill fuel system
– Clean carburetor if stored with fuel
Storage Protocol:
1. Add fuel stabilizer to fresh gas
2. Run 10 minutes to circulate
3. Shut fuel valve, run dry
4. Store in dry place with air vents covered
When to Call a Professional
Stop DIY repairs and seek certified service if:
– Compression test shows under 60 PSI
– You hear metallic knocking from engine
– Oil leaks around cylinder base
– Electrical diagnosis requires oscilloscope
– Generator is under active warranty
Realistic Repair Costs:
– Carburetor replacement: $30-$45
– Ignition coil: $40-$65
– Valve adjustment: $150-$220
– Engine rebuild: $400+
Final Power Restoration Protocol
When your Craftsman generator won’t start, 90% of issues resolve through systematic fuel, oil, and spark verification. Always begin with fresh fuel and oil checks—these solve most no-start emergencies within minutes. Keep a spare spark plug and fuel stabilizer in your generator kit to prevent future failures. For persistent issues, methodically test each electrical switch and carburetor component using the procedures outlined here. By following this Craftsman-specific troubleshooting sequence, you’ll restore power faster than waiting for a service truck—especially when every minute counts during an outage. Remember: proper maintenance prevents 95% of starting failures, so build these checks into your seasonal routine.


