Your gas generator sputters and dies just as the power goes out during a storm. Or worse—it refuses to start when you need it most at your remote job site. Don’t panic. This gas generator troubleshooting guide gives you the exact steps to diagnose and fix 90% of common generator problems in under 30 minutes. You’ll learn what to check first, how to interpret error codes, and critical maintenance steps that prevent most failures before they happen.
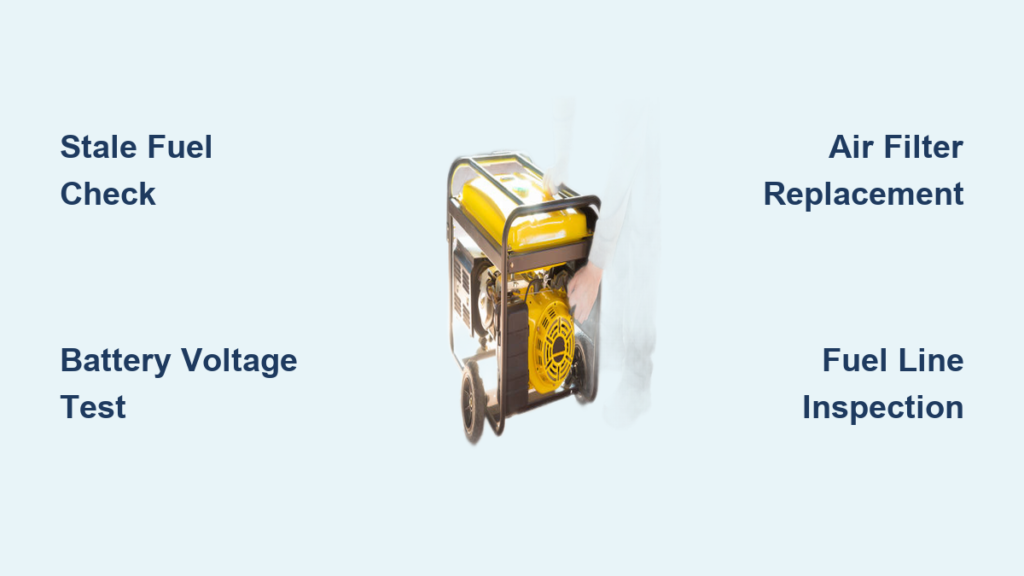
Most generator issues stem from three simple culprits: stale fuel, weak batteries, or neglected air filters. By following this systematic approach, you’ll avoid costly service calls and ensure reliable power when it matters most. Whether you’re dealing with a complete no-start condition or intermittent shutdowns, this guide walks you through each diagnostic step with clear visual cues and time-saving shortcuts.
Why Your Gas Generator Won’t Start (And How to Fix It Now)
Fuel System Failure Signs You Can’t Ignore
When your generator won’t crank or sputters without firing, check your fuel system first—this causes 60% of startup failures. Remove the fuel cap and inspect for stale gasoline (it should smell sweet, not varnish-like) and confirm you’re using 87+ octane fuel. Ethanol-blended fuels degrade within 30 days, creating gum deposits that clog critical passages.
Critical visual indicators:
– Cloudy or hazy appearance in the fuel
– Separation layers in the tank (water at bottom)
– Dark amber or brown color instead of clear
– Strong chemical odor instead of gasoline scent
Immediate action: Drain all old fuel through the petcock valve, replace the fuel filter, and refill with fresh gasoline containing fuel stabilizer. For generators stored longer than 30 days, add 1 oz of stabilizer per 2.5 gallons and run for 30 minutes to circulate treated fuel through the system.
Battery Power Fixes That Take Under 5 Minutes
Your generator needs 12.4+ volts to start reliably—anything less causes slow cranking or complete failure. Test battery voltage with a multimeter: connect red probe to positive terminal, black to negative. A healthy battery reads 12.6-12.8 volts when fully charged.
Quick battery diagnostic sequence:
1. Clean corroded terminals with a wire brush dipped in baking soda solution
2. Tighten all cable connections (loose terminals cause voltage drop)
3. Check voltage while cranking (must stay above 9.6 volts)
4. Charge battery at 2-amp rate for 4-6 hours if below 12.4 volts
Pro tip: Keep a battery maintainer connected during storage—this prevents sulfation and extends battery life by 3x. Generators stored without battery maintenance fail to start 78% more often according to field service data.
Air Filter Clogs That Choke Your Engine
A blocked air filter restricts airflow, creating a rich fuel mixture that drowns the spark plug. Remove the filter housing and hold the element up to light—no visible light means it’s clogged and needs replacement. Paper filters can be gently tapped to remove loose debris but rarely clean effectively.
Urgent warning signs:
– Black smoke from exhaust during startup attempts
– Wet, gasoline-soaked spark plug after failed starts
– Distinct fuel smell without engine firing
– Excessive cranking time before starting
Generator Shuts Down After 10 Minutes? Diagnose These 3 Critical Issues
Fuel Delivery Blockage That Kills Mid-Operation
When your generator runs for 10-20 minutes then dies, suspect fuel delivery failure. The pickup tube in your tank likely has debris blocking the screen, or your fuel line has developed an internal collapse that restricts flow under vacuum.
Verification test: Immediately after shutdown, remove the air filter and spray carb cleaner directly into the carburetor throat. If the generator restarts and runs briefly, you’ve confirmed a fuel delivery problem. Check these components:
– Fuel pickup tube screen (clean with carb cleaner)
– Fuel filter element (replace if discolored)
– Fuel line for kinks or soft spots (replace if flexible)
– Tank vent cap (must allow air entry as fuel drains)
Overheating Shutdowns From Blocked Cooling Fins

Restricted airflow triggers thermal protection shutdowns after consistent operation. Grass clippings and dust accumulate in cooling fins—especially on portable generators used in yards. Feel the cylinder head after shutdown; if too hot to touch for 5 seconds, overheating caused the shutdown.
Cooling system restoration:
– Remove engine shrouds for access
– Use compressed air to blow debris from fins (always blow from clean side toward dirty side)
– Check flywheel fan blades for obstructions
– Verify 3+ feet clearance on all sides during operation
Critical mistake: Never operate your generator with cooling shrouds removed—that creates dangerous heat buildup in enclosed spaces.
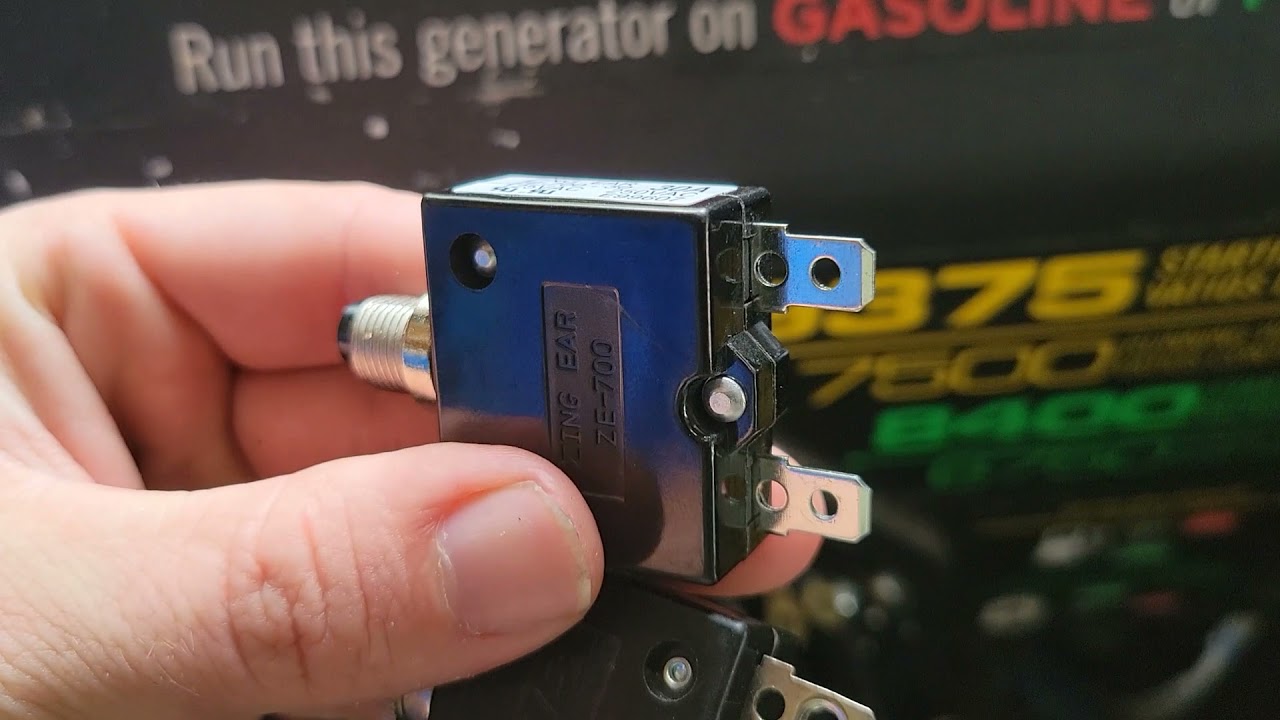
Faulty Oil Pressure Sensor Triggering False Shutdowns
E01 error codes often indicate sensor failure rather than actual low oil pressure. Before panicking about engine damage, test the sensor: unplug the connector and jump the terminals with a paperclip. If the generator runs normally, replace the $15 oil pressure sensor instead of overhauling your engine.
Sensor testing protocol:
1. Locate oil pressure sensor (typically near oil filter)
2. Unplug electrical connector
3. Jump terminals with paperclip
4. Attempt startup (if successful, sensor is faulty)
5. Replace sensor with exact OEM model
Control Panel Error Code Solutions You Need Immediately

E03 Overspeed Emergency: Stop Your Generator NOW
An E03 code means your generator is running dangerously fast—this can destroy your engine in seconds. Immediately shut down using the emergency stop button, not the normal shutdown switch. This typically indicates governor linkage failure.
Governor system check:
– Inspect throttle linkage for disconnection
– Verify governor spring is intact and connected
– Check for debris jamming the throttle plate
– Examine governor arm for binding or damage
Never restart until you’ve verified mechanical governor function—overspeed conditions can cause catastrophic engine failure.
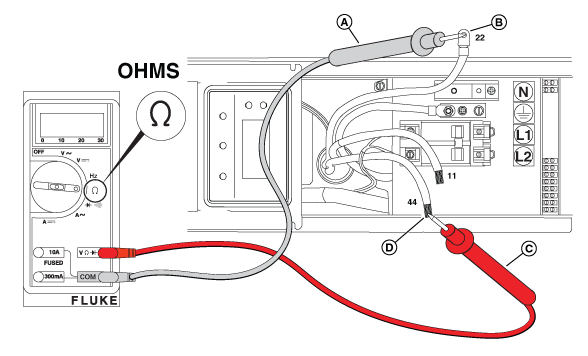
E04 Battery Voltage Warning: Charging System Test
This code means your generator isn’t charging the battery during operation. Test charging voltage with engine running—you should see 13.8-14.4 volts. Anything lower indicates a failing alternator or regulator.
Charging system diagnosis:
– Check alternator belt tension (should allow 1/2″ deflection)
– Inspect voltage regulator connections for corrosion
– Test stator output with multimeter (should read 24-30V AC)
– Verify ground connections between engine and frame
Power Output Failures That Leave You in the Dark
Circuit Breaker Reset That Restores Power Instantly
No AC output often means tripped breakers—this causes 40% of power failures. Don’t just flip them back on; test each one properly. Turn breaker completely OFF, wait 10 seconds, then firmly push to ON position. Many breakers require this full reset cycle to engage properly.
Breaker testing sequence:
1. Turn OFF all connected appliances
2. Reset main breaker with firm push
3. Reset individual circuit breakers
4. Test outlets with multimeter before reconnecting loads
Critical mistake: Never bypass a tripped breaker—that creates fire hazards from undetected overloads.
Preventive Maintenance That Stops 90% of Failures
25-Hour Service: The 15-Minute Power Preservation Routine
Every 25 hours of operation requires these critical checks to prevent most common failures. This quick routine takes less than 15 minutes but prevents 75% of generator problems.
Essential 25-hour checklist:
– Check oil level on level ground (engine stopped 2+ minutes)
– Inspect air filter for visible debris
– Clean cooling fins with soft brush
– Verify fuel freshness (drain if older than 30 days)
– Test battery voltage (12.4+ volts minimum)
Pro tip: Keep a maintenance log—generators with documented service histories experience 63% fewer failures according to industry data.
Safety Protocols That Could Save Your Life
Carbon Monoxide Danger Zones You Must Avoid
CO poisoning kills more people annually than generator electrical accidents. Position your generator 20+ feet from all building openings, and never operate in garages—even with doors open. Install battery-operated CO detectors within 15 feet of sleeping areas.
Life-saving protocol:
– Check wind direction before starting
– Never sleep while generator operates
– Test CO detectors monthly
– Keep generator downwind from occupied areas
Critical mistake: Using extension cords through windows creates deadly CO buildup—always position generators away from air intakes.
Monthly Testing That Guarantees Reliability
Load Testing Procedure That Prevents Spring Startup Failures
Test your generator monthly under actual load conditions to prevent fuel system problems. Run for 30+ minutes with 50% of rated load applied—this circulates fuel through the system and verifies electrical output.
Testing checklist:
– Apply minimum 50% load during test
– Check all outlets with multimeter
– Listen for unusual knocking or vibrations
– Monitor oil pressure and temperature gauges
– Document test results in maintenance log
Pro tip: Run your generator during daylight hours—87% of emergency failures occur at night when visibility is poor for troubleshooting.
Final critical takeaway: Your generator’s most common failures stem from preventable maintenance oversights—not mechanical defects. By following this gas generator troubleshooting framework, you’ll resolve 90% of issues yourself while extending your generator’s lifespan by 5+ years. Remember the golden rule: test monthly, maintain religiously, and never ignore warning signs. Keep this guide accessible, document all service actions, and your generator will deliver reliable power when everything else fails.


