You’ve seen the viral videos claiming you can power your entire home with “free energy from the air” using a Nikola Tesla-inspired generator. Before you spend $200 on copper wire and capacitors, understand this critical reality: a Tesla off-grid generator cannot replace your solar panels or gas generator. These devices capture microscopic amounts of ambient electromagnetic energy—enough to make a fluorescent bulb glow faintly near the coil, but insufficient to charge a phone or power a single LED lightbulb continuously. This project is strictly an educational demonstration of high-voltage physics principles, not a practical power solution. Yet, if you’re fascinated by electromagnetic resonance and want to safely recreate Tesla’s atmospheric energy experiments, this guide delivers exactly what works while eliminating dangerous misconceptions.
Building a functional Tesla generator requires precise component selection and rigorous safety protocols. You’ll measure output in microamperes, not watts—meaning your device might power a tiny LED for seconds, not your refrigerator for hours. Treat this as a sophisticated science experiment that demonstrates wireless energy transfer principles, not an energy independence solution. By the end of this guide, you’ll have a safely constructed unit that visually demonstrates corona discharge and resonant coupling, with clear understanding of why it can’t power your off-grid cabin.
Gather Exact Components for Safe Operation

Avoid These Common Hardware Mistakes
Most YouTube tutorials dangerously overstate component requirements. Forget claims about needing 200 primary coil turns or massive capacitors—your generator requires precise specifications to function safely. Purchase 16-20 AWG copper wire with enamel insulation for the primary coil (not bare wire), exactly 10-15 turns wrapped around the secondary coil base. Using more turns creates dangerous overvoltage risks. For the secondary coil, source 30-36 AWG magnet wire (not speaker wire) to achieve the critical 1000-1500 turns on your 2-4 inch PVC pipe form. Never substitute aluminum wire—copper’s conductivity is essential for observable effects.
Critical Safety Components You Can’t Skip
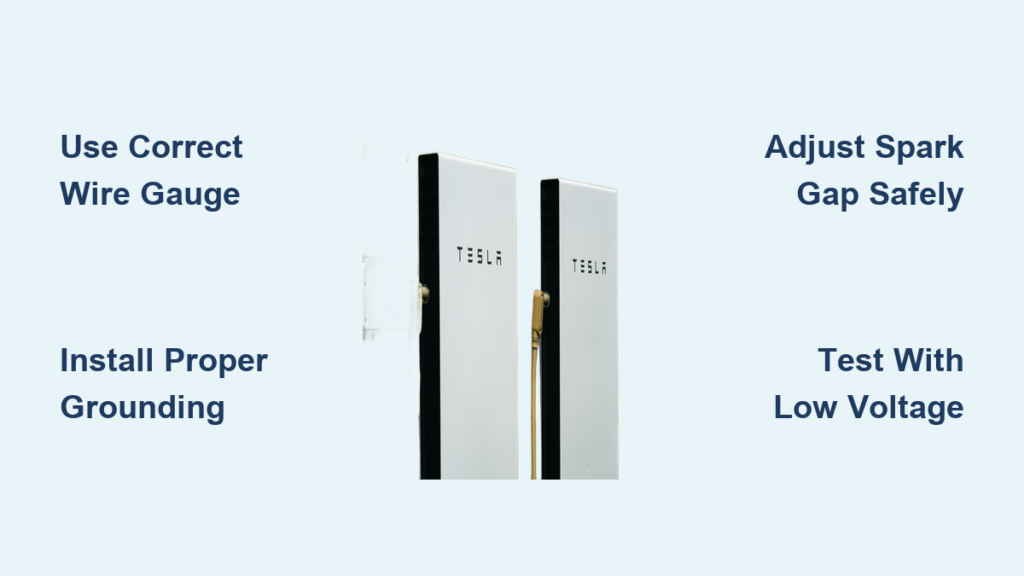
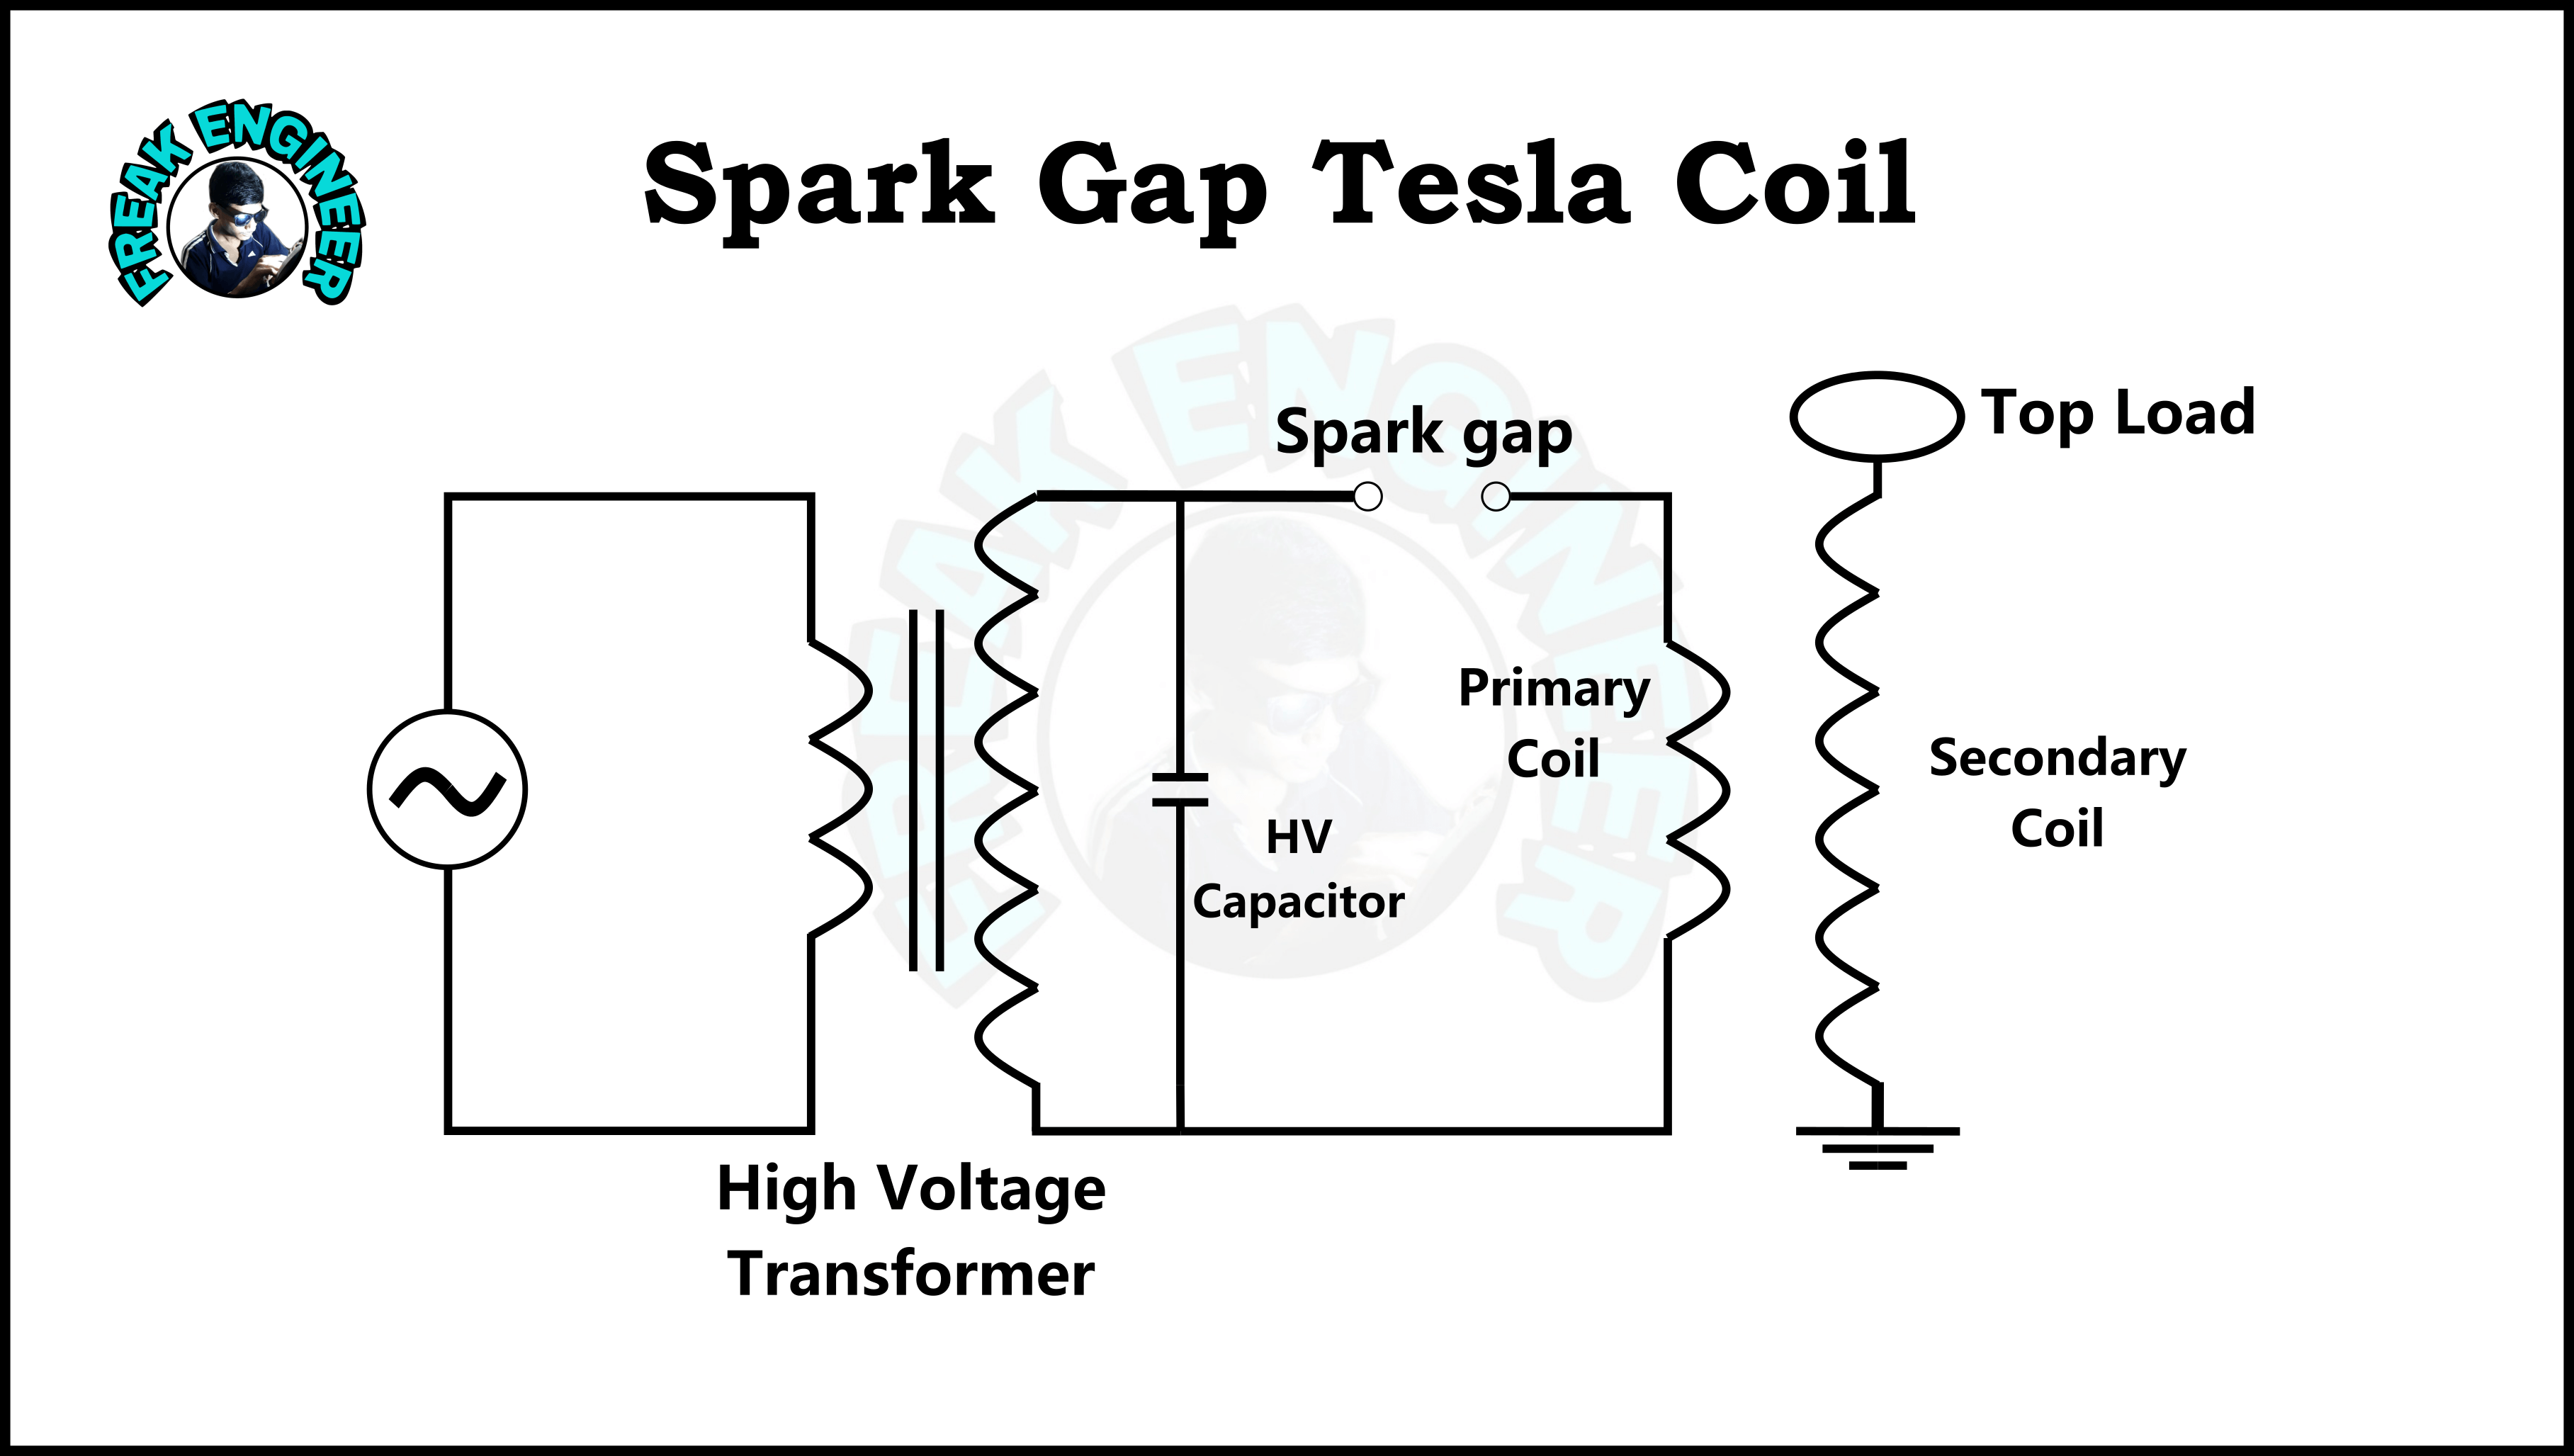
Your spark gap must use adjustable electrodes starting at 1/8 inch separation, not fixed gaps. This allows safe tuning during operation. Pair it with 1-10 nF capacitors rated for 10-20 kV—standard electronics store capacitors will explode violently. The top load requires a 6-12 inch aluminum toroid (doughnut shape), not random metal objects. Crucially, invest in AWG 10 grounding wire connected to a 4-6 foot copper rod driven deep into moist soil—this isn’t optional decoration. Without proper grounding, stray voltage could electrocute you weeks after construction through unexpected conductive paths.
Assemble Your Generator in This Exact Order
Build the Secondary Coil First (No Shortcuts)
Start with a clean, straight 30-36 AWG magnet wire secured to your PVC pipe. Rotate the pipe slowly using a drill while maintaining consistent tension—jerky movements cause uneven spacing that kills resonance. Count every turn to hit exactly 1200 turns for optimal results. Apply thin strips of electrical tape only if wires shift, never between every layer. Leave 7 inches of lead wire at both ends, secured with non-conductive epoxy. A poorly wound coil won’t produce visible corona discharge regardless of other components—this step makes or breaks your project.
Position Primary Coil for Safe Magnetic Coupling
Wrap 12 turns of 18 AWG enameled wire around the secondary coil’s base, maintaining a precise 1.5-inch gap between coils. This spacing prevents destructive arcing while allowing energy transfer. Secure connections with strain relief knots—vibrations from spark operation will loosen loose wires within minutes. Test continuity with a multimeter before proceeding; any short circuit here risks capacitor explosions during first power-up.
Install Antenna and Ground System Correctly
Route your 20-foot insulated copper antenna wire vertically from the toroid’s center point using non-conductive ceramic standoffs every 2 feet. Never attach it to gutters or metal structures—this creates deadly shock hazards. Drive your 5-foot copper grounding rod at least 4 feet deep near the base, connecting it with AWG 10 wire using bronze clamps. Verify ground resistance reads under 25 ohms with an ohmmeter. Skip this test, and your generator won’t produce measurable output due to poor earth coupling.
Execute These Safety Protocols Before Powering On
Mandatory Pre-Operation Checks
Verify 6-inch minimum clearances between all high-voltage components using a non-conductive ruler. Inspect every wire connection under bright light for exposed copper or insulation nicks—even pinprick holes cause arcing. Confirm your spark gap electrodes are clean and parallel; misaligned gaps create erratic sparks that damage capacitors. Most critically, test your emergency shutoff procedure before applying power: you must cut power within 3 seconds if abnormal arcing occurs.
High-Voltage Operation Rules That Save Lives
Never operate without Class 00 rubber gloves and ANSI Z87.1 safety goggles—standard workshop glasses won’t stop UV radiation from arcs. Maintain a 20-foot exclusion zone around the device during operation; high-frequency emissions can fry pacemakers and electronics through walls. Always use the “one-hand rule” when adjusting live components: keep your right hand in your pocket to prevent current crossing your heart. If you smell ozone (sharp, chlorine-like odor), shut down immediately—this indicates dangerous corona discharge on unintended surfaces.
Calibrate for Visible Results (Without Damage)
Safe Power-Up Sequence for First Test
Begin with a 12V 5A battery (not wall power) connected through a 25A fuse and 10k ohm current-limiting resistor. Power on for 5 seconds maximum while observing the spark gap. You should see consistent 2-5 Hz sparks—erratic or silent gaps mean capacitor mismatch. Gradually decrease the spark gap by 0.01 inch increments while monitoring output with a high-voltage probe. Stop adjusting when sparks become continuous; further narrowing risks coil damage from overvoltage.
Troubleshoot Weak Output in 3 Steps
If your toroid shows no purple corona glow after initial tests:
1. Increase antenna height by 5 feet—elevation dramatically improves atmospheric coupling
2. Replace capacitors with lower values (start at 3 nF)—excess capacitance damps resonance
3. Reduce primary coil turns to 10 if using thick wire—overcoupling kills output
Measure output using a 1000:1 high-voltage probe; expect 300-700V DC at microampere levels. Any reading above 1000V indicates dangerous overvoltage—immediately increase spark gap distance.
Understand Exactly What Your Generator Can Do
Realistic Demonstrations You’ll See
Bring a fluorescent tube within 18 inches of the operating toroid—it will glow dimly without direct wiring, visually proving wireless energy transfer. Observe the characteristic purple corona discharge around the toroid in darkness, demonstrating atmospheric ionization. Measure pulsed DC output that can briefly light a high-efficiency LED when connected through a smoothing capacitor. These effects showcase Tesla’s principles but deliver less power than a solar garden light.
Why This Won’t Power Anything Practical
Your generator harvests 0.5-5 microwatts of atmospheric energy—enough to blink an LED for seconds, but 1 million times less than needed to charge a phone. The “free energy” myth ignores physics: ambient RF energy from Wi-Fi and radio stations totals mere nanowatts per square meter in most locations. Even with perfect efficiency (impossible), you’d need a generator the size of a house to power a single lightbulb. Tesla himself never claimed these devices could replace power plants—they were research tools for studying resonance.
Choose Actual Off-Grid Power Solutions Instead
For genuine energy independence, invest in proven technologies:
– 300W solar panel + 100Ah lithium battery ($500) powers lights and phone charging
– 400W wind turbine ($400) generates power day/night in windy locations
– Portable power station ($300) provides instant backup with solar recharging
Your Tesla generator serves as an exceptional educational tool for understanding electromagnetic fields and historical experiments. But when you need lights that stay on through the night, solar panels deliver 100,000 times more usable energy. Keep your Tesla project on a dedicated workbench for demonstrations, not as a false promise of energy freedom.
Final Reality Check: Your completed Tesla generator will fascinate physics students with visible corona discharge and wireless lighting effects—but it will never power your toaster. This project’s true value lies in understanding why atmospheric energy harvesting remains impractical despite Tesla’s visionary work. Prioritize safety at every step, respect the lethal voltages involved, and channel your enthusiasm toward solar or wind systems for actual off-grid power. When you hear “free energy” claims online, remember: physics always collects its due, and no coil winding pattern defies the laws of thermodynamics. Build this for education, not expectation, and you’ll gain profound respect for both Tesla’s genius and modern renewable energy engineering.


