Nothing disrupts your home life faster than a sudden power outage during a summer storm or winter freeze. When the lights go out and your refrigerator stops humming, knowing how to connect generator to house properly becomes your top priority. A correctly installed backup power system keeps your family safe, preserves perishable food, and maintains critical medical equipment during emergencies. This guide cuts through the confusion to show you exactly how to connect generator to house safely and effectively—whether you’re using a portable unit for occasional outages or installing a permanent standby system.
Most homeowners don’t realize that improper generator connections cause hundreds of carbon monoxide deaths and electrocution incidents each year. The key to safe operation lies in creating a physical barrier between your generator and the utility grid—never simply plugging into a wall outlet. By following the methods outlined here, you’ll ensure your backup power system operates safely while complying with electrical codes that protect both your household and utility workers restoring power.
Manual Transfer Switch Installation Steps
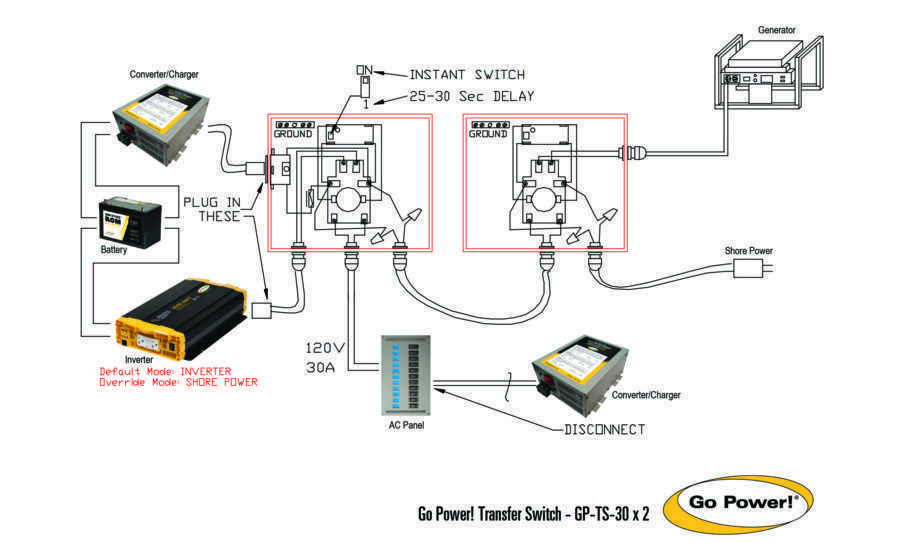
Selecting the Right Transfer Switch Size
Choose a transfer switch based on your exact power needs rather than your home’s total square footage. A six-circuit switch ($300-$500) works for essential circuits like refrigerator, furnace, and lighting in small homes under 1,500 square feet. Larger homes need eight or ten-circuit models ($600-$900) to handle additional loads. Always size your switch to match your generator’s amperage—30-amp for 7,200-watt generators, 50-amp for 12,000-watt units.
Before purchasing, create a priority list of circuits to power during outages. Group A should include life-safety items like medical equipment and security systems. Group B covers comfort essentials like refrigerators and lighting. This prevents overload when you’re connecting generator to house during stressful emergency situations.
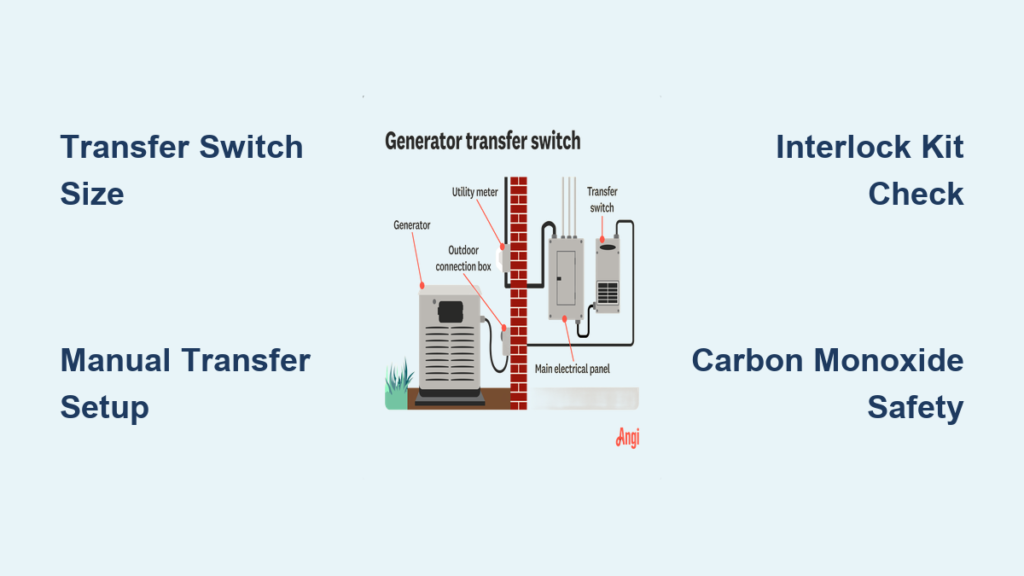
Main Panel Wiring Connections
Never attempt this step without turning off your main breaker and verifying zero voltage with a non-contact tester. Install the generator breaker in your main panel’s designated space—typically the top-right position. Route 10/4 AWG cable for 30-amp systems or 6/4 AWG for 50-amp systems from your planned outdoor inlet location to this breaker using Schedule 40 PVC conduit for protection.
Connect the generator feed from the power inlet to the transfer switch input lugs following manufacturer color-coding. Route individual circuit wires from the transfer switch to each selected household circuit. Mistakes here create dangerous backfeed conditions—double-check hot, neutral, and ground connections before restoring power. Label every circuit clearly with permanent markers for quick identification during emergencies.
Interlock Kit Alternative for Budget Installations
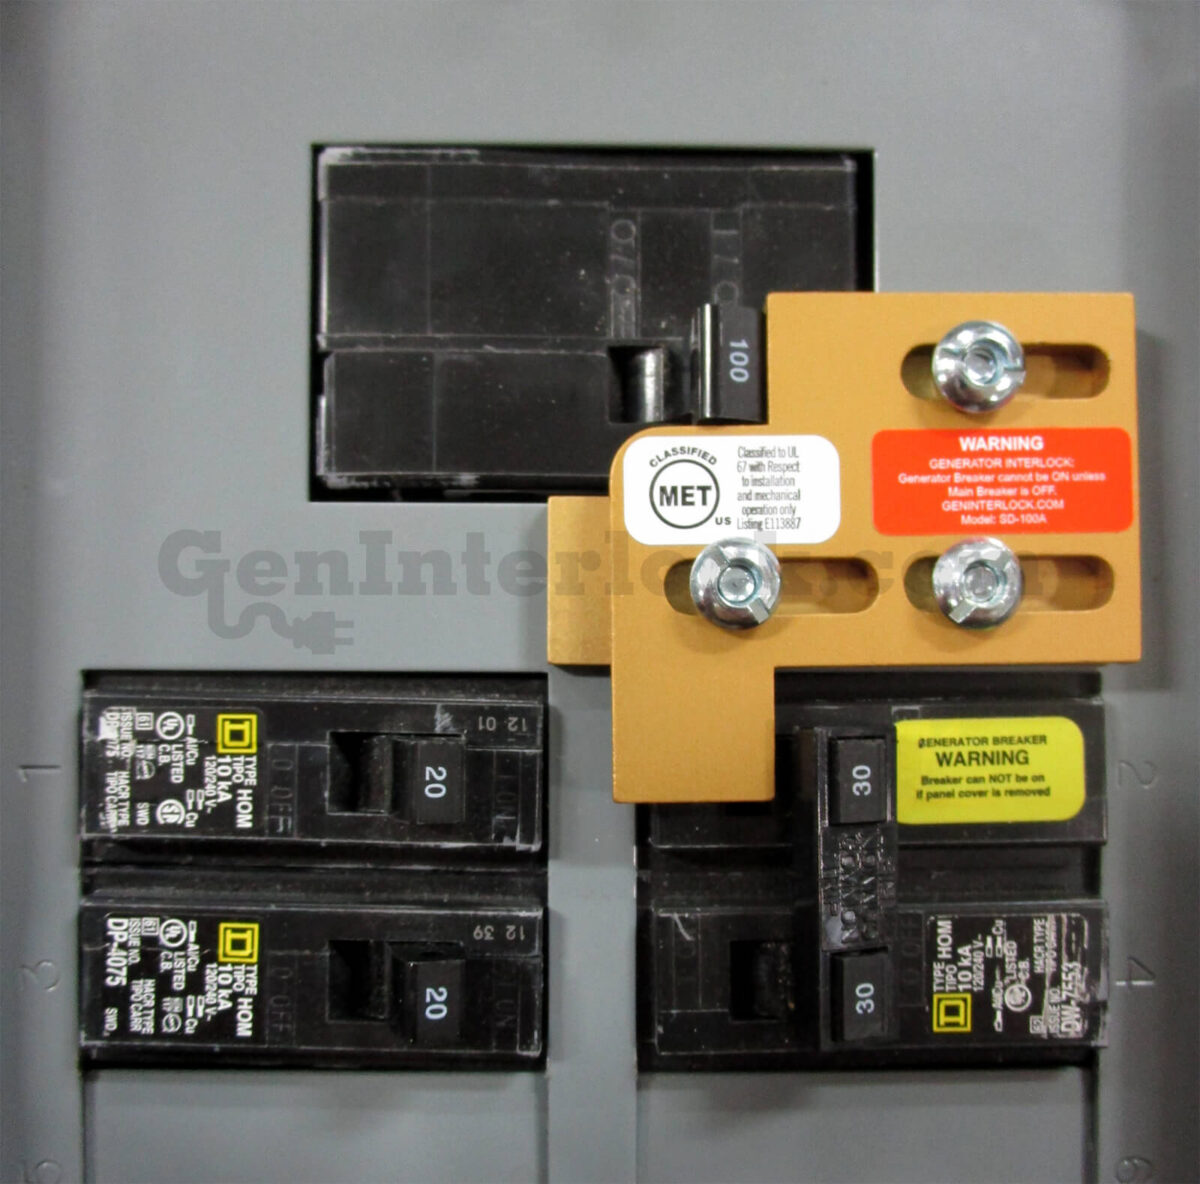
Verifying Panel Compatibility First
Interlock kits cost just $50-$150 but require precise matching to your electrical panel. Check your panel’s manufacturer label inside the cover—Siemens, Square D, GE, and Eaton all require different interlock designs. Measure available space in your panel; older models often lack room for additional breakers needed when connecting generator to house.
Most residential installations use 30-amp interlock kits, but verify your generator’s output matches the kit’s amperage rating. Install the generator breaker in the designated top-right position for optimal mechanical operation. The interlock plate mounts using existing panel cover screw holes—no drilling should be required for compatible kits.
Critical Safety Verification Process
Test the interlock mechanism thoroughly before relying on it during an outage. With all breakers OFF, attempt to turn on both the main breaker and generator breaker simultaneously—the interlock should physically prevent this dangerous condition. Install weatherproof covers on both your generator inlet box and main panel to prevent moisture intrusion.
Create laminated instruction cards showing the exact startup sequence: turn OFF main breaker first, then slide interlock and turn ON generator breaker. Store these near your electrical panel where family members can find them during stressful outage situations. This simple step prevents deadly backfeed that could electrocute utility workers restoring power.
Calculate Your Exact Power Requirements

Essential Circuit Load Planning
Start by listing every device you want to power during outages, noting both running watts and starting watts. Motor-driven appliances like refrigerators need 2-3 times their running wattage to start—your 800-watt fridge actually requires 1,800 watts at startup. Furnace fans might use 2,000 watts running but surge to 5,000 watts when the blower kicks on.
Create a priority ranking:
– Group A: Medical equipment, security systems, sump pumps
– Group B: Refrigerator, furnace, essential lighting
– Group C: Non-essentials like entertainment systems
Always add a 25% buffer to your total calculations to accommodate motor starting surges and prevent your generator from running at maximum capacity continuously. Generator ratings often reflect peak output, not sustainable running watts—check both specifications before purchasing.
Generator Placement Safety Protocols
Outdoor Positioning Rules You Must Follow
Position your generator minimum 5 feet from any building opening—windows, doors, or vents—to prevent deadly carbon monoxide infiltration. Maintain 3 feet of clearance on all sides for ventilation, and never operate generators in garages, basements, or any enclosed space—even with doors open. Carbon monoxide kills silently and quickly, causing hundreds of deaths annually during power outages.
Place generators above potential flood levels on stable, level surfaces. Elevation matters more than many homeowners realize—never position units in low-lying areas prone to water accumulation. Install carbon monoxide detectors with battery backup on every floor of your home—they’re your last line of defense if generator placement isn’t perfect.
Proper Connection Cable Management
Use only outdoor-rated 10/4 AWG SOOW cable for 30-amp systems or 6/4 AWG for 50-amp connections—never indoor extension cords. These specialized cables feature weatherproof jackets and appropriate wire gauges to prevent overheating during extended operation. Keep cable runs under 50 feet to minimize dangerous voltage drop that can damage sensitive electronics.
Inspect cables before each use for cuts, nicks, or damaged insulation. Store coiled cables in dry locations when not in use, avoiding kinks that compromise internal conductors. Replace damaged cables immediately—electrical tape repairs won’t protect against moisture or abrasion during rainy outages.
Safe Power Transfer Sequence
Step-by-Step Connection Process
- Verify fuel and oil levels in your generator before starting
- Ensure transfer switch sits in UTILITY position with all non-essential loads off
- Start generator and let it stabilize for 2-3 minutes before applying load
- Turn OFF main breaker first—this critical step prevents utility grid backfeed
- Switch transfer switch to GENERATOR position or activate interlock system
- Turn ON circuits gradually starting with highest priority items
Never skip the warm-up period—rushing the startup sequence can damage sensitive electronics in your home. Modern generators include automatic voltage regulation, but connecting loads too soon causes voltage spikes that fry circuit boards in computers and appliances.
Proper Shutdown Procedures
Turn OFF all branch circuits powered by the generator before switching back to utility power. Switch the transfer switch to UTILITY position, then turn ON your main breaker to restore grid power. Allow the generator to run 3-5 minutes without load before shutdown—this cool-down period prevents damage to engine and electrical components.
Disconnect the generator cable only after the unit has cooled completely—hot engine parts cause severe burns. Store equipment properly: drain fuel for long-term storage, coil cables carefully, and cover the generator to protect from weather elements until next use.
Monthly System Testing Routine
Essential Maintenance Checklist
Test your entire system monthly without an actual outage: Start the generator, verify proper transfer switch operation, and confirm power to essential circuits. Exercise the transfer mechanism by switching between UTILITY and GENERATOR positions to keep contacts clean and moving parts lubricated.
Inspect connections annually for corrosion or looseness—tighten terminal screws to specified torque values. Check generator oil levels every 8 hours of operation and change oil and filters every 50 hours to prevent catastrophic engine damage during critical outages.
Before each storm season, verify GFCI outlets on your generator function correctly using the TEST button. Faulty GFCI protection creates serious shock hazards during wet conditions when you’re most likely to need backup power.
Connecting generator to house properly transforms power outages from emergencies into minor inconveniences. Whether you choose a manual transfer switch, interlock kit, or automatic system, strict adherence to safety protocols prevents deadly carbon monoxide exposure and electrical hazards. Never skip permits and inspections—cutting corners creates risks that could harm your family or utility workers restoring power.
Start with accurate load calculations, choose equipment matching your needs, and follow installation procedures exactly. Test your system monthly and maintain everything according to manufacturer schedules. When the next storm knocks out power, your properly connected generator will keep your lights on, food fresh, and family safe—exactly what a reliable backup power system should do.


