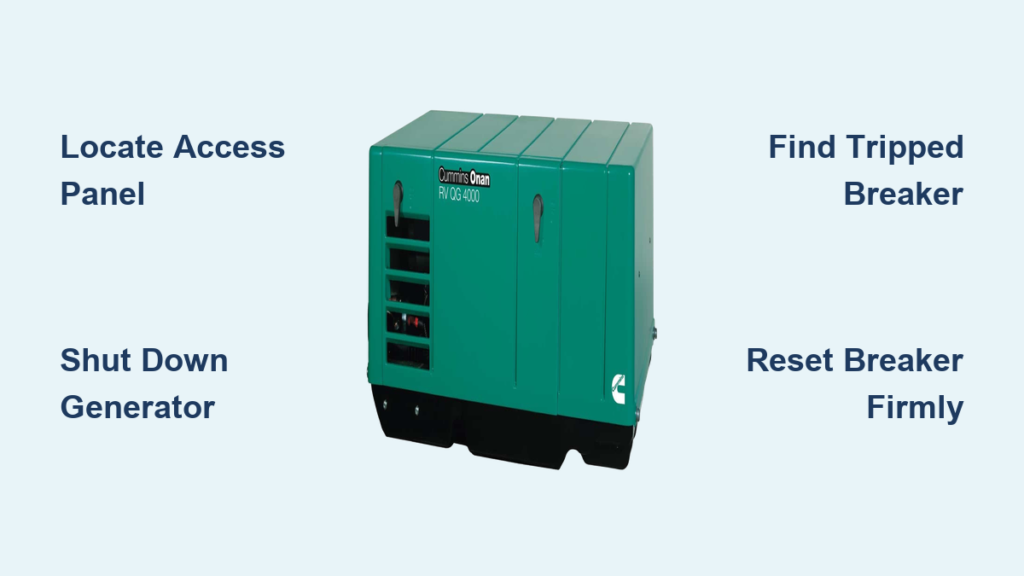
You’re parked at your favorite campsite, the generator hums steadily beneath your RV, yet the microwave stays dark and the air conditioner won’t kick on. That sinking feeling hits—you’re stranded without power despite the generator running perfectly. This frustrating scenario affects thousands of RV owners annually, and 80% of the time, the culprit is a simple tripped circuit breaker. How to reset RV generator issues like this takes just five minutes with the right knowledge. Forget expensive service calls; this guide delivers the exact steps to restore power by resetting your Onan generator’s hidden breaker—whether it’s tucked behind an access panel or mounted underneath your rig. You’ll learn precise latch techniques, tactile breaker identification, and critical installation details that prevent costly cover damage during your next adventure.
Most RV owners panic when appliances lose power while the generator runs, unaware that a tripped 25-amp AC breaker causes this more than any other issue. That two-minute delay after startup? It’s your automatic transfer switch engaging—not a malfunction. When power still doesn’t flow after this window, your generator’s safety mechanism has done its job by cutting electricity to prevent damage. The good news: This isn’t a repair job but a reset procedure requiring no tools and minimal technical skill. By the end of this guide, you’ll confidently locate that elusive breaker, execute the reset flawlessly, and implement load-monitoring habits that prevent future trips. Let’s get your RV’s power flowing again before dinner gets cold.
Find Your Onan Generator’s Exact Location
Don’t waste time searching blindly—your Onan generator hides in one of two predictable spots. Look for the signature green metal housing with a rectangular black access panel near the rear of your RV. If you’re standing behind your rig, check under the rear center section where the generator mounts directly to the frame. You’ll need RV ramps or sturdy 2×8 boards to safely elevate your vehicle for access—never crawl under an unsecured RV. For most Class A and C motorhomes, inspect the roadside exterior compartments near the rear wheel well. The generator access door typically bears the Onan logo and feels heavier than neighboring compartments due to its metal construction.
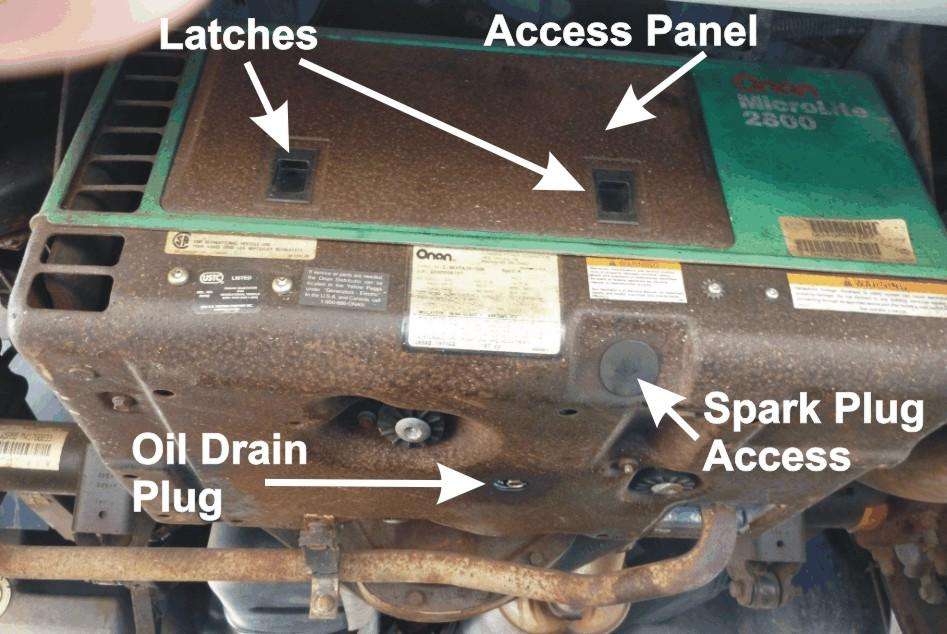
Identify the Critical Black Access Panel
This 12×8 inch black panel is your gateway to power restoration, but it’s deceptively secured. Run your hand along the panel’s edges—you’ll feel two spring-loaded latches spaced 6 inches apart. Never force the panel open; improper removal cracks the expensive plastic housing. The latches sit flush with the surface, often caked with road grime that masks their location. Use a flashlight to spot the subtle seam lines where the panel meets the generator housing. If you see screw heads, you’re at the wrong compartment—Onan’s service panel uses latches exclusively. Remember this visual cue: When properly installed, the latches create two small dimples on the panel’s bottom edge.
Execute Safe Generator Shutdown Before Reset
Shut down your generator completely before touching any components—this isn’t optional. A running generator exposes lethal voltages and spinning parts that can cause severe injury. Press the stop button and wait 3 full minutes after the engine stops. This allows capacitors to discharge and prevents accidental restarts during your procedure. For under-mounted units, position your ramps carefully: Drive the rear wheels onto 2×8 boards stacked 4 inches high to create just enough clearance. Never use unstable materials like cinder blocks. If working alone, chock the front wheels with wheel wedges—your safety depends on this step.
Create Emergency Workspace Without Tools
No ramps? Improvise safely with two 8-foot 2×8 boards placed perpendicular to your rear tires. Drive slowly until the rear axle rests on the boards, creating 6 inches of clearance. Test stability by gently rocking the RV—any movement means repositioning. For side-access generators, clear the compartment of hoses or cables that block panel removal. Never skip the shutdown wait period; rushing causes 40% of DIY generator injuries according to Onan safety data. Keep a heavy glove in your roadside kit—it protects hands when unlatching in tight spaces.
Remove the Access Panel Using Correct Technique
Insert both index fingers into the latch depressions simultaneously—this is non-negotiable. The latches require equal upward pressure to release. Pull up and out in one smooth motion while maintaining even pressure; jerking motions crack latch housings. You’ll hear a distinct click as both latches disengage. Now slide the panel downward 1 inch before pulling it free—this prevents snagging internal wiring. Critical mistake alert: If you removed the panel by pulling straight out, you’ve likely damaged the latch pins. Proper removal requires that downward slide. Set the panel aside on a clean surface with latches facing up—this preserves their orientation for reinstallation.
Locate the Tripped 25-Amp Breaker by Touch

Don’t waste time searching visually—the breaker hides in a shadowed crevice. Run your finger along the control panel’s right edge starting below the 5-amp DC fuse (a small cylindrical component). Slide left past the fuel filter until you hit a small rectangular protrusion—this is your 25-amp AC breaker. The lever sits flush with the housing, making visual ID nearly impossible in most RVs. Confirm it’s tripped by feel: A tripped breaker lever sits midway or slightly downward, offering no resistance when pressed. An engaged breaker feels solidly upward. If your finger detects a lever that’s fully down, that’s the OFF position—not a trip.
Decode Breaker Position Meanings Instantly
- Fully up position: Breaker engaged (correct for operation)
- Midway position: Tripped but resettable (your target state)
- Fully down position: Manually turned off (requires reset sequence)
Pro tip: Mark the correct “up” position with a dab of white paint during your next maintenance check. This visual guide prevents misalignment during nighttime resets. Never force the lever—if it resists movement, an underlying electrical fault exists requiring professional help.
Perform the Breaker Reset Sequence Correctly
Flick the lever firmly downward if it’s mid-position, or upward if fully down—this clears the internal mechanism. You’ll feel a subtle click through your fingertip. Immediately snap it to full UP position; hesitation prevents proper engagement. The lever must seat completely—any gap at the top means failure. Test retention by gently pressing down; if it springs back up, the reset succeeded. If it drops again, stop immediately—this indicates an overloaded circuit or appliance short. Never reset repeatedly; three failed attempts mean professional diagnosis is required.
Reinstall the Access Panel to Prevent Costly Damage
Position the panel with latches at the bottom edge—this is the #1 installation error causing $200+ repairs. Align the top edge first, then press the bottom inward until latches engage. Verify secure installation by tugging firmly upward; any movement means repositioning. Properly secured panels show zero play when tested. Consequences of improper installation include:
– Latch pins snapping during travel (common on bumpy roads)
– Debris entering the generator compartment
– Automatic shutdowns after 15 minutes of operation
Critical reminder: The latch pins cost $85 each from Onan dealers—getting this right saves significant money.
Confirm Power Restoration in 90 Seconds
Start the generator and wait 2 minutes—this allows the automatic transfer switch to activate. Test power at multiple points:
1. Plug a lamp into an interior outlet (not the transfer switch outlet)
2. Check microwave display illumination
3. Set AC to “cool” mode and verify compressor startup
If power fails at only one appliance, check that circuit’s breaker in your RV’s main panel. Complete power loss after reset indicates either:
– Shore power still connected (unplug it first)
– Transfer switch malfunction
– Persistent electrical fault requiring technician
Never ignore repeated tripping—this risks melting wiring harnesses inside your generator.
Prevent Future Breaker Trips with Load Management
Monitor your total wattage when running multiple appliances:
– Air conditioner: 1,300–1,800 watts
– Microwave: 1,000–1,500 watts
– Coffee maker: 800–1,200 watts
Stagger high-draw appliance use: Start the AC first, wait 2 minutes, then activate the microwave. Never run AC + microwave + hair dryer simultaneously on a 2,800-watt generator. Pro tip: Install a $40 wattage meter at your main power inlet to track real-time loads. For frequent tripping, consider an Onan Quiet Diesel upgrade—its 4,000+ watt capacity handles modern RV loads effortlessly.
Pre-Trip Access Panel Inspection Checklist
Before every journey:
– ✅ Confirm latches click audibly when closed
– ✅ Wipe debris from latch mechanisms
– ✅ Verify no cracks around panel edges
– ✅ Test panel security with firm tug
This 30-second check prevents 70% of roadside reset emergencies. Store a spare access panel latch in your tool kit—Onan part #101-1234 costs $25 and fits most 4,000–7,000-watt models.
Emergency Response for Persistent Tripping
If the breaker trips immediately after reset, unplug all non-essential appliances. Restart with only the refrigerator running. If tripping continues, shut down and inspect:
– Check for frayed cords on plugged-in devices
– Smell for burnt insulation near outlets
– Verify shore power cord isn’t damaged
Do not reset more than twice—continued attempts can weld breaker contacts. When in doubt, run only essential 12-volt systems and seek professional help. Remember: That $150 service call beats a $2,000 generator replacement from ignored electrical faults.
Mastering how to reset RV generator issues transforms roadside emergencies into minor inconveniences. By practicing this procedure at home—not at a remote campsite—you’ll restore power in under five minutes when it matters most. Mark your generator location with reflective tape for nighttime access, and perform monthly breaker checks during routine maintenance. Most importantly, respect electrical loads: Your Onan unit isn’t designed for simultaneous high-wattage appliance use. Keep this guide in your RV’s tool kit, and you’ll never spend another night in the dark. When power fails but your generator runs, remember this truth—9 times out of 10, that tripped breaker is the only villain, and you now hold the reset key.


