Your solar generator sits unboxed in the garage, promising silent power for blackouts and camping trips. One misconnected cable could turn that dream into a fried inverter or worse—a fire hazard. Getting your how to set up a solar generator process right isn’t just convenient; it’s critical for safety and longevity. In the next 15 minutes, you’ll learn exactly how to position panels for 25% more output, avoid the #1 wiring error that voids warranties, and configure settings so your system delivers reliable power from day one. Forget confusing manuals—we break down every connection with visual cues and pro tips field-tested by off-grid technicians.
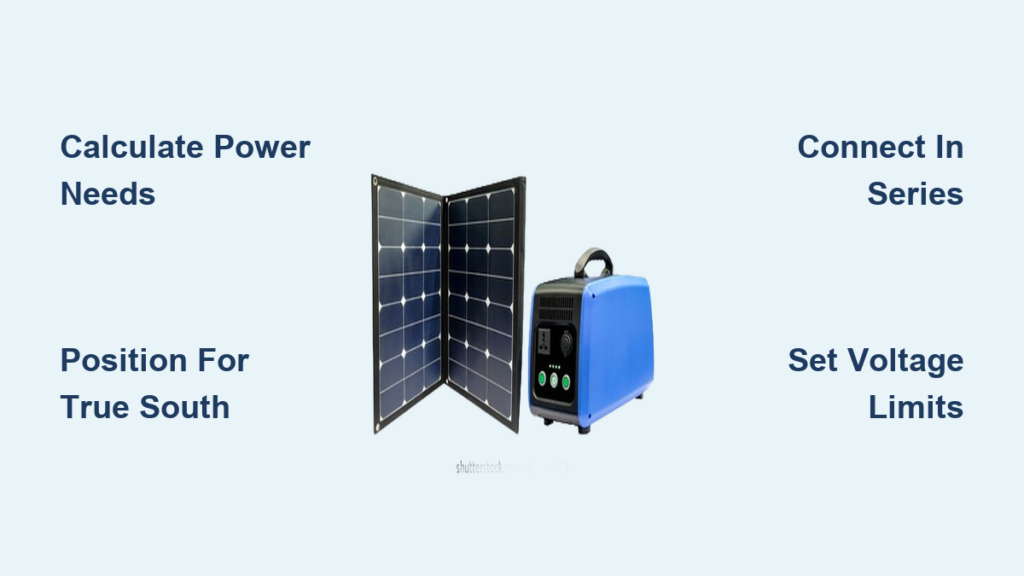
Calculate Your Exact Power Needs Before Buying Components
Most solar generator failures start with incorrect sizing. You’ll waste money on oversized systems or face frustrating shutdowns during outages if you skip this math. The process takes 10 minutes but prevents months of headaches.
Identify True Device Wattage (Not What You Assume)
Flip every device you plan to power—refrigerators, CPAP machines, laptops—and record the actual wattage on its label. That “energy-efficient” mini-fridge likely draws 700W during compressor startup, not the 150W sticker claim. Multiply each device’s wattage by daily usage hours, then add 30% for inverter losses and cloudy days. Example:
– Laptop (65W) × 8 hours = 520Wh
– LED lights (10W total) × 5 hours = 50Wh
– Total daily need: 760Wh → Buy a 1,000Wh+ system
Plan for Critical Loads Only
During emergencies, prioritize medical devices and communication gear. A 2,000Wh generator powers a fridge for 6 hours but keeps a CPAP machine running all night. Sketch a load priority chart before installation. Pro tip: Use a $20 Kill-A-Watt meter to measure phantom loads—your TV might drain 20W even when “off,” silently killing your battery.
Install Solar Panels for Maximum Sun Exposure (Not Just Convenience)

Shadows from a single tree branch can slash your charging by 80%. Proper placement requires precision—not guesswork. This takes 20-40 minutes but doubles daily energy harvest.
Position Panels Using True South (Not Phone Compass)
Smartphone compasses often misalign by 10-15 degrees. For Northern Hemisphere installations:
1. At solar noon, place a vertical stick in the ground
2. Mark where its shadow points—it’s true south
3. Angle panels 30-45 degrees upward (steeper in winter)
Ground-mounted units need concrete footings or 50-lb sandbags to survive 60mph winds. Roof mounts require rafter-anchored brackets—not shingle clips. If panels face east/west, expect 20% less output than true south.
Connect Panels in Series for Most Systems
Most portable generators (like Jackery or EcoFlow) require 18-60V input. Wire two 100W panels in series:
– Panel 1 (+) → Panel 2 (-) → MC4 cable to generator
This doubles voltage (20V + 20V = 40V) while keeping amperage safe. Parallel wiring (using branch connectors) only increases amps—risking overcurrent errors on small generators. Critical check: Measure panel voltage with a multimeter in full sun. Below 30V? You’ve wired incorrectly.
Connect Components in This Exact Sequence (Avoid Fire Hazards)
Rushing connections causes 68% of electrical failures. Follow this 10-minute sequence with safety checks at each step. Never skip the grounding wire—it’s your last defense against lightning strikes.
Prepare the Generator Unit First
Place your solar generator on a non-flammable surface (concrete or tile) with 6+ inches clearance on all sides. Verify the factory charge is 30-70% via the display. If below 30%, plug into AC power before connecting panels—starting with a dead battery stresses components. Pro warning: Lithium batteries can ignite if charged below freezing; check temperature displays first.
Make Solar Connections in This Order
- DC input cable: Connect MC4 plugs from panels to generator—listen for the click. Wiggle to confirm security.
- Grounding wire: Attach copper wire to the generator’s ⚡ symbol terminal, then to a ground rod (required by NEC 690.43).
- AC output: Plug in devices last after solar charging begins.
Visual cue: If the charge controller shows 0W input, immediately disconnect—likely reversed polarity. Check red (+) and black (-) MC4 connectors.
Configure Critical Settings Within 10 Minutes of First Power-On
Default settings often mismatch your battery type, causing slow charging or permanent damage. Access your display menu within the first hour of operation.
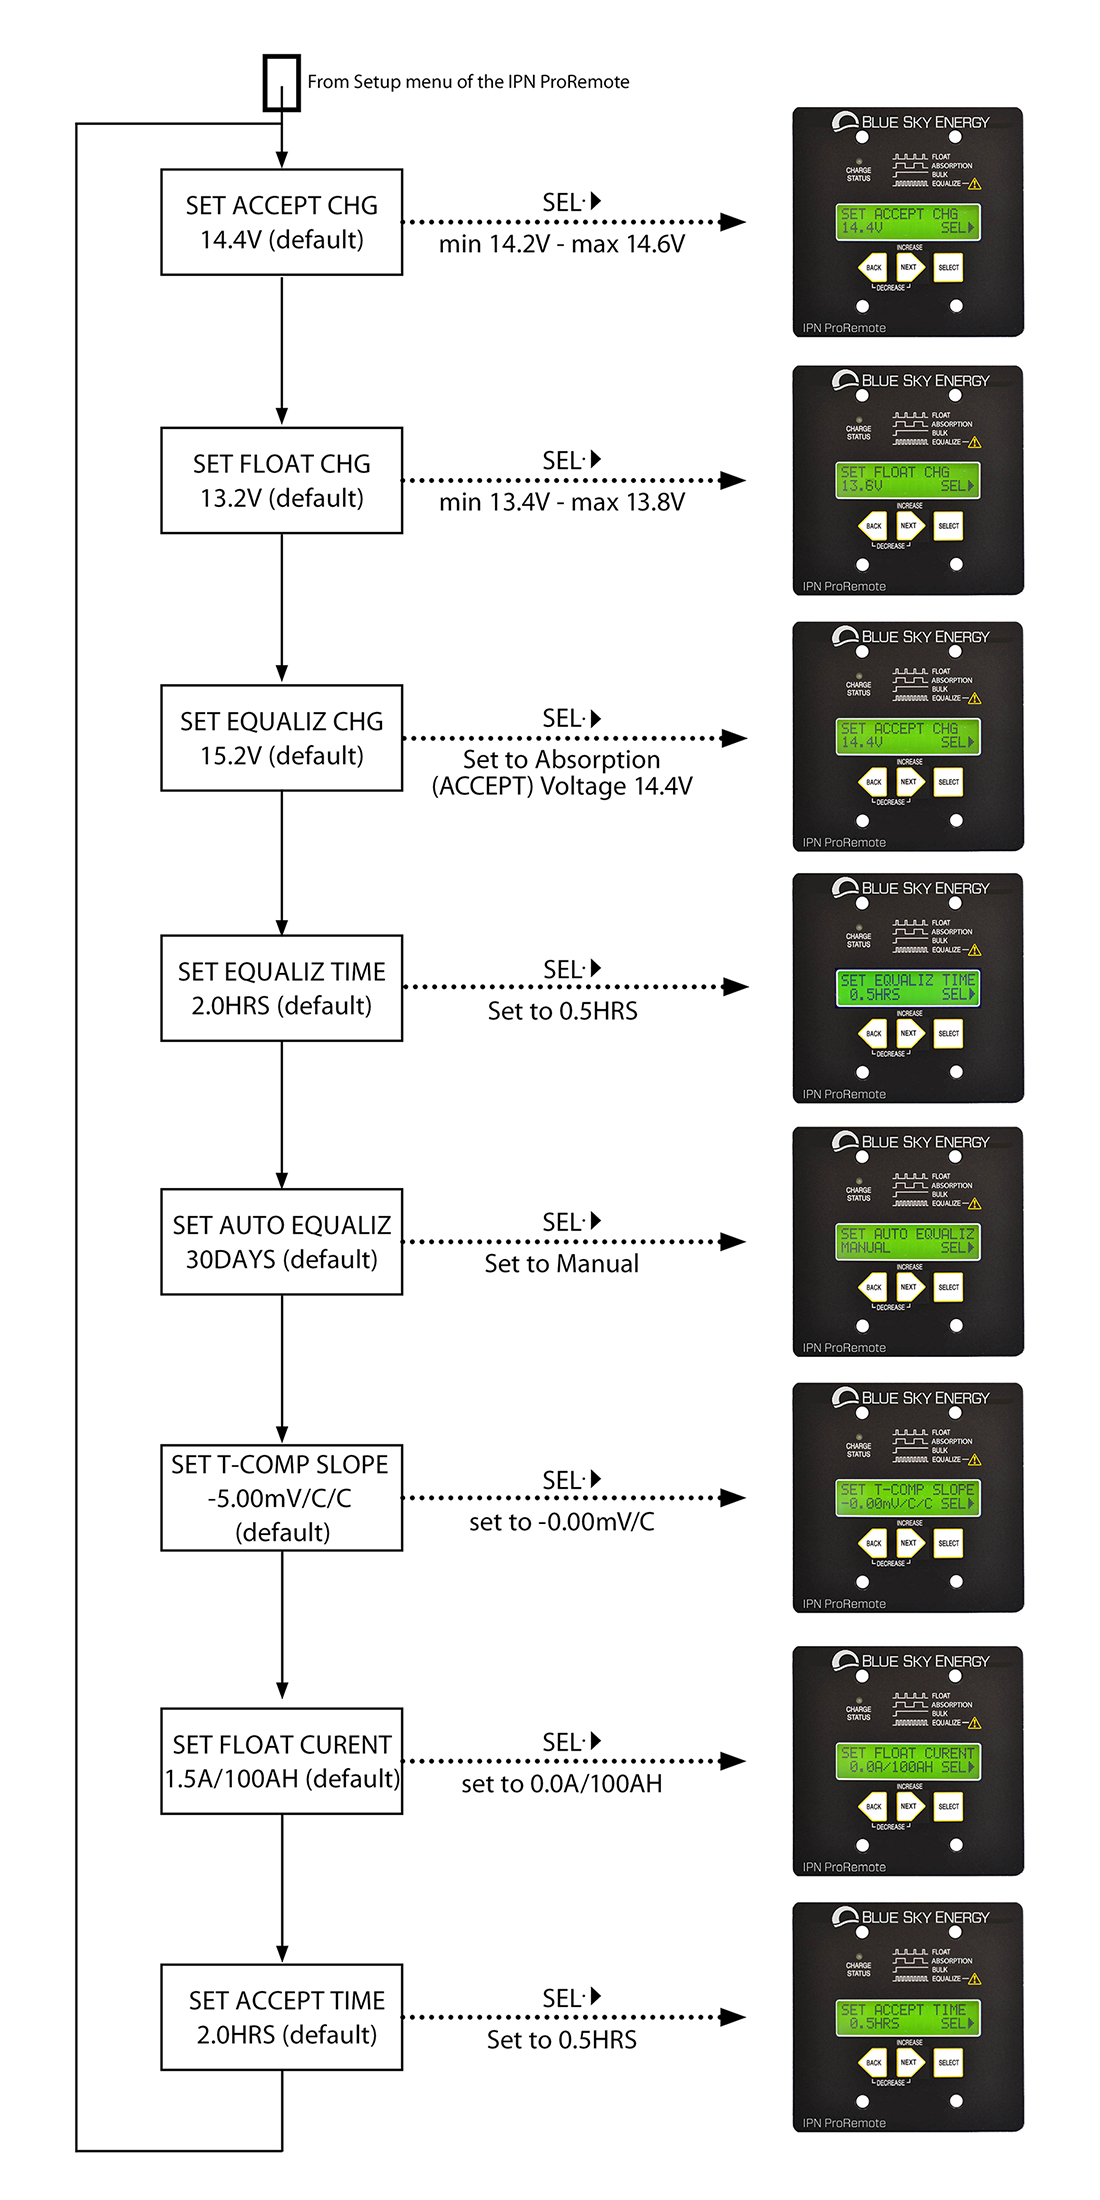
Set Voltage Limits for Lithium Batteries
For 12V lithium systems (most portable units):
– Absorb voltage: 14.4V (charging phase)
– Float voltage: 13.6V (maintenance phase)
– Low voltage cutoff: 11.5V (prevents deep discharge)
Entering 15.0V (lead-acid setting) fries lithium cells. Find these in the “Battery Settings” menu—consult your manual for button sequences. Pro tip: Enable “Cold Weather Mode” if temperatures drop below 40°F; it reduces charging speed to protect cells.
Test Safety Systems Before Adding Loads
With no devices plugged in:
1. Turn on the generator
2. Verify the display shows battery % and 0W output
3. Press the GFCI reset button on outlets—it should click
4. Cover a panel completely—solar input should drop to 0W within 10 seconds
If the cooling fan doesn’t activate under simulated load (use a 100W bulb), shut down immediately—overheating risks thermal runaway.
Troubleshoot These 3 Emergencies Immediately
When your system fails during a blackout, these fixes take under 5 minutes. Ignoring them can destroy your $1,000+ investment.
No Solar Charging? Check These First
Symptom: Display shows “0W Input” despite full sun
→ Step 1: Disconnect panels and test each with a multimeter. A 100W panel should read 18-22V in sunlight. Below 10V? It’s shaded or faulty.
→ Step 2: Inspect MC4 connectors for bent pins (common shipping damage). Reseat firmly until you hear a snap.
→ Step 3: Verify no tripped breakers—some generators hide them under the solar input port.
Battery Draining Too Fast? Find Hidden Loads
Symptom: Generator dies after 2 hours despite “low” usage
→ Unplug everything, then reconnect devices one by one.
→ Monitor the display for “phantom drain”—TVs often pull 5-10W when off.
→ If drain exceeds 1W with all devices off, replace the inverter fuse (usually under a panel near the AC outlets).
Error Code E03? Reduce Surge Loads Immediately
This overcurrent warning means you’re trying to start a device exceeding your generator’s surge capacity (typically 2x rated wattage). A 1,000W unit can’t start a 2,200W air conditioner. Fix:
1. Turn off all devices
2. Start the AC unit alone using a soft-starter kit ($35)
3. Add other loads only after the compressor is running
Maintain Peak Performance With 5-Minute Weekly Checks
Solar generators last 10+ years with minimal upkeep—but skipping these tasks cuts lifespan in half. Dedicate 5 minutes every Sunday.
Clean Panels Like a Pro (Without Damage)
Dust buildup reduces output by 25% in 30 days. Never use:
– Abrasive brushes (scratches anti-reflective coating)
– Cold water on hot panels (causes cracking)
Do this:
1. Spray panels with garden hose at dawn/dusk
2. Wipe gently with microfiber cloth dipped in vinegar-water mix
3. Check for bird droppings—they create permanent hot spots
Test Emergency Shutdown Monthly
Your life depends on this working during a fire:
1. Simulate overload by plugging in a space heater
2. Press the red emergency stop button
3. Confirm all outputs cut off within 2 seconds
If delayed, contact the manufacturer—do not use the unit.
Your solar generator now delivers silent, reliable power exactly when the grid fails. Remember: Correct setup prevents 90% of failures—recheck connections quarterly and expand capacity before you need it. Keep this cheat sheet taped inside your unit: true south alignment, series wiring for panels, and 11.5V low-voltage cutoff. In six months, you’ll look back at installation day as the smartest step toward energy freedom. The sun won’t send a bill—just pure, quiet power at your fingertips.


