Your Champion generator sits unboxed in your garage, but storm season is looming and you’re paralyzed by setup worries. What if you place it too close to the house? Could stale fuel ruin your first use? This comprehensive how to set up Champion generator guide eliminates guesswork with field-tested procedures straight from manufacturer specs. You’ll learn exact placement distances, oil fill quantities, and load management tricks that prevent dangerous carbon monoxide risks and equipment damage. By following these steps, you’ll transform from anxious novice to confident operator ready for power outages or remote job sites.
Position Your Generator for Safety and Performance
Avoid Deadly Carbon Monoxide Exposure
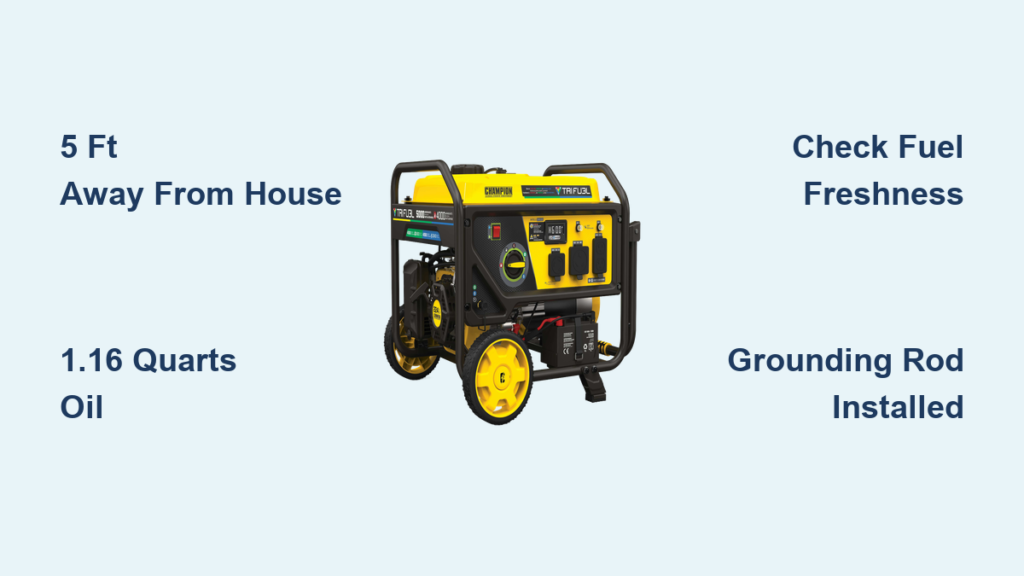
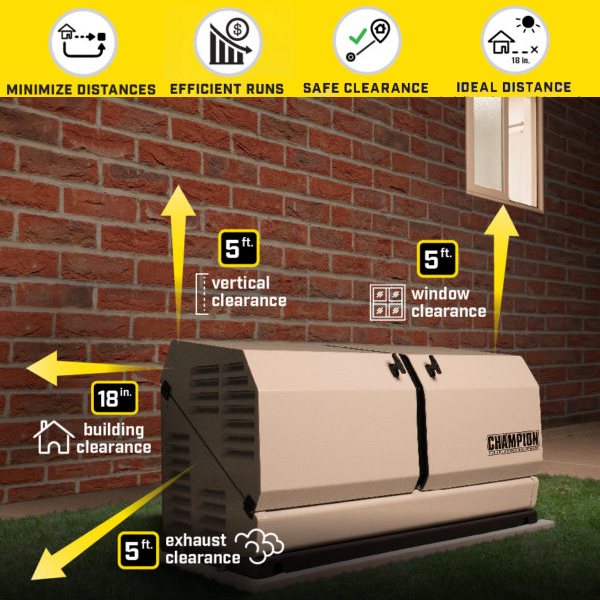
Place your Champion generator minimum 5 feet away from all building openings—windows, doors, vents, or crawl spaces. Even slight breezes can pull exhaust into living spaces where carbon monoxide becomes lethal within minutes. Never position it near downspouts or under eaves that could trap fumes. For permanent installations, pour a concrete pad at least 6 inches thick; temporary setups require packed gravel or ¾-inch plywood to prevent tipping on soft ground.
Secure Weather-Resistant Shelter
Build a canopy with 3-foot side clearance using treated lumber and waterproof roofing material. The shelter must have open sides for ventilation while shielding the unit from rain or snow. Never operate in enclosed spaces like garages—even with doors open—as exhaust gases accumulate rapidly. During operation, check for water pooling around the base that could cause electrical hazards.
Unpack and Verify Critical Components
Confirm Complete Kit Before First Use
Your Champion generator box contains essential items: the generator unit (wheels/handles pre-installed on most models), owner’s manual, 10W-30 oil bottle (typically 1.16 quarts), spark plug wrench, oil funnel, and warranty card. Immediately inspect for shipping damage—dents, loose bolts, or oil leaks around the dipstick tube. Critical check: Smell for gasoline odors indicating fuel cap leaks, and confirm the air filter sits snugly in its housing. If components are missing, contact Champion support before proceeding.
Fill Engine Oil to Prevent Catastrophic Failure
Add Exact Oil Quantity for Your Model
Most Champion generators ship dry. Position the unit on level ground, remove the yellow oil fill cap/dipstick, and pour in 1.16 quarts of 10W-30 oil using the provided funnel (for 4000-5000W models). Check levels by inserting the dipstick without screwing it in—oil must reach the “Full” mark. Overfilling causes smoking; underfilling triggers automatic shutdown. For temperatures below 40°F, switch to 5W-30 for easier cold starts.
Complete Mandatory Break-In Protocol
After your first 5 hours of operation, change the oil immediately—this critical step removes metal shavings from new engine components. During break-in, vary loads between 25-75% capacity; never run continuously at full power. Monitor for unusual knocking sounds or blue exhaust smoke signaling improper lubrication.
Configure Fuel System for Reliable Operation
Gasoline Setup: Avoid Stale Fuel Damage
Turn the fuel valve to OFF before filling. Use fresh unleaded gasoline (87 octane minimum) less than 30 days old—stale fuel gums carburetors within weeks. Fill only to the bottom of the filler neck (typically 3.8 gallons for 4000W models), leaving space for expansion. Never overfill; spills create fire hazards during startup. For storage beyond 30 days, add fuel stabilizer and run the engine for 10 minutes to circulate treated fuel.
Propane Connection: Leak-Test Every Joint
With the tank valve closed, attach the regulator hose securely. Mix dish soap with water and brush it over all connections—bubbles indicate dangerous leaks requiring immediate tightening. Always position propane tanks upright and secured against tipping. Propane models require slightly longer cranking (5-7 seconds) but avoid fuel degradation issues.
Ground Your Generator to Prevent Electrocution

Install Proper Grounding System
Drive an 8-foot copper grounding rod 18 inches deep within 6 feet of your generator. Use #6 AWG copper wire connected tightly to both the generator’s ground terminal and rod clamp. This critical step diverts stray voltage during faults—skip it, and a short circuit could electrify metal surfaces. Verify connections monthly by checking for corrosion or looseness.
Master Control Panel Functions
Identify Critical Startup Controls
Locate these key components before first use:
– Circuit breakers: Resettable switches for main (20-30A) and individual outlets
– Choke lever: Pull fully out for cold starts, push in gradually as engine warms
– Fuel valve: Toggle between ON/OFF positions (propane models have dual selectors)
– Voltage switch: Set to 120V for standard appliances or 240V for heavy tools
Pro tip: Note your hour meter reading at setup—it triggers maintenance alerts at 5, 50, and 100 hours.
Execute Safe Startup Sequence
Cold-Start Your Generator Correctly
Follow this exact sequence to avoid flooding:
1. Confirm fuel valve is ON and choke is CLOSED
2. Turn engine switch to RUN position
3. Pull recoil starter firmly in one smooth motion (don’t yank)
4. After ignition, let engine idle 2 minutes before connecting loads
5. Gradually open choke as RPMs stabilize
Never start with appliances plugged in—this overloads the engine. If it stalls, wait 2 minutes for fuel to clear before retrying.
Connect Loads Without Overloading
Calculate Wattage Requirements First
Sum starting watts (not running watts) for all appliances:
– Refrigerator: 800 starting watts
– Sump pump: 2,150 starting watts
– LED lights: 15 watts per bulb
A 4000W Champion model handles 3,500 running watts but only 4,000 starting watts—exceeding this trips breakers. Critical rule: Start largest motor loads first (like pumps), then add smaller items. Use 12-gauge outdoor extension cords for distances over 25 feet.
Install Transfer Switch Professionally
For whole-home backup, a licensed electrician must install a manual transfer switch. This $500-$1,000 system safely isolates your generator from utility lines—backfeeding through house wiring is illegal and kills utility workers. Manual switches let you power 6-10 critical circuits; automatic versions start the generator during outages.
Perform Essential Maintenance
Follow Hour-Based Schedule Rigorously
Every 8 hours:
– Check oil level with dipstick
– Clean air filter in dusty conditions
– Inspect for fuel leaks around tank
Every 50 hours:
– Replace engine oil
– Clean spark plug (gap: 0.028-0.031″)
– Tighten loose bolts on frame
Pro tip: Keep a maintenance log by the generator—Champion’s 3-year warranty requires proof of service.
Fix Common Startup Failures Immediately
Diagnose “No-Start” Issues Systematically
If your Champion generator won’t fire:
– Check oil level first: Low oil triggers automatic shutdown
– Verify fuel freshness: Stale gas clogs carburetors (drain if >30 days old)
– Inspect spark plug: Remove and check for black fouling or wide gaps
– Test choke position: Must be fully closed for cold starts
For propane models, ensure tank valves are fully open—not just partially turned.
Store Your Generator for Longevity
Prepare for Seasonal Storage
For short-term storage (under 30 days): Add fuel stabilizer, run 10 minutes, then turn fuel valve OFF. For long-term storage:
1. Drain all fuel from tank and carburetor
2. Change oil while engine is warm
3. Remove spark plug, drip 1 tsp oil into cylinder, reinstall
4. Cover with breathable tarp in dry location
Never store with gasoline inside—ethanol separates and corrodes fuel systems within months.
Critical Safety Reminders You Can’t Ignore
Never operate your Champion generator within 5 feet of structures or in wet conditions—even light rain causes electrocution risks. Always stop the engine and wait 2 minutes before refueling; hot surfaces ignite vapors instantly. Keep a Class B fire extinguisher within 10 feet, and store fuel in UL-approved containers 25+ feet from the unit. Register your warranty within 10 days using the included card to activate full coverage.
Your Champion generator now delivers safe, reliable power for emergencies or job sites. Stick to the 50-hour oil change schedule and load calculations, and you’ll avoid 95% of common failures. For model-specific support, call Champion’s technical line at 1-877-338-0999—have your serial number ready. Now’s the time to test your setup: run the generator monthly for 15 minutes under load to ensure readiness when storms hit.


