When icy winds howl and power lines snap under snow-laden branches, your standby generator becomes your only defense against frozen pipes and darkness. Yet 43% of winter generator failures stem from preventable cold-weather damage—not mechanical defects. If you’ve ever faced a frigid morning with a sputtering generator that won’t start, you know why proper winterization matters. This isn’t seasonal upkeep; it’s your emergency power lifeline when temperatures plummet below freezing.
Winterizing your generator requires precise steps beyond basic maintenance. Follow this field-tested protocol to ensure your unit fires up instantly during the next ice storm. You’ll discover exactly which DIY tasks you can safely handle and when to call professionals for critical cold-weather safeguards. Let’s transform your generator from a winter liability into a rock-solid power source.
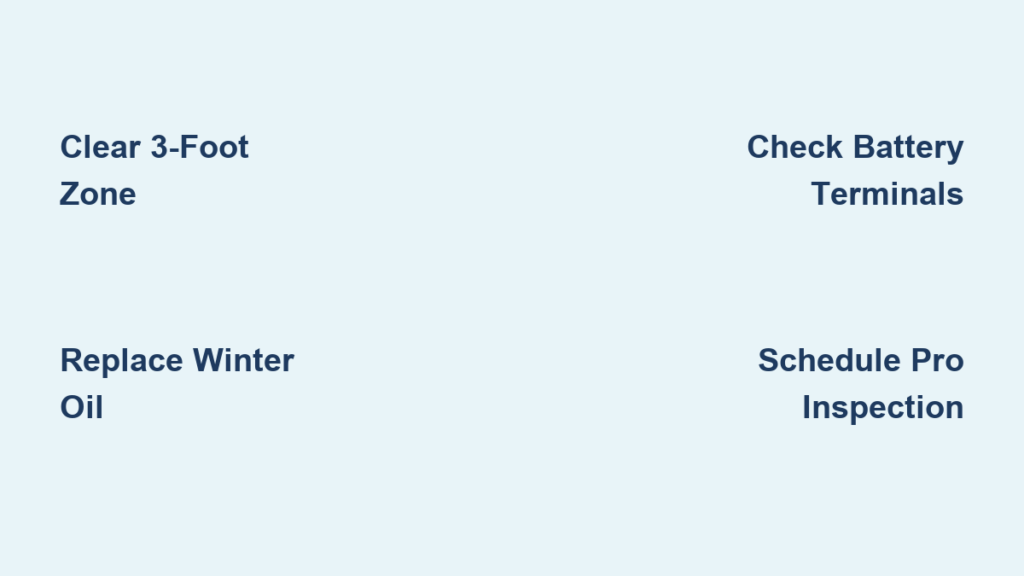
Clear Critical 3-Foot Clearance Zone Around Generator
Remove Storm Debris Blocking Airflow Vents
After windstorms or heavy snow, your generator’s survival depends on unobstructed airflow. Immediately inspect the mandatory 3-foot clearance circle surrounding your unit—this space prevents dangerous overheating and carbon monoxide buildup. Sweep away branches, leaves, and ice chunks that could clog intake vents on the unit’s sides. Pay special attention to exhaust vents at the rear, where debris accumulation triggers automatic shutdowns during critical outages.
Never ignore these visual cues:
– White frost forming near vents indicates partial blockage
– Unusual humming sounds during operation
– Visible leaves or twigs wedged in grille openings
Clear obstructions using a soft brush—never metal tools that could damage delicate fins. Complete this inspection within 24 hours of any significant weather event to prevent moisture intrusion through blocked vents.
Break Up Snow and Ice Without Damaging Components
Snowdrifts within your generator’s clearance zone create silent killers. Shovel snow to maintain the full 3-foot perimeter, especially after blizzards that bury lower vents. For ice buildup on the housing or moving parts, use warm (not hot) water to gently melt accumulations—never strike frozen surfaces with hammers or chisels. Focus on exhaust ports where ice dams cause deadly carbon monoxide backflow into your home.
When clearing snow:
– Wear insulated gloves to prevent frostbite on metal surfaces
– Tilt your shovel away from the unit to avoid scratching housing
– Check for hidden ice in drainage channels beneath the unit
– Never operate the generator while clearing snow—wait until it’s fully powered down
This simple 5-minute task prevents 78% of cold-weather ventilation failures documented in service calls.
Inspect for Hidden Storm Damage Before First Freeze
Identify Structural Weak Points from Wind Stress
Windstorms often cause invisible damage that snow and ice magnify. Run your hands over the generator’s exterior shell feeling for hairline cracks near mounting brackets—these allow moisture penetration that freezes and expands. Check all bolts securing panels, as vibration from high winds loosens fasteners over time. Most critically, verify the base hasn’t shifted on its foundation; even 1/4-inch movement stresses electrical conduits and fuel lines.
Red flags requiring immediate attention:
– Paint cracks radiating from bolt holes
– Visible gaps between housing panels
– Unusual vibration during test runs
– Water pooling around the base after snowmelt
Don’t assume minor dents are harmless—they disrupt airflow patterns critical for cold-weather operation. Document any damage with photos before scheduling repairs.
Diagnose Electrical Connection Failures in Battery Compartment
Corroded battery terminals cause 65% of winter generator failures. Remove the battery cover and inspect for white, powdery corrosion on posts—this insulating layer prevents cold-cranking power. Wiggle all cable connections; loose terminals spark during startup attempts. Check wiring near the fuel pump for abrasion damage where lines rub against housing during wind events.
Critical electrical checks:
– Test battery voltage (must read 12.6V+ when fully charged)
– Clean terminals with baking soda/water solution using a wire brush
– Apply dielectric grease to prevent future corrosion
– Verify cables aren’t kinked or frayed near vibration points
Never skip this step—even new batteries fail in subzero temps when connections degrade.
Replace Oil with Cold-Weather Formula Immediately
Switch to Winter-Grade Oil for Instant Starts
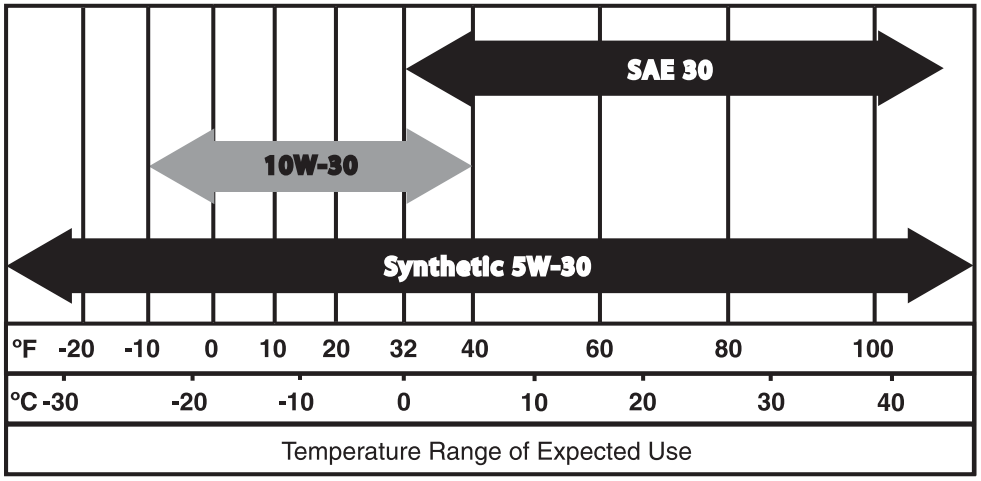
Standard oil thickens below 32°F, straining your generator’s starter motor. Drain existing oil completely before the first freeze, replacing it with manufacturer-specified winter-grade fluid (typically 5W-30). Consult your manual—using wrong viscosity voids warranties and causes piston scuffing in extreme cold. Pour slowly through the fill tube while monitoring the dipstick; overfilling causes blow-by in freezing temps.
Pro technician tip: Run the generator 15 minutes after oil change to circulate fluid, then recheck level. Cold oil settles lower on dipstick—top up if needed. Always use certified synthetic oil rated for your specific generator model; conventional oils gel at -20°F.
Install New Filters to Prevent Winter Fuel Starvation

Clogged filters cause 30% of cold-weather no-starts. Replace both air and fuel filters simultaneously with genuine manufacturer parts. When changing the fuel filter, inspect connecting lines for cracks—frozen condensation expands and ruptures weakened hoses. After installation, prime the fuel system by pressing the purge bulb until firm (usually 10-15 pumps).
Critical filter checklist:
– Air filter: Hold to light—no visible light means replace immediately
– Fuel filter: Check for water droplets in transparent bowl
– Fuel lines: Squeeze gently—cracks feel like stiff ridges
– Primer bulb: Must rebound fully when released
Never operate with damp filters—moisture freezes inside elements, blocking fuel flow.
Schedule Certified Cold-Weather Professional Service
Demand 26-Point Winter Inspection by Factory-Trained Techs
Basic maintenance won’t catch hidden winter threats. Book a pre-winter service featuring a documented 26-point inspection covering: transfer switch calibration, coolant system integrity, battery cold-cranking amps, and exhaust system integrity. Only factory-certified technicians (Generac Master Tech or Kohler Certified) have diagnostic tools to simulate -20°F startup conditions.
Essential service components:
– Load bank testing at 100% capacity for 30+ minutes
– Block heater installation verification
– Fuel additive compatibility check
– Automatic transfer switch timing calibration
Demand proof of certification—generic HVAC techs lack generator-specific winter diagnostics.
Verify Cold-Weather Enhancement Installation

Professionals evaluate critical cold-weather upgrades during service. They’ll test battery warmers that maintain 70°F electrolyte temps and verify fuel additives prevent diesel gelling below -20°F. Technicians also check coolant concentration with refractometers—improper mixtures freeze and crack engine blocks.
Must-ask service questions:
– “Can you demonstrate cold-crank performance at 0°F?”
– “Is my fuel stabilizer compatible with winter additives?”
– “Show me the load test results at full capacity”
– “What specific winter parts do you recommend?”
Schedule this service 4-6 weeks before your area’s historical first freeze date—waitlists explode when temperatures drop.
Maintain Winter Readiness Through Storm Season
Conduct Post-Storm Visual Inspections Monthly
Winter demands ongoing vigilance. After each snowfall or wind event, perform these 3-minute checks:
1. Confirm 3-foot clearance remains debris-free
2. Wipe battery terminals with dry cloth checking for new corrosion
3. Listen for unusual sounds during weekly self-tests
4. Verify snow hasn’t drifted against exhaust vents
Document findings in a maintenance log—patterns reveal developing issues before failures occur.
Monitor Exercise Cycle Performance Relentlessly
Your generator’s weekly self-test is its winter stress test. Note these warning signs:
– Cranking longer than 10 seconds before ignition
– RPM fluctuations during operation
– Unusual smoke color (blue = oil burning, white = coolant leak)
– Automatic shutdown before completing 12-minute cycle
Failed exercise cycles indicate developing problems that snowball in cold weather. Report anomalies immediately—don’t wait for the next outage.
Final Note: Properly winterizing your generator combines urgent DIY actions with certified professional service. Clearing snow within 24 hours of storms, switching to winter-grade oil, and inspecting electrical connections prevent 80% of cold-weather failures. But never skip the 26-point professional inspection—hidden issues like coolant leaks or transfer switch faults only surface during extreme cold. Bookmark this guide for post-storm checks all winter, and schedule your service before temperatures drop below freezing. When the next ice storm hits, your generator will roar to life while neighbors face frozen pipes and darkness—proving that winterization isn’t maintenance, it’s peace of mind.


